Each partition type is strictly identified by a GUID number. For example, the data partitions (“Basic data partition”) are identified by the GUID ebd0a0a2-b9e5-4433-87c0-68b6b72699c7. The EFI partition has the GUID c12a7328-f81f-11d2-ba4b-00a0c93ec93b.
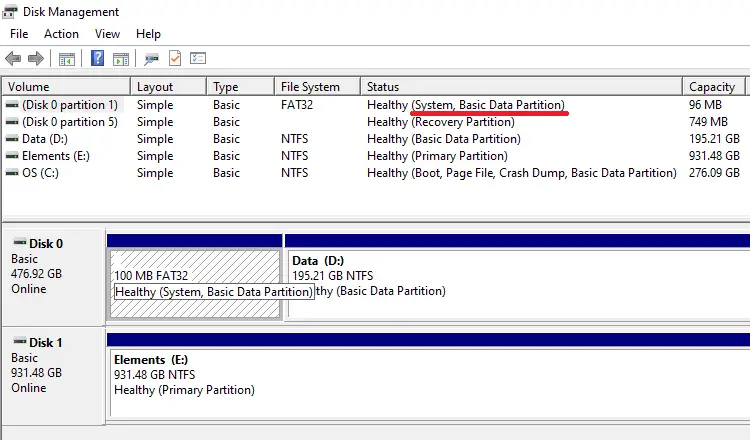
However, on some systems, the EFI partition may have an incorrect ID assigned for unknown reasons. As a result, the EFI partition may appear as a “basic data partition” when you open Disk Management.Read more