In any version of Windows, the PrintScreen key captures the screen to the clipboard, which can then be pasted in Paint or any image editor and saved to a file. However, Windows 8 and Windows 10 save you that additional step, making it very easy to capture your screen and saving to a file in a single keystroke. This article discusses various methods to take screenshots in Windows.
How to Take Screenshots in Windows 10
- Using the PrintScreen key
- Using WinKey + PrintScreen key in Windows 8 & Windows 10
- Using the built-in Snipping Tool
- Using WinKey + Shift + S keystroke to capture a specific area on the screen
- Using the built-in Snip & Sketch app
- Using third-party freeware like ShareX, Greenshot
- Capture a Scrolling window
- Take a screenshot of the User Account Control dialog
- Take a screenshot of the Windows Recovery Environment
- Take a screenshot of the Lock/Login Screen
- Troubleshoot: Print Screen does not work on my system
Method 1: Using the PrintScreen key (all versions of Windows)
These are the conventional ways to capture the screen, which works in any version of Windows.
- PrintScreen: Copies the entire screen to the clipboard.
- Alt + PrintScreen: Copies the currently active window to the clipboard.
Then open Paintbrush, paste (Ctrl + V) the clipboard contents, and save the file.
Method 2: Using WinKey + PrintScreen in Windows 8 & Windows 10
You no longer need to open Paint to paste the image, as Windows saves the image automatically when you use the WinKey + PrintScreen keystroke.
WinKey + PrintScreen copies the entire screen to the clipboard & automatically saves it to a PNG file in your Pictures\Screenshots folder.
The files are named “Screenshot (n).png” where n is the index/counter, which automatically increments after using the WinKey + PrintScreen.
Additionally, press the Fn Key for Notebooks
If you’re using a laptop, use the Fn key also:
- Fn + PrintScreen
- Fn + Alt + PrintScreen
- Fn + WinKey + PrintScreen
When you press Fn + WinKey + PrintScreen or WinKey + PrintScreen, the screen dims for a moment. It’s an indication that the screen has been captured.
If you want to disable screen dimming during WinKey + PrintScreen, disable the window animation setting in Visual Performance options.
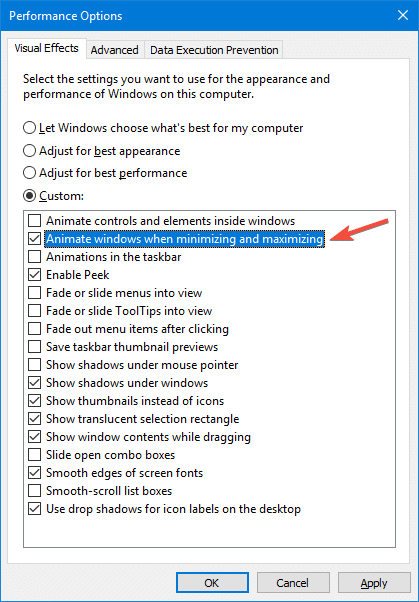
Launch sysdm.cpl → Advanced → Performance → Settings → Visual Effects → Uncheck Animate windows when minimizing and maximizing → click OK → OK.
Quick Tip:
The screenshots index is stored in a value named ScreenshotIndex the following registry key, and is updated (+1) every time you press WinKey + PrintScreen:
HKEY_CURRENT_USER\SOFTWARE\Microsoft\Windows\CurrentVersion\Explorer
Method 3: Using the built-in Snipping Tool
The above methods can be helpful to capture a specific window or the entire screen. What if you need to grab a particular area on the screen? You may use the built-in Snipping Tool for that. This excellent tool was first introduced in Windows Vista as a Tablet PC feature and is available even in later versions of Windows, including Windows 10.
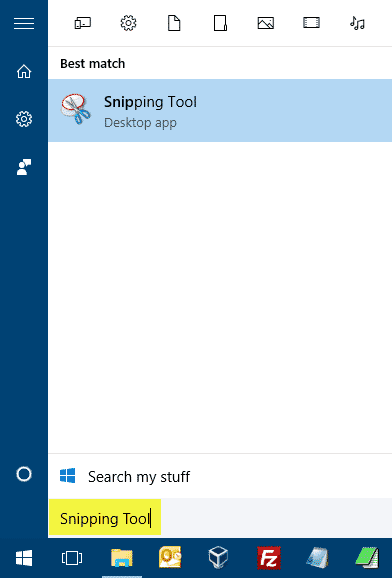
Click Start. Type snipping tool → select Snipping Tool from the results.
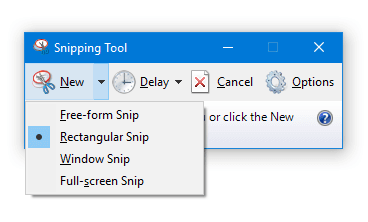
This tool offers you 4 screen capture choices:
- Free-form Snip – Captures the area you draw, can be an irregular shape. You can draw any shape around an object with your finger, mouse, or tablet pen.
- Rectangular Snip – Captures a specific portion (rectangular area) on the screen.
- Window Snip – Captures a specific window.
- Full-screen Snip – Captures Fullscreen.
Related article: How to Start Snipping Tool in Capture Mode by Default?
Once a snip is taken, you can save it as a .PNG | .JPG | .GIF | .MHT file.
How to capture the Right-click Context menu or any menu in any program?
- Start the Snipping Tool
- Open the menu (in some program window) that you want to capture.
- Press Ctrl + PrintScreen.
- Click the arrow next to the New button, choose the kind of snip you want from the four choices displayed. For example, select Free-form Snip or Rectangular Snip, and choose the area you want to capture.
You can set the time delay to capture a menu.
- Click on the Delay button and set the time (in seconds) accordingly.
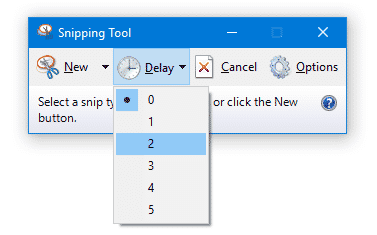
- Click the arrow next to New, and click an option.
- Immediately switch over to the program in which you need to capture a menu. Snipping Tool will kick in after the specified number of seconds and capture the screen.
Method 4: Using WinKey + Shift + S (“Screen Snip”) in Windows 10
In Windows 10 Creators Update and higher, you can use the Winkey + Shift + S keystroke to screenshot a specific area on the screen, a window, or the entire screen.
In Windows 10 build 1809 and higher, this feature is named Screen Snip, which can be launched using Winkey + Shift + S. You can also click the Action Center icon in the notification area and click Screen snip to start it.
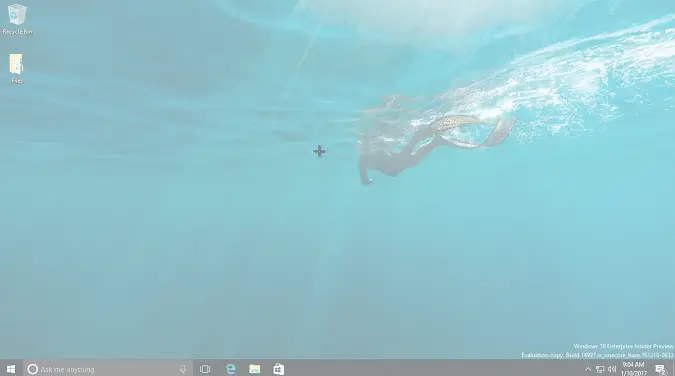
It lets you take a rectangular snip, freeform snip, and fullscreen snip options. In the previous build, it offered only the rectangular clip option.
![]() This tool stores the screenshot on the clipboard and saves it to a .PNG file in a temporary folder. For more information, check out the article Screenshot a Portion of the Screen in Windows 10
This tool stores the screenshot on the clipboard and saves it to a .PNG file in a temporary folder. For more information, check out the article Screenshot a Portion of the Screen in Windows 10

The snipping bar provides you with four options that you can use for precise snipping. For example, you can do a rectangular snip, freeform snip, window snip, or full-screen snip.
In the Creators update, the Winkey + Shift + S keystroke launched Snipping Tool in the background, which means no Snipping Tool window is shown, but the capture is copied to the clipboard automatically. I’ve written about it in detail in the post Screenshot a Portion of the Screen in Windows 10 [Winkey+Shift+S].In v1809 and higher, Winkey + Shift + S is no longer powered by the Snipping Tool. It’s now a part of Snip & Sketch which will phase out the Snipping Tool shortly.
Launch Screen snip by pressing PrintScreen
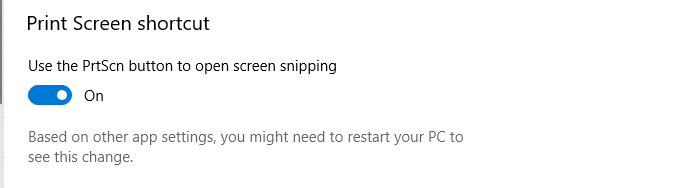
If you think the three keys combo is tough to operate, you can choose to have your PrtScn key open the new snipping bar instead of Winkey + Shift + S. To do so:
- Click Start → Settings → Ease of Access → Keyboard → Use the PrtScn button to open screen snipping
If the above setting is enabled, your third-party screen capture tools may complain that it’s unable to register hotkey – PrintScreen. That’s normal, as only one application can register the hotkey at a time.
Method 5: Using the built-in Snip & Sketch app
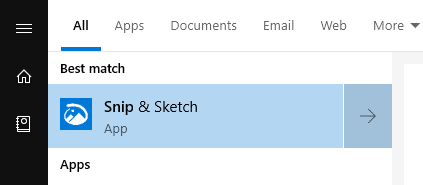
The Screen snip shortcut we’ve seen in Method 4 is powered by the Snip & Sketch built-in app. This app lets you capture screenshots, annotate, and share them using the Windows 10 Sharing UI. You can open Snip & Sketch from the Start menu.
This new tool is a complete replacement for the Snipping Tool. At some point in time, Microsoft will phase out the Snipping Tool completely.
You’ll see these three snip options in the Snip & Sketch interface.
- Snip now
- Snip in 3 seconds
- Snip in 10 seconds
If you click one of the above “New” snip options, you’ll see the screen snip controls at the top of your screen:
Once you take a screen clip, the image appears in the Snip & Sketch window, where you can annotate the image or crop it.
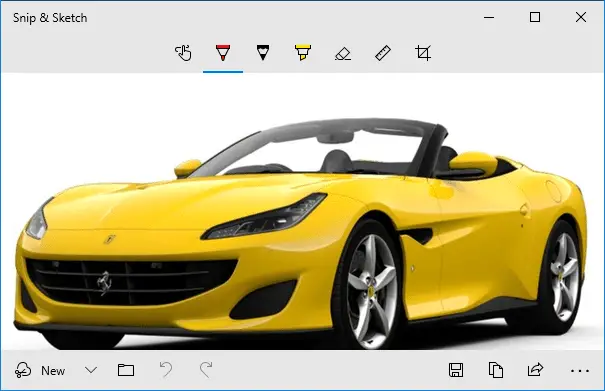
Here is the list of buttons/options available in Snip & Screen:
- Touch writing
- Ballpoint pen
- Pencil
- Highlighter
- Eraser
- Ruler
- Image Crop
- Save
- Copy to clipboard
- Share
- Open with
Microsoft has a guide on Snip & Sketch on their website. See How to take and annotate screenshots on Windows 10
Method 6: Using a 3rd party program like Greenshot or ShareX
Greenshot is a light-weight screenshot software that provides many valuable features that are not available in Snipping Tool: It allows you to:
- Quickly create screenshots of a selected region, window, or fullscreen
- Capture complete (scrolling) web pages from Internet Explorer
- Easily annotate, highlight or obfuscate parts of the screenshot
- Save screenshot to file, send to the printer, clipboard, e-mail, or Office programs
- Upload to photo sites like Flickr or Picasa, and others.
When you capture a rectangular area, Greenshot also shows you the dimensions (in pixels) of the chosen portion.

That’s a great feature to have, mainly if you write a lot of web content and need to capture screenshots with dimensions not exceeding the web page width.
Check out Greenshot – a free and open-source screenshot tool for productivity!
You can also use the NirCmd multi-purpose command-line tool and a script to automate the task of taking screenshots and opening the screenshot image automatically in an editor. Check out the post How to Automatically Take a Screenshot and Open it in an Editor for more information.
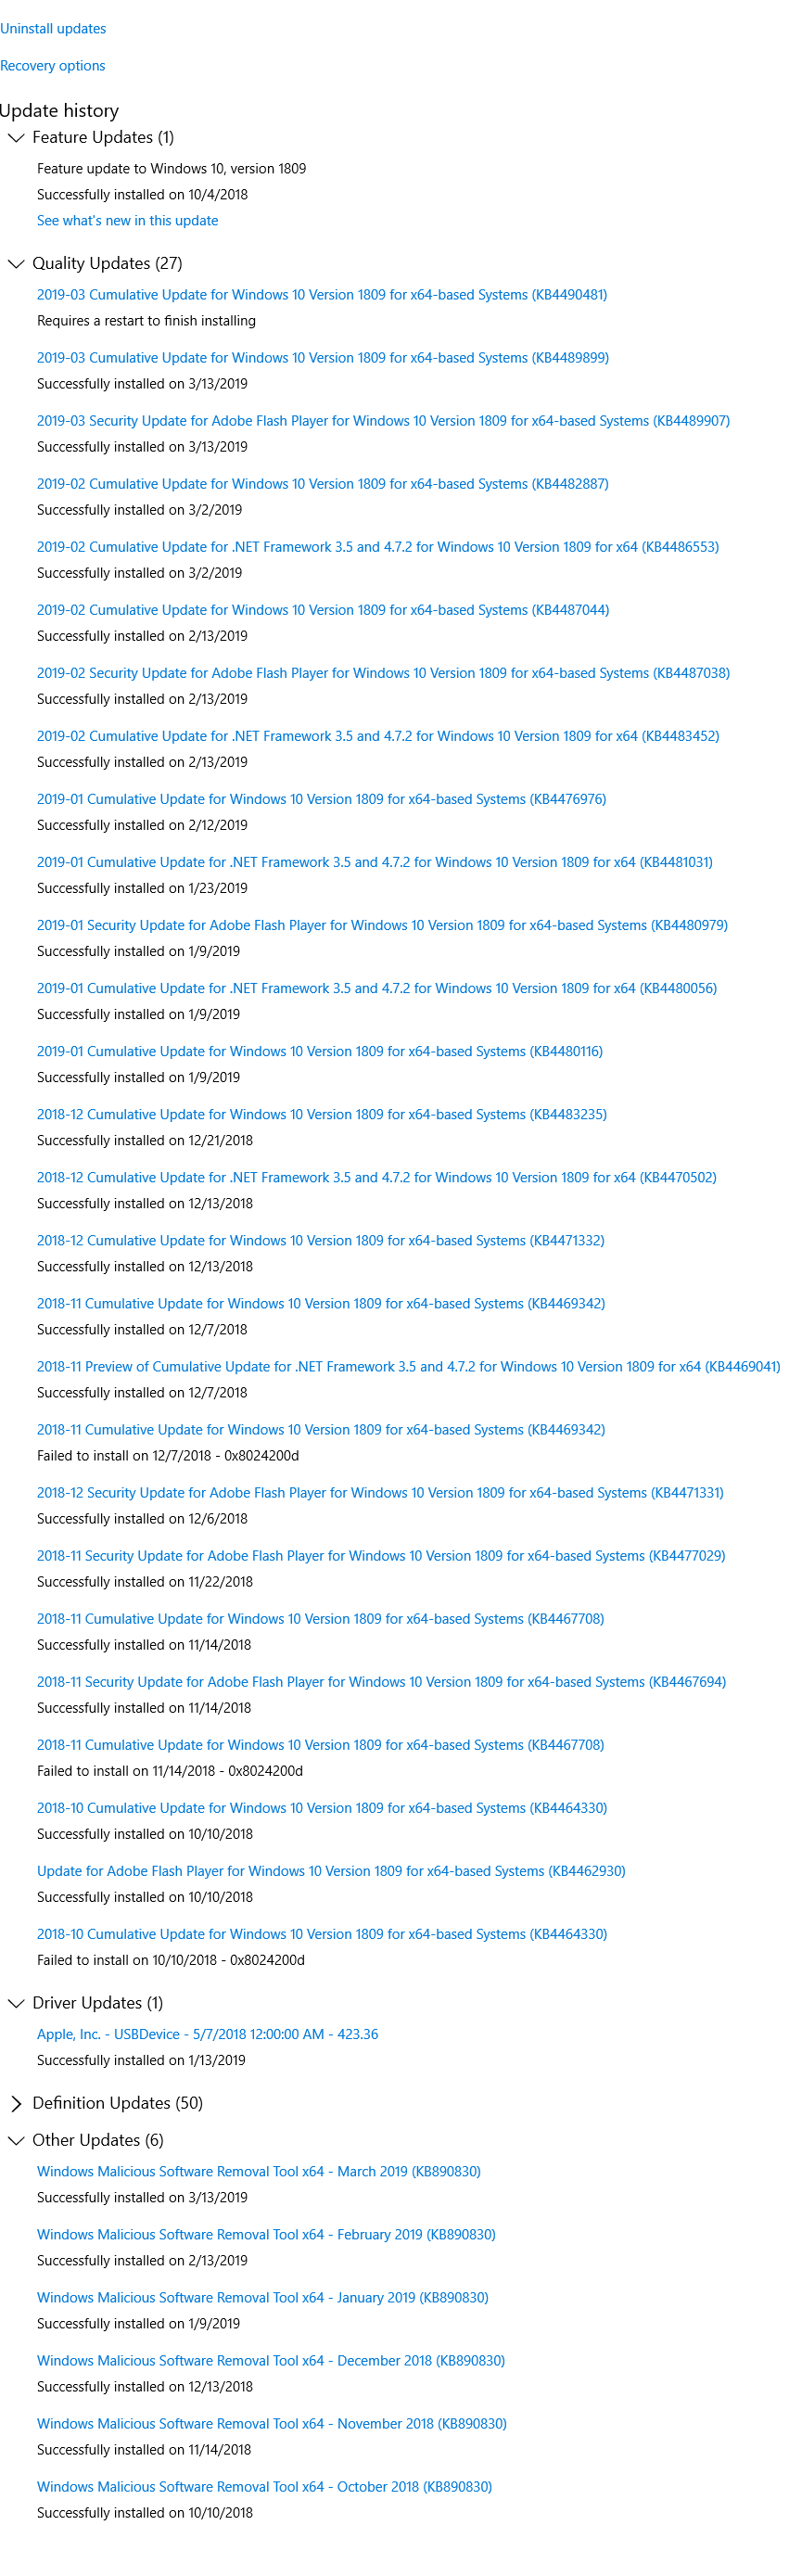
How do I Capture a Scrolling window?
Unfortunately, using Windows built-in tools, you can’t do a scrolling capture. Instead, you’ll need to use third-party freeware like ShareX, Greenshot, etc., to capture a scrolling window.
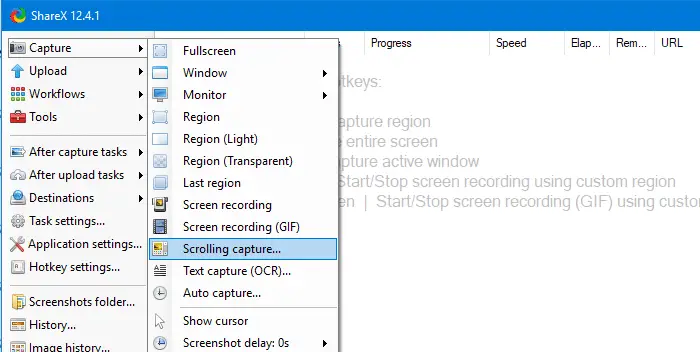
Using ShareX, I captured the Windows 10 Update History page.
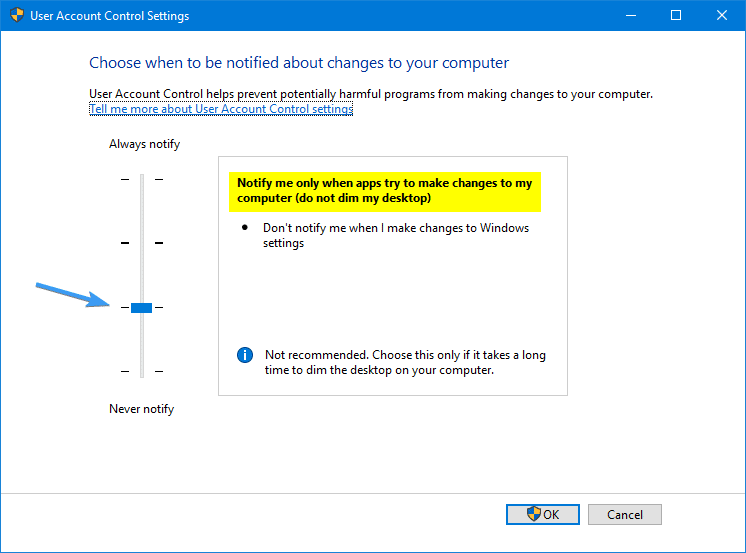
How do I Capture the User Account Control dialog?
The UAC window displays on a secure desktop, and hence the Print Screen button wouldn’t capture it. If you’re a technical writer who needs to capture the User Account Control dialog for documentation purposes, temporarily lower the UAC slider to “Do not dim my desktop” and then take a screenshot.
For more information and a GPO or registry method, see the article How To Capture a Screenshot of the User Account Control Elevation Dialog
How do I Take a Screenshot of the Windows Recovery Environment
You may need to take screenshots of the Windows Recovery Environment for documentation purposes. You can use a virtual machine (Hyper-V, Oracle Virtualbox, etc.) to take screenshots from it. But, if you can’t load a VM for some reason, here is how to take screenshots by booting the host machine into Windows RE.
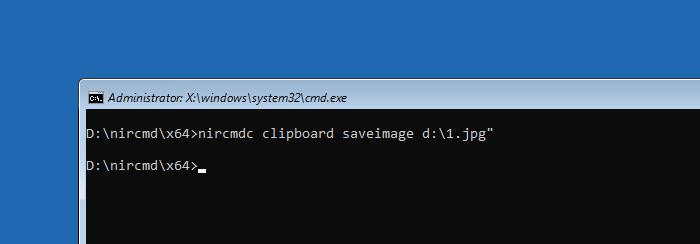
To take a screenshot of your Windows Recovery Environment screen, you can use the NirCmd console tool (nircmdc.exe). NircmdC.exe is the console version of the NirCmd.exe automation tool. NirCmd allows you to output the screen capture from the clipboard to a file.
While you’re logged in, download NirCmd, and extract NirCmdc.exe to a folder.
- Start the Windows Recovery Environment, and open the screen you want to capture.
Windows Recovery Environment - Press the PrintScreen button on your keyboard to capture the current screen to the clipboard.
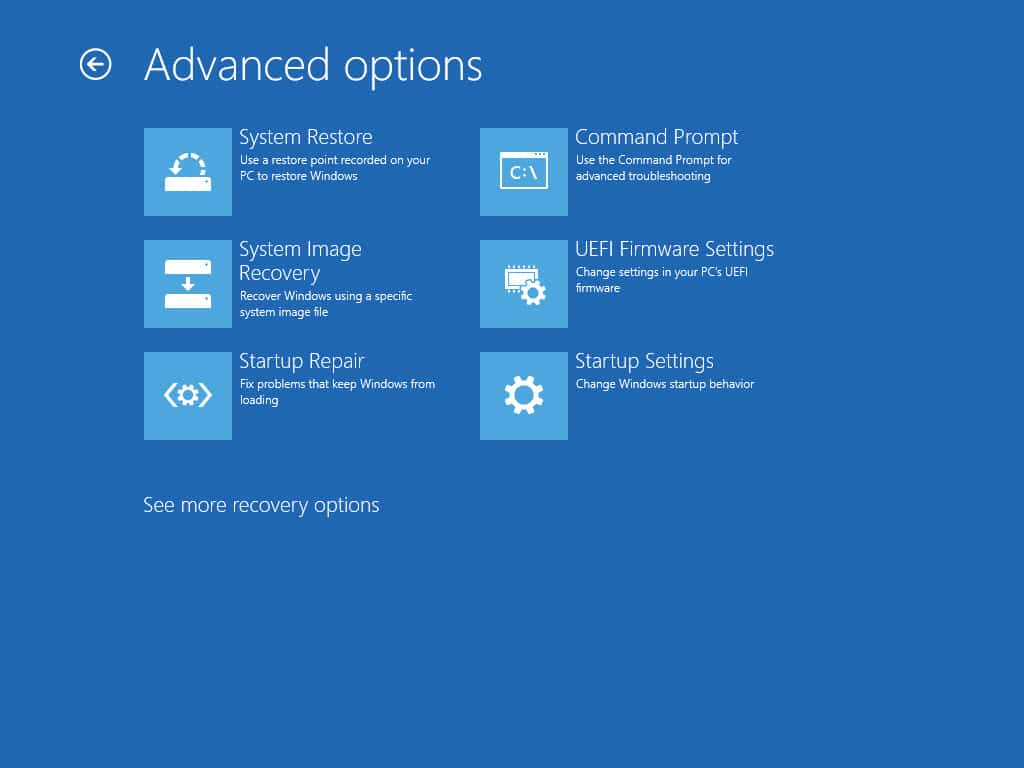
- Then, open Command Prompt via Troubleshoot → Advanced Options → Command Prompt.
- Next, switch to the directory where
Nircmdc.exeis located. - Type the following command, and press ENTER:
nircmdc clipboard saveimage D:\screencapture.jpg
[Change the drive letter and filename as required. NircmdC.exe supports the file formats:
.bmp,.gif,.jpg,.png,.tiff.]The above command outputs the captured image from the clipboard to a JPG file.
- Type
exitto quit the Command Prompt window and go back to the Recovery Options page. - Repeat the steps for each Windows RE page you want to capture.
Take a screenshot of the Lock Screen or Login Screen
Capturing the lock screen or login screen is tricky in Windows 10. The usual PrntScrn or Win + PrntScrn keys can’t capture the screenshot when you’re at the login screen. However, there is a neat trick using the built-in Snip & Sketch Utility in Windows 10 that can accomplish the task.
- Launch the Snip & Sketch tool.
- Click on the chevron near the New button
- Select Snip in 10 seconds.
- Now, lock the workstation using Win + L keystroke or via the Start menu.
To capture the lock screen:
-
- Wait for the Snip & Sketch menu to kick in at the top of the screen.
- Select one of the options: Rectangular, Free-form, or Full-screen snip.
- Unlock the workstation by typing in the PIN or password.
- The lock screen image is captured and visible in the Snip & Sketch interface.
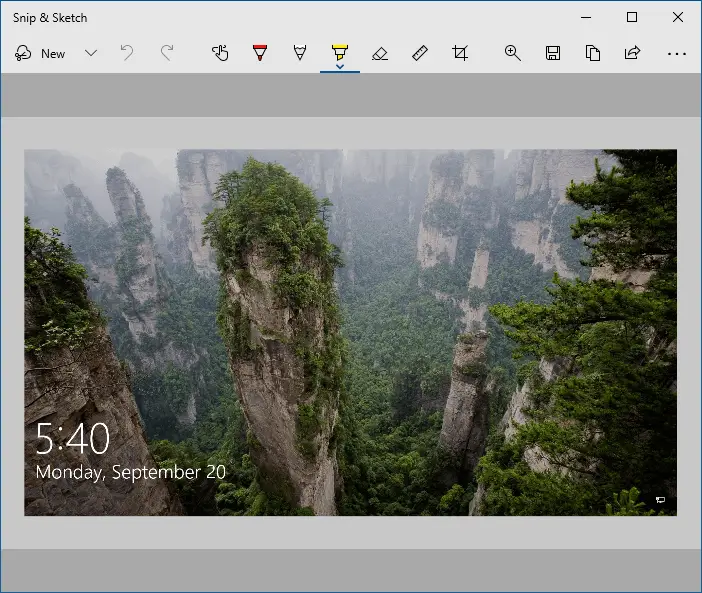
- Save the image to a file.
To capture the login screen:
-
- Click on the lock screen to dismiss it. This shows the login screen.
- Unlock the workstation by typing in the PIN or password. The Snip & Sketch menu will now appear at the top of the screen.
- Select one of the options: Rectangular, Free-form, or Full-screen snip.
- The login screen is captured, and the image is visible in Snip & Sketch.
- Save the image to a file.
Troubleshooting: Print Screen does not work on my system?
Check your OneDrive, Dropbox, or Google Drive Sync settings
If PrintScreen or one of the above key combinations doesn’t work, another application running in the background may have registered the hotkey. For example, if you’re using OneDrive, DropBox, or any cloud storage service, the respective client software can include an option to save screenshots to your cloud storage account directly. For this to work, the client software takes over the PrintScreen hotkey.
Check your settings in OneDrive, Dropbox, Google Drive, or any other sync client, disable the screen capture hotkey feature in those programs. If you have two programs competing for the PrintScreen hotkey, the first program which registers the hotkey will take over the key.
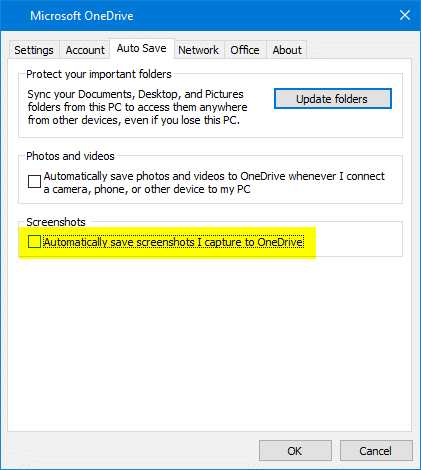
In OneDrive, open Settings → Auto Save tab → uncheck Automatically save screenshots I capture to OneDrive → click OK.
Additionally, if you’ve redirected your Pictures folder to OneDrive, the Screenshots would be silently saved to Onedrive\Pictures\Screenshots folder instead of Pictures\Screenshots. That’s another thing to watch out for.
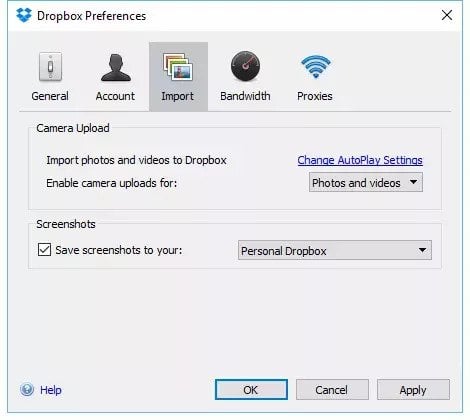
If you’re using Dropbox, open Dropbox Preferences → Import → Uncheck Save screenshots to your Dropbox → OK.
Likewise, check out if you have any such cloud sync tools or photo editing tools. One of the tools may have taken over the PrintScreen key.
Quoting a Windows 10 user:
Thanks so much, I checked the background programs, & low & behold, I installed a new program last night called Movavi photo editor & that is what took over my print screen feature & would not let print screen work for capturing a screenshot in any other program. So I am thankful that you had an answer to my problem.
Clipboard locked? Close all running apps to test
Another remote possibility is that a rogue program may have exclusively locked the clipboard. If that happens, you can’t write to the clipboard — copy & paste options won’t work in any application. PrintScreen or any combination of it may fail to copy the screen to the clipboard.
The best way to troubleshoot is to close down running programs one at a time to test. Alternately, you can perform a clean boot procedure, especially if a Windows or 3rd party Service is locking the clipboard and the PrintScreen key. To perform a clean boot troubleshooting in Windows, see Clean Boot Windows Using the Autoruns Utility.
Clipboard still does not work. How to debug?
There is another excellent tool called Clipboard Owner Debug. In many online support forums, especially the Microsoft Office forums, I’ve seen users complaining about Copy/Paste features not working in Word or Excel. The problem, as said earlier, occurs due to a rogue program that has owned the clipboard and locked it, preventing other apps from writing to the clipboard.
ClipboardOwnerDebug is a tool for debugging problems with the Windows clipboard, specifically with apps that open the clipboard and do not close it on time so that you’re unable to copy or paste anything. It’s a console that will poll the clipboard at specified intervals (in milliseconds) and reports changes to the clipboard along with the corresponding process name.
For example, to monitor the clipboard after every 100ms, i.e., poll the clipboard 10 times per second, use the following command-line:
ClipboardOwnerDebug.exe 100
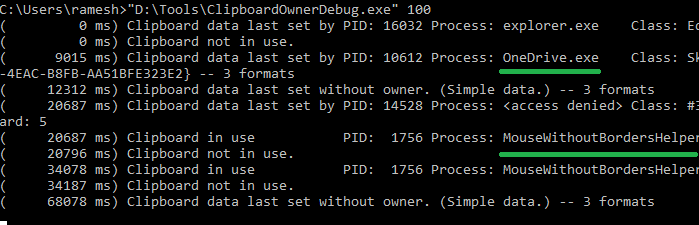
You’ll see reports of different programs using the clipboard for short periods.
The above screenshot shows that OneDrive and MouseWithoutBorders utilities have written to the clipboard once each. This doesn’t mean the apps have taken over the clipboard. If a particular process repeatedly writes to the clipboard, you’ll see many “clipboard in use” entries, and that process is most likely the culprit. Exit that program or service and see if the Copy, Paste, or Print Screen operations work on your system.
I hope this article covered most of the methods available to take screenshots in Windows 10 and earlier.
One small request: If you liked this post, please share this?
One "tiny" share from you would seriously help a lot with the growth of this blog. Some great suggestions:- Pin it!
- Share it to your favorite blog + Facebook, Reddit
- Tweet it!
Greenshot, eh?
Actually, I tested it a long time ago. But I use ShareX. It is very comprehensive.
Greenshot is excellent. Will give ShareX a try anyway. its reviews are good.