Generally, black and white images appear to be more timeless than color images. Also, some experts say that removing the color from a picture helps the viewer to focus on a subject’s emotional state. Monochrome portraiture lets the audience see the subject’s face without distraction.
This post tells you how to change a picture from color to black and white (monochrome image) using the built-in Photos app in Windows 10.
Convert Images to Monochrome (Black & White) using Photos app
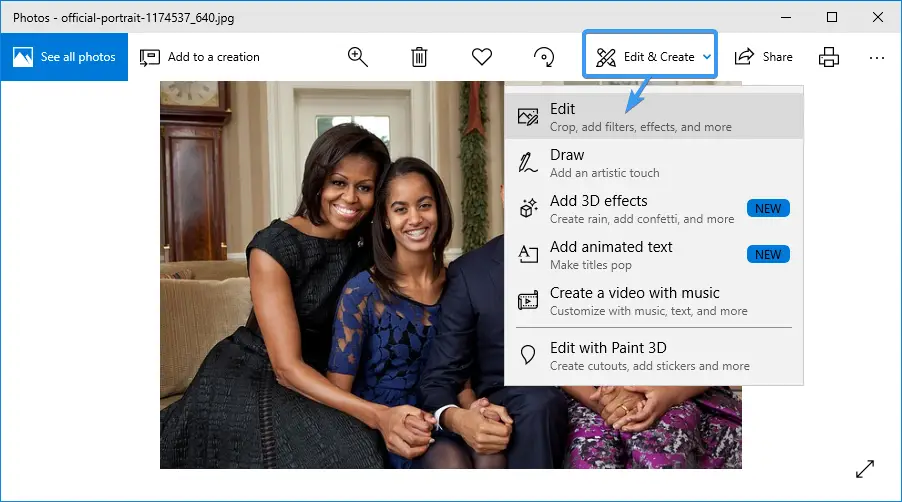
- Open the image file (which you want to change to monochrome) using the Photos app. You can right-click on the image file, choose Open with and select
Photosfrom the list. - In the Photos app, click on the
Edit & Createbutton at the top, and selectEditin the drop-down menu.
The resulting page shows you three options namely:Crop & rotate,Filters, andAdjustments. - Click
Adjustments. On the Adjustments page, you’re provided the option to increase or decrease the brightness, lower the colors, etc.
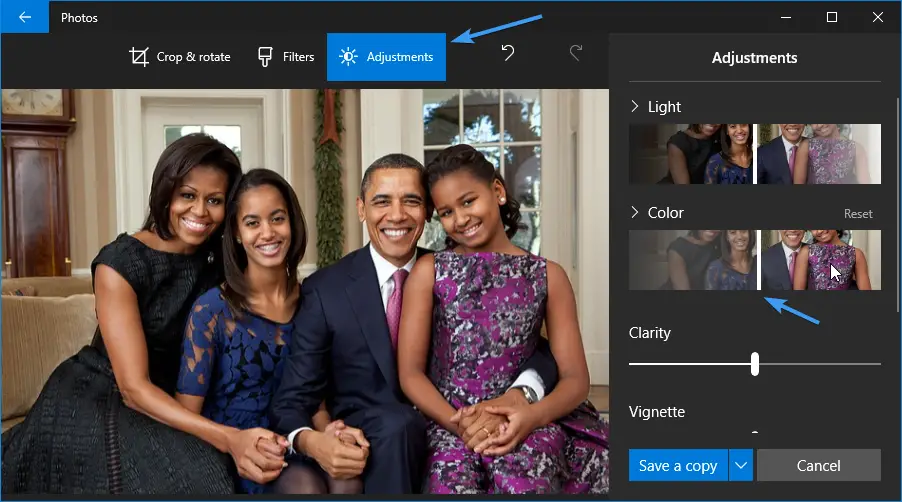
- Click on the Colors slider and drag it all the way the left (
-100setting). The color image changes to black and white.
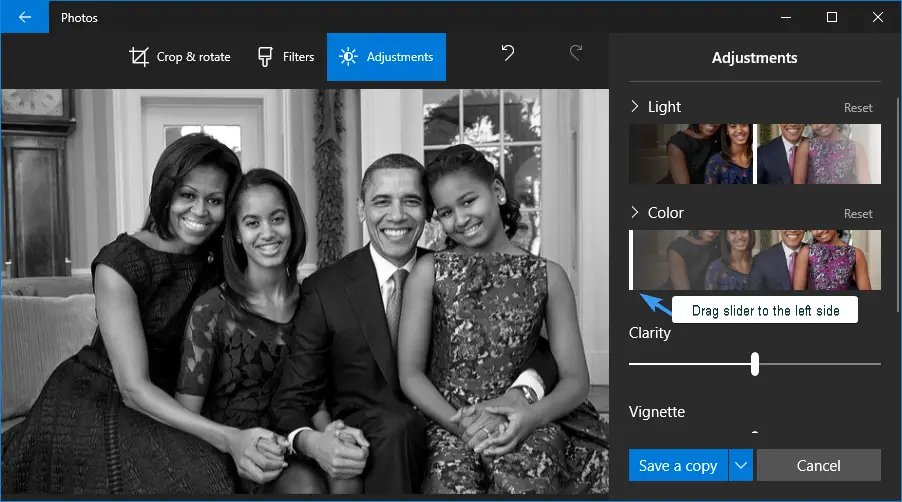
- Click on the
Save a copybutton to save the modified file with a new name.Note that theSave a copychevron also provides aSaveoption which when used, will overwrite the current file.
That’s it! Look how easy it is to change a picture from color to black and white using the built-in Photos app in Windows 10.
One small request: If you liked this post, please share this?
One "tiny" share from you would seriously help a lot with the growth of this blog. Some great suggestions:- Pin it!
- Share it to your favorite blog + Facebook, Reddit
- Tweet it!
Related articles
- How to Extract a Still Image from a Video in Windows 10
- Straighten Up Slanted Photos using Photos or Windows Live Photo Gallery
- How To Merge Videos In Windows 10 Using the Built-In Photos App
- How to Split or Trim Videos Using Windows 10 Photos App?
- How to Trim or Crop Images in Windows 10 Using Photos App
- How to Resize Images Using Photos App in Windows 10
Very clear step by step instructions. This worked great for me. Thank you so much.
this is grey scale not black and white.
Is there a way to convert images to monochrome – black and white – as per the title of this page? This page describes how to convert images to greyscale, which is not monochrome.