This post tells you how to change a picture from color to greyscale using the built-in Photos app in Windows 10.
Convert Images to Greyscale
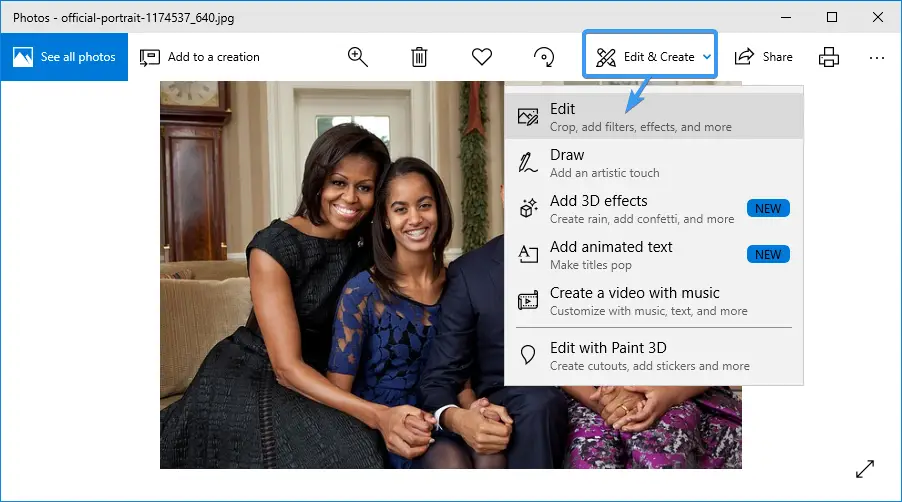
- Open the image file using the Photos app. You can right-click on the image file, choose Open with, and select
Photosfrom the list. - In the Photos app, click on the
Edit & Createbutton at the top, and selectEditin the drop-down menu.
The resulting page shows you three options, namely:Crop & rotate,Filters, andAdjustments. - Click
Adjustments. On the Adjustments page, you’re given the option to increase or decrease brightness, reduce color saturation, etc.
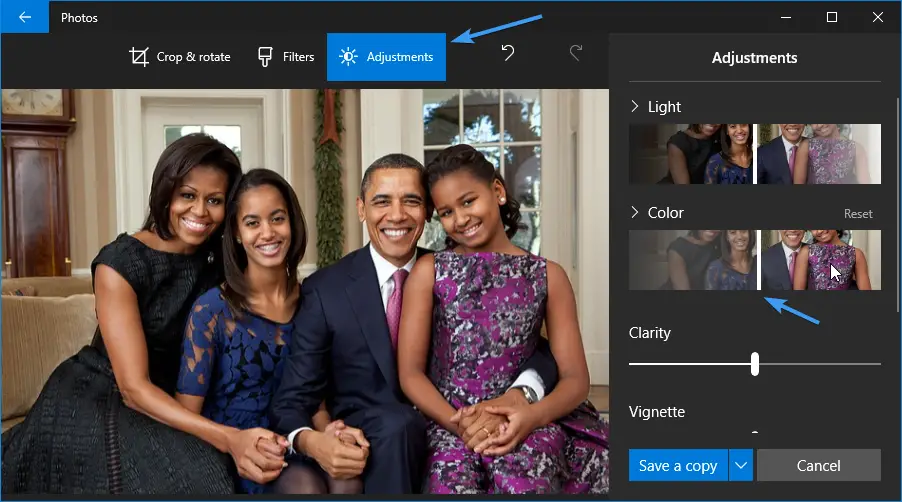
- Click on the Colors slider and drag it all the way to the left (
-100setting).
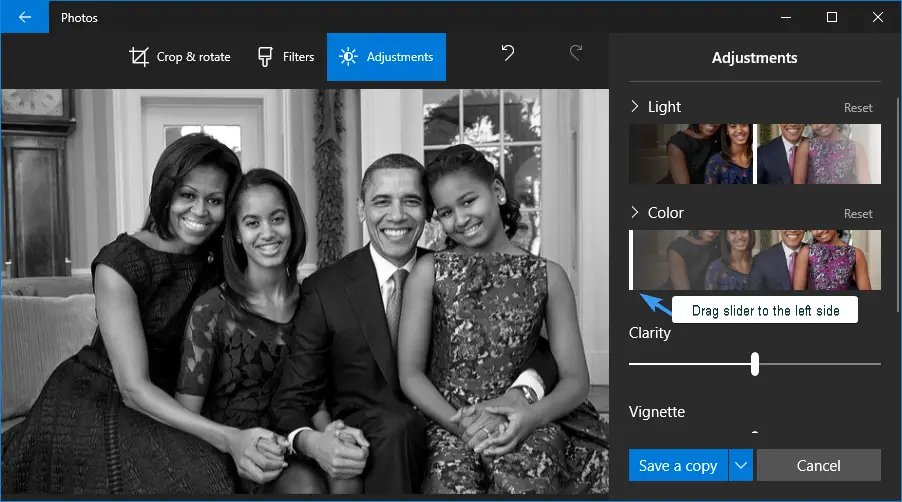
- Click on the
Save a copybutton to save the modified file with a new name. Note that theSave a copychevron also provides aSaveoption which when used, will overwrite the current file.
Related articles
- How to Extract a Still Image from a Video in Windows 10
- Straighten Up Slanted Photos using Photos or Windows Live Photo Gallery
- How To Merge Videos In Windows 10 Using the Built-In Photos App
- How to Split or Trim Videos Using Windows 10 Photos App?
- How to Trim or Crop Images in Windows 10 Using Photos App
- How to Resize Images Using Photos App in Windows 10
One small request: If you liked this post, please share this?
One "tiny" share from you would seriously help a lot with the growth of this blog. Some great suggestions:- Pin it!
- Share it to your favorite blog + Facebook, Reddit
- Tweet it!
Very clear step by step instructions. This worked great for me. Thank you so much.