Over time, many invalid or obsolete taskbar notification icons may appear on the “Customize notifications” or the “Select which icons appear on the Taskbar” page with duplicate, invalid or missing icons.
On Windows 11, the setting is called “Taskbar corner overflow.” It’s located under Personalization → Taskbar, in the Settings app.
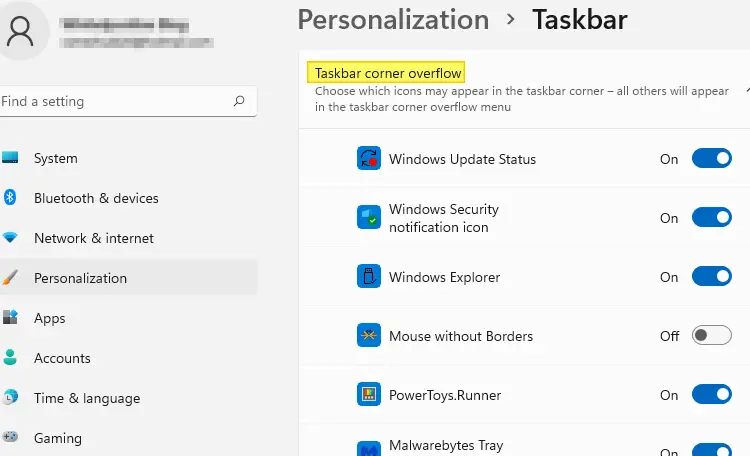
You may also see duplicate entries on that screen. It’s caused when a program updates to a new version, causing an additional entry to appear under the “Taskbar corner overflow” or “Customize notifications” settings page. For instance, this issue often happens with the Telegram Desktop app.
This article describes how to clear the past and current items list in the Customize Notifications dialog in Windows. Information and the script here apply to all versions of Windows, including Windows 10 and Windows 11.
Clear Customize Notifications (Taskbar corner overflow) Icons
Method 1: Using a Script
Here is a VBScript to quickly clear the customize notification icons.
- Close all your running programs.
- Download clear_notification_taskbar_overflow_icons.vbs
- Run the script file. It clears Taskbar overflow icons (aka, Customize Notifications items) and restarts the Explorer shell automatically.
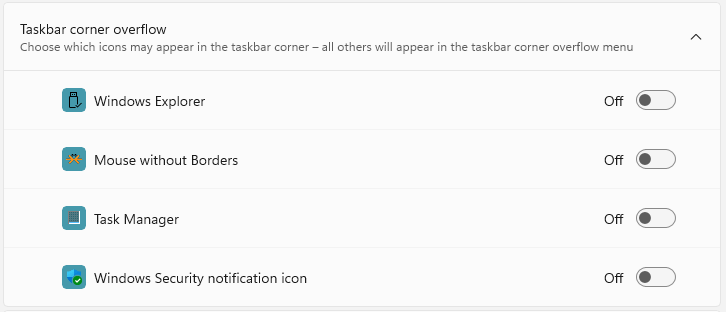
 Here is what the customize notifications dialog (“Select which icons appear on the Taskbar”) looks like after clearing the obsolete entries.
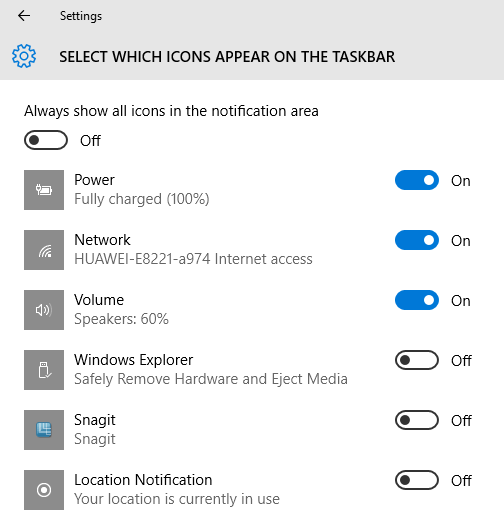
Customize Notifications Dialog after clearing. Programs will re-add their icons. You can see that the blank icons on the left are also fixed. (Compare Snagit icons.)
On Windows 11: Before running the script
After running the script
Contents of the VBScript
Method 2: Clearing the icons manually
Option 1: Using Reg.exe (for Windows 11 only)
In Windows 11 22H2, you can reset the tray icons by running the following command from a Command Prompt window:
reg.exe delete "HKCU\Control Panel\NotifyIconSettings" /f
Option 2: Using Regedit.exe (for Windows 10 and Windows 11)
To clear the Customize Notifications items list manually using the Registry Editor, follow these steps:
- Open Task Manager by pressing Ctrl + Shift + Esc
- Exit (don’t restart) the Explorer shell cleanly. See instructions for Windows 8 & 10.
Exit Explorer in Windows 11?:
Since Windows 11 doesn’t have the “Exit Explorer” GUI menu option, Windows 11 users can use the script method (“Option 1”) instead. Or use Task Manager to end the Explorer.exe process. It won’t be a graceful termination, though.
- The Taskbar and your desktop icons wouldn’t be visible now. From the Task Manager’s File menu, launch the Registry Editor (
regedit.exe) - In the Registry Editor, navigate to the following branch:
HKEY_CURRENT_USER\Software\Classes\Local Settings\Software\Microsoft\Windows\CurrentVersion\TrayNotify
- Delete the two values, namely IconStreams and PastIconsStream. If they’re missing, proceed to the next step.
- In addition, if using Windows 11 22H2 and higher, navigate to the following branch:
HKEY_CURRENT_USER\Control Panel\NotifyIconSettings
- Right-click NotifyIconSettings and choose Delete.
- Exit the Registry Editor.
- From the Task Manager’s File menu, launch
Explorer.exe. This starts the Windows shell again.
The Windows shell is the graphical user interface for the Microsoft Windows operating system. Its primary elements are the desktop, the taskbar, and the Start menu.
Additional Tip
How to remove a specific tray icon?
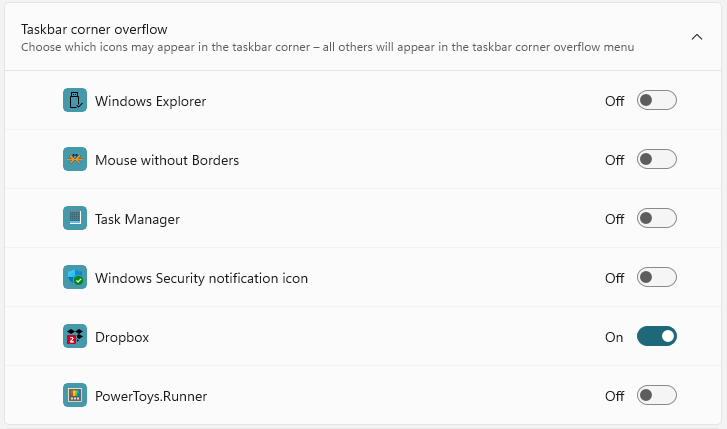
In Windows 11 22H2 and above, you can remove a specific tray icon rather than clearing the entire listing. For example, you may want to remove the PowerToys entry or entries from the following page:
![]()
- Go to the following key in the Registry Editor:
HKEY_CURRENT_USER\Control Panel\NotifyIconSettings
- Expand the branch and click on each subkey. Identify the product name from the InitialTooltip and the ExecutablePath REG_SZ values.
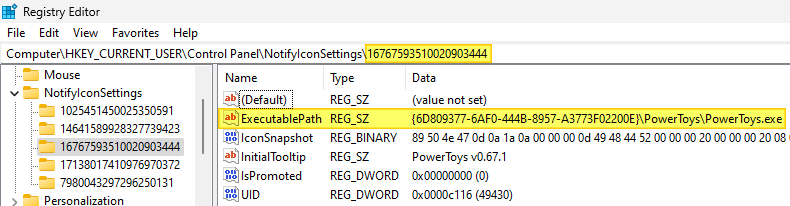
- Once you spot the item you want to remove, right-click on the corresponding branch and choose Delete.
- If the program has multiple tray entries, delete each subkey that has references to the program.
- Exit the Registry Editor.
That’s it! The PowerToys entries are now gone.
![]()
This clears your customize notification tray icons in the Taskbar in all versions of Windows, including Windows 11.
One small request: If you liked this post, please share this?
One "tiny" share from you would seriously help a lot with the growth of this blog. Some great suggestions:- Pin it!
- Share it to your favorite blog + Facebook, Reddit
- Tweet it!
Fantastic script! Glad to see you’ve added Windows 7 support. Thank you.
People
I don’t know how to download that script because when I click with the mouse on the link I get a text script! And when I download it (?) how do I start it?
Thank you!
Right-click on the vbscript link and choose “Save link as” in your browser. Run the .vbs file.
Thanks so much, it worked!!
THANK YOU SO MUCH IT WORKED SO FINE but the manual deletion didn’t work as there were no such values as iconstreams and pasticonsstream on windows 7
thanks!
no luck with the manual attempt, but the script worked perfectly, and will no doubt come in handy again…
good work!
I’ve been looking for this ages too! THANK YOU! but manual version does not work, don’t even waste your time. script version works as a CHARM!
Bingo. Many thanks for the script. IT WORKS. The manual version does not.
the manual doesn’t work, but the script worked, thank you so much>>
Worked like a charm and deleted the junk in a second, great work and I’m sure that the script will come in handy again…
Thanks
George
Used it and it works fine, many thanks!
December 2012
just used it again and it works perfectly so thank you again…
Just used your automated .vbs script and it worked perfectly. Bye bye stubborn, old tray icons .. hello cleaned out tray! Fantastic stuff Ramesh and many thanks. 😀
Thank you, thank you, thank you for the automated.vbs script, it worked like a charm! Another computer aggravation bit the dust. The old stubborn crap is gone!
I LOVE YOU so much !
That VBS script is awesome !
The “clear-notification-items.vbs” zip worked like a charm! It doesn’t get any easier than that!
AWESOME !!! THANKS A MILLION!!!
This is awesome!! it fixed my little annoying problem I was having with my Battery power icon disappearing! <3
Excellent little program. VB script worked in seconds
I had to forcibly remove an old anti-virus and it left an annoying little icon that I couldn’t find anywhere else but in the notifications tray. Junk cleaner, registry hunt-down, skimming through files to find it nothing worked. This little magic file though…whatever it is and however it does it WORKED! I’m definitely going to use this in the future 🙂
Thank you for the VBS at https://www.winhelponline.com/blog/clear-customize-notifications-tray-items-windows-7-vista-xp/ However, it didn’t work on my Windows 10 laptop, because the domain part of strCurrentUserName is upper-case, whilst strUserDomain is mixed-case. I fixed this by changing line 41 to
If UCase(strUserDomain & "\" & strNameOfUser) = UCase(strCurrentUserName)then and now it works perfectly 🙂 Cheers, JulieDear Sir,
Would you please to modify the VBS Script File to work on Windows 10 x64.
Since I was unsuccessfully clear by Regedit manaully.
Thanks in advance
[▀▄▀▄▀ ” P E R F E C T ” ▀▄▀▄▀]
Does it work with Windows 11 ?
@bRonCOde: Yes. The script and the manual method work on Windows 11 as well.
Windows 11 22623.891 Did not work. There is no PastIconsStream entry.
Script didn’t worked for me (Win11)
Excellent _ Worked perfectly on Windows 11
Did not work for me Windows 11 22623.1325
@Noel: Something may have changed in the Insider Preview build. I don’t have that build installed here to test.
I have the same problem, the keys don’t exist.
No luck here with either the script or the manual method, uwing W11 22H2 (22621.1413)…
I have like 15 ShareX listed in my settings, each update it adds another one.
For the recent builds of Windows 11 22H2 (and higher), open a Command Prompt window and run:
This clears the overflow icons.