Windows 10 allows you to set a Wifi connection as a “Metered” connection, but no such GUI option existed for Ethernet (LAN) networks. In Windows 8 and Windows 10 v1607 and earlier, you needed to apply a registry edit to set Ethernet or LAN connection as metered. Thankfully, with Windows 10 Creators Update, it’s a built-in option that can be configured using the Settings UI — no registry edit required.
Wi‑Fi network connections are set as non-metered by default. However, you can change set it to metered to limit data usage by the user as well as the Operating System, if your ISP charges you by the amount of data traffic you use.
On the other hand, mobile broadband networks are set to metered by default. There are mobile broadband service providers that allow unlimited data plans with full speed for a fixed monthly fee. In such cases, you may want to change the setting to non-metered.
Coming to Ethernet networks, it doesn’t mean it has no data usage limit because one uses an Ethernet connection. Ethernet is just the medium you use to access or share an internet connection, which can be capped.
I have two different setups. One uses a mobile broadband modem which plugs into a power socket using a travel adapter. The connection is shared via Wi-Fi. Another setup uses a fiber network whose endpoint connects to my TP-Link router. The connection is shared via Ethernet (with three computers) and through Wi-Fi so my tablets and mobiles can connect to it at home. In either case, my providers charge me by data usage, given the plan I opted for.
Set Ethernet (LAN) connection as metered
If you access the internet via ethernet, whose source connection is capped, you can still set it as a metered connection to reduce data usage by the Operating System and the Apps.
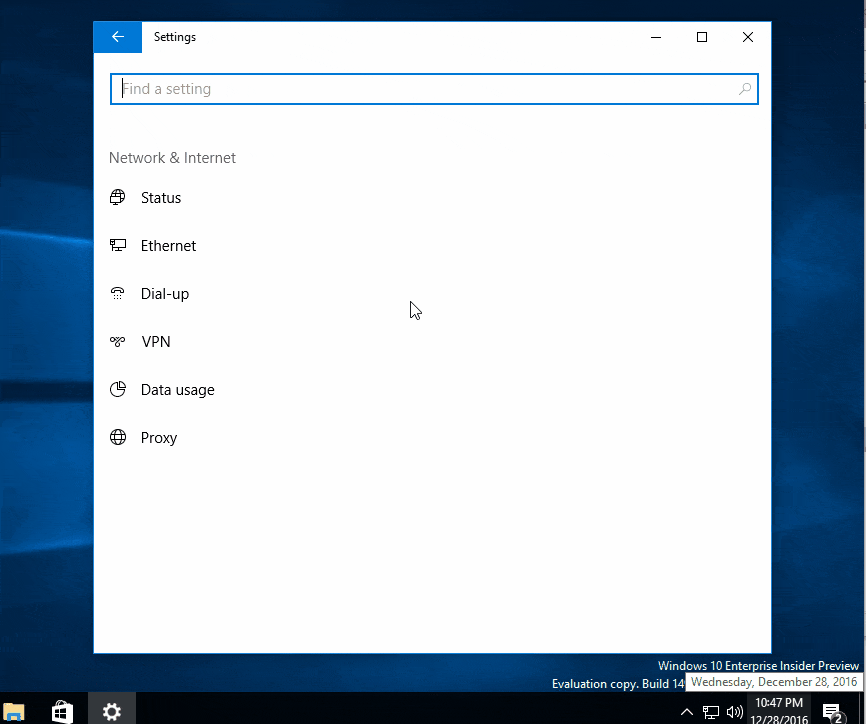
- Click Start, Settings (or press Winkey + i)
- Click Network & Internet
- Click Ethernet, and click the network connection listed.
- Click to enable the option “Set as metered connection”
Set Ethernet as metered in Windows 10
“Set as metered connection” Disables Automatically?
If the “Set as metered connection” toggle button turns off automatically, an important service may have been disabled.
- Launch Services.msc
- Double-click “Data Usage” service (DusmSvc)
- Set its startup type to “Automatic”
- Click “Start” the start the service.
- Close Services MMC,
- Open Settings and set your ethernet connection as metered. The setting should be retained.
For Windows 10 v1607 (Anniversary Update) and earlier
Here is how to set an Ethernet connection as Metered, using the registry in Windows 10. The instructions should apply to Windows 8 as well.
- Start the Registry Editor (Regedit.exe) and go to the following key:
HKEY_LOCAL_MACHINE\SOFTWARE\Microsoft\Windows NT\CurrentVersion\NetworkList\DefaultMediaCost
This key is owned by TrustedInstaller by default. You’ll need to take ownership of the key and assign full control permissions for “Administrators” group.
- Double-click Ethernet and set its value data to
2. (Value data of1means non-metered and2is metered.)
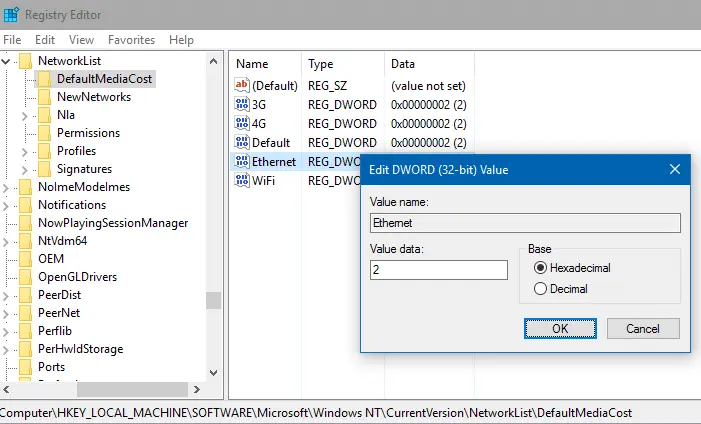
- Once done, revert back the ownership to TrustedInstaller (“
NT Service\TrustedInstaller“) for that branch. - Exit the Registry Editor.
What happens when using a metered internet connection?
When on metered connection, Microsoft Outlook would show the notification “Outlook is working offline to prevent data charges..” and offers the “Connect Anyway” option.
![]()
Whereas other apps may reduce their data usage but won’t necessarily show you a notification.
When you set a connection as metered, Windows Update won’t automatically download updates, except perhaps the priority updates. You’ll need to click the “Download” button manually to install updates. Start screen tiles might stop updating. Offline files automatic sync may not work. Also, Windows Store won’t update apps automatically.
And, in Windows 10, the Spotlight feature may stop working when on a metered connection — it may not fetch new images for your Lock Screen. Microsoft didn’t document this one officially, though.
Image credits: Martinelle, pixabay.com
One small request: If you liked this post, please share this?
One "tiny" share from you would seriously help a lot with the growth of this blog. Some great suggestions:- Pin it!
- Share it to your favorite blog + Facebook, Reddit
- Tweet it!
Using this setup, is there a way to classify certain programs as non-metered? I.e. I want to disable Windows Updates (as they suck up 100% of my bandwidth while I’m trying to work) but I don’t want to defer Windows Defender updates.
Also, setting the reg keys back to 1 (on 1607) doesn’t appear to change the behavior. I reset the ownership however, so maybe after a reboot that will take.
If you set a network as metered, only important updates get downloaded through it. This includes Windows Defender updates.
Hi I have windows 10 professional v1903 and when I go into the settings and then I click on the network and internet and then I click on change connection properties and from there it talks about the metered connection and Underneath is the toggle switch to turn on or off the metered connection. I toggle it to on but then when I go and exit out and then I go back into where the toggle switch is it’s back off again. Now I have done the registry setting and I have it enabled in the registry I clicked on permissions for default media cost and I clicked advanced and I changed the account to admiministartor. Where I was confused is that when I click on user accounts in the control panel it shows my name my email and then shows administrator. When I click on permissions in the registry to change the permissions it shows me administartor and administrators. So I wasnt sure which to click on because like I said in the controll panel is user accounts it shows administartor not administartors. The only difference is the s everything after that is the same. So should I delete the administrators entry and just go with administrator?. I’m on an ethernet connection
“administrator” is the administrator account.
“administrators” is the administrator group account (people in this group have administrator privileges). This entry wont show in user management because it isn’t a user.
you are obviously you.