Microsoft Defender’s command-line utility MpCmdrun.exe is used for scheduling scans or updating the signatures using the command-line. This post tells you how to set up Microsoft Defender to scan the computer daily at a specified time using Task Scheduler and in Windows 10 or 11.
Note: Windows already includes the Automatic Maintenance feature, which runs many scheduled tasks, including Defender daily scan. However, the task runs only if the system is idle. Moreover, Automatic Maintenance stops running once it detects user activity in the system.
If you can leave the system idle for some time daily for Automatic Maintenance, you don’t have to schedule it manually. Creating a scheduled task manually runs the scan, regardless of whether your system is idle.
How to Schedule a Microsoft Defender Scan
Method 1: Create a Defender Scan Task Using SchTasks.exe
To schedule a daily Microsoft Defender scan, create a scheduled task using SchTasks.exe console tool using the following steps:
- Open a elevated Command Prompt. To do so, right-click Start and click Command Prompt (Admin).
- Type in the following command and press
ENTER:schtasks /create /tn "Scan With Defender (Daily Quick Scan)" /sc DAILY /st 13:00 /ru SYSTEM /rl HIGHEST /tr "'C:\Program Files\Windows Defender\MpCmdRun.exe' -Scan -ScanType 1"

This creates a Microsoft Defender Scan task that runs daily, at
13:00hours underSYSTEMuser account with highest privileges. If you running it underSYSTEMaccount you wouldn’t see the Command Prompt window that the task runs in. To see the Command Prompt window (interactive), changeSYSTEMto your user name (say,John, in place ofSYSTEM). - Type
EXITto close the Command Prompt window.
The above command was given as an example. You can alter the scan schedule time, frequency (DAILY, WEEKLY, MONTHLY) accordingly as per your requirements. For more information about Schtasks.exe command-line switches, see Schtasks.exe | Microsoft Docs article.
Method 2: Create a Defender Scan Task Using Task Scheduler
If you’d like to configure Microsoft Defender Scan schedule using Task Scheduler GUI, use these steps:
- Click Start, type Task Scheduler and click Task Scheduler from the list.
- From the Action menu, click Create Basic Task…
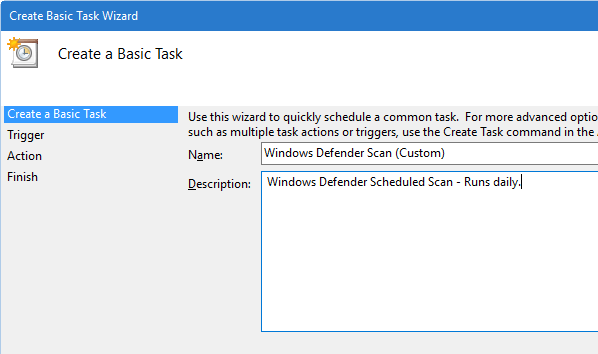
- Assign a name for the task, and give an apt description for the custom task.
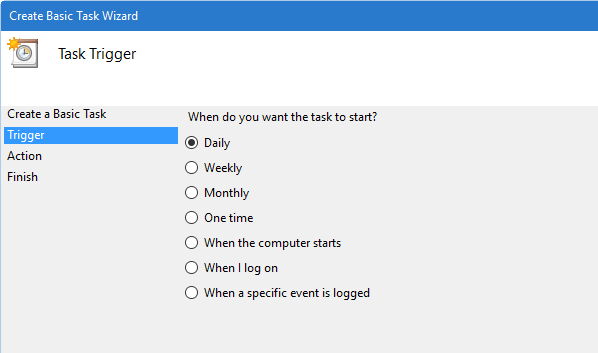
- If you want to run the task once daily, click Daily, and click Next.
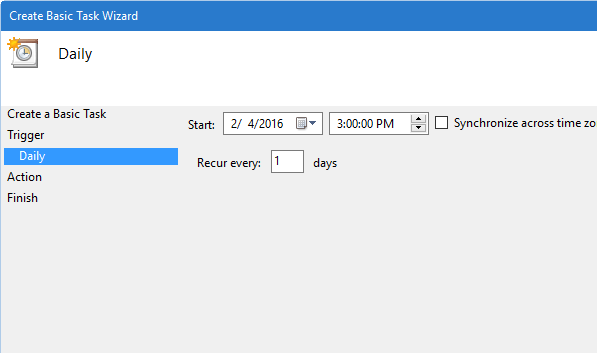
- Set the time when you want to task to run, and click Next.
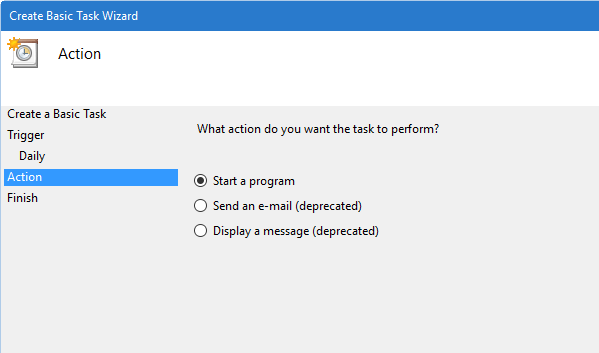
- In the Action dialog, click Start a program, and click Next.
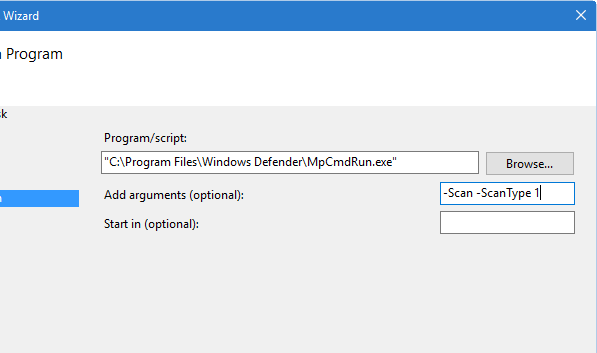
- In the Program/Script text box, mention the full path of
MpCmdRun.exe. In the “Add arguments” text box, type one of the following:-Scan -ScanType 1 (for Quick Scan)
-Scan -ScanType 2 (for Full system Scan)
(or)
SignatureUpdateAndQuickScan
Editor’s Note:
SignatureUpdateAndQuickScanparameter does two things, just as the name implies: it updates the signatures and runs a Quick Scan. It is a hidden parameter that is not mentioned in the help or anywhere. Also, check out the post Using MpCmdRun.exe to Update Defender and Run a Quick Scan in One Go for more information.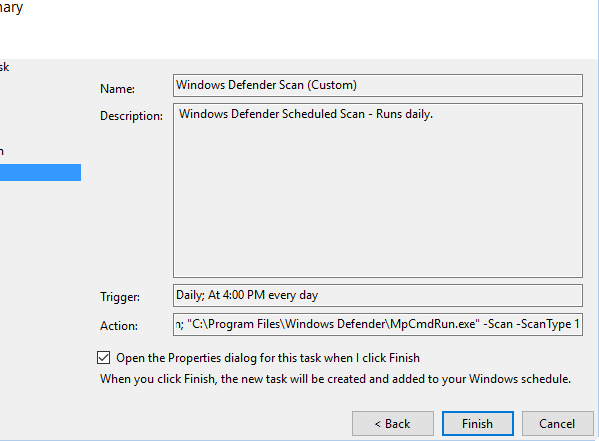
- Select the Open the Properties dialog for this task when I click Finish, and then click Finish.
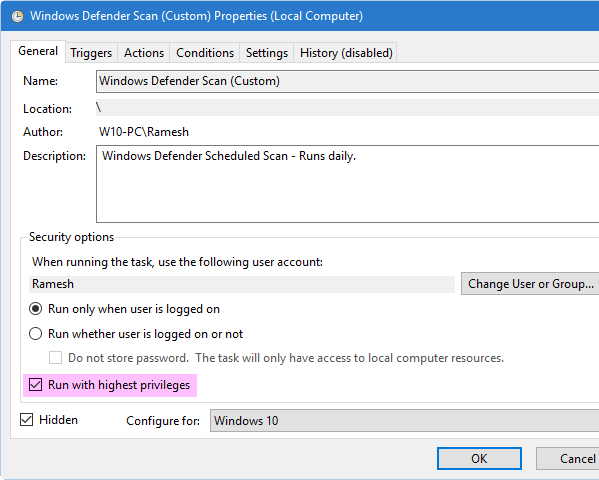
- Enable the check box for
Run with highest privileges. - Select Windows 10 in the Configure for: drop down list box.
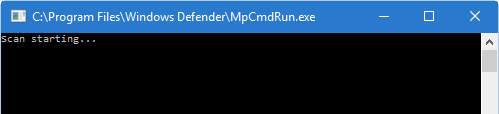
- Exit the Task Scheduler.That’s it! You’ve now created a task that launches Microsoft Defender Scan on schedule. The task duly runs at the specified time. The Command Prompt window can be minimized.
 If you use the
 SignatureUpdateAndQuickScanparameter, it updates the signatures and follows up with a Quick Scan.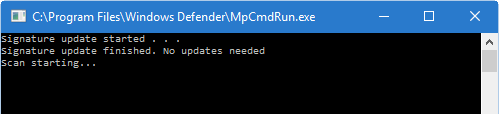
I hope that info helps.
One small request: If you liked this post, please share this?
One "tiny" share from you would seriously help a lot with the growth of this blog. Some great suggestions:- Pin it!
- Share it to your favorite blog + Facebook, Reddit
- Tweet it!
I used method 2 to set mine up to run daily and it works good but I keep getting a black screen that pops up during the scan that says scan starting the black screen won’t go away till the scan is done…. Anyway to fix this so the black screen won’t show up during the scan
try this
PowerShell.exe -WindowStyle hidden { your script.. }