The EFI partition is created automatically when you install Windows. However, after adding a second HDD/SSD and installing Windows on that disk, you may realize that the EFI system partition remains on the old hard disk. You wonder how to move the EFI partition from the old hard drive to the new one.
For example, the screenshot below shows no EFI partition on “Disk 2” (SSD, where Windows is installed). Instead, the EFI partition exists on the old drive, “Disk 1”. This means physically removing Disk 1 will stop the system from booting.
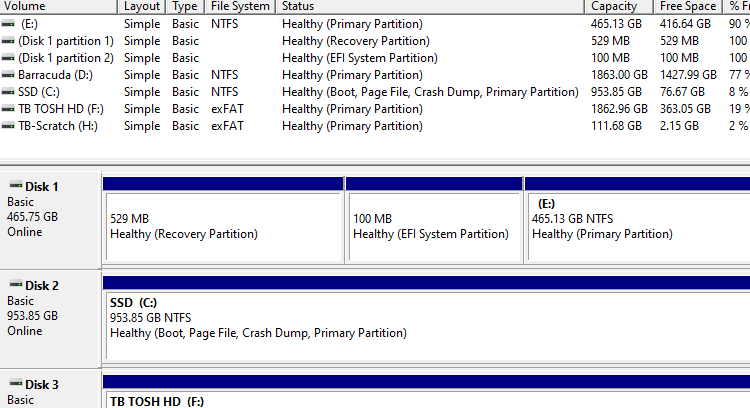
The user added an SSD and installed Windows on the SDD. Later, he realized that the EFI System Partition was not on the SSD but remained on the old HDD.
As a result, you cannot physically remove and discard the old hard drive. The problem is that the EFI partition is located on the old hard drive, and removing that drive will render the system unbootable.
Resolution
To resolve the issue, create a new EFI system partition on the SSD, which is Disk 2 in this example.
To create the EFI boot partition, one of the partitions (e.g., C:\ ) on Disk 2 needs to be shrunk by 100 to 200 MB. The entire procedure can be completed using the command-line. Follow the steps below:
From an admin Command Prompt, run the following commands:
diskpart
select volume C
shrink desired=150
create partition efi size=150
format fs=fat32 quick
assign letter=Y
list vol
exit
Important: Do not proceed to the next command if a command fails to execute correctly.
Next, to copy the boot files and create the Boot Configuration Database (BCD) file, run the following:
bcdboot C:\Windows /s Y:
You should see the output “Boot files successfully created.”
(In the above example, C:\ is where Windows is installed, and Y:\ is the drive letter we assigned for the EFI system partition.)
That’s it. The above steps create the EFI partition on Disk 2, where the OS partition (C:\ drive ) exists.
Open Disk Management. You should see the newly created EFI system partition on Disk 2. You can now physically remove Disk 1 if you don’t need it.
One small request: If you liked this post, please share this?
One "tiny" share from you would seriously help a lot with the growth of this blog. Some great suggestions:- Pin it!
- Share it to your favorite blog + Facebook, Reddit
- Tweet it!
Hello Ramesh, thanks a lot for this post, it perfectly addressed my question and you described the solution in such a way that it worked out exactly as mentioned.
Best regards, Ulf
Hey! thanks a lot for this guide, i managed to fix my drives and saved me a lot of time. I had the exact same problem as “the user”
Installed Zorin on separate drive in Win10 machine. Tried to pull the drive and the boot partition for Windows 10 was on the Zorin drive in EFI. Tried many software but nothing would work. After 12hrs ….This solution worked! Thank YOU!