Google Chrome’s synchronize feature stores a copy of your entire browser settings in the cloud and synchronizes it with your other devices. It can sync your Apps, Bookmarks, Extensions, History, Settings, Themes, Reading List, Open Tabs, Passwords, Addresses, phone numbers, payment methods, etc. With sync, all you need to do is install the Chrome browser on a new computer and log in to the same Google account. This transfers all of the above settings to the new device.
But if you don’t prefer logging into a Google account in Chrome browser, you’ll need to backup and restore your data manually, as the synchronize feature requires a Google account.
This post tells you how to backup Chrome profiles manually and restore them on another computer. The instructions would be helpful if your old Windows user profile has been corrupted and you want to restore the Chrome settings to the new profile.
How to Transfer Chrome Profile to Another Computer
Backup Google Chrome Profiles
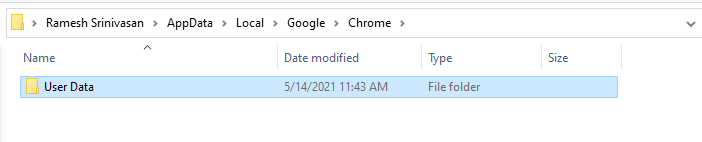
Google Chrome stores the user data (for all profiles) under the %LOCALAPPDATA%\Google\Chrome\User Data\ directory. The profile folders are named “Default,” “Profile 2”, “Profile 3,” and so forth — depending upon the number of browser profiles you created.
To transfer the Chrome profiles to another computer, backup the data to a USB flash drive and restore it on the new computer or user account. Follow these steps:
Profile folders
- Close all instances of Chrome.exe. You can check the Task Manager Details or Processes tab to see if Chrome.exe is running.
- Next, assess the total disk size occupied by the
User Datadirectory. It can be in several Gigabytes. Be sure that your external/USB flash drive has sufficient space. - Copy the
%LOCALAPPDATA%\Google\Chrome\User Data\directory to your USB flash drive.
 Note that the
User Datafolder includes all the user profiles in it. If you want to copy a particular profile, say “Default“, then copy the following subdirectory only:%LOCALAPPDATA%\Google\Chrome\User Data\Default
Tips:
- To know the profile path for your Chrome profile, visit
chrome://versionin your browser. - To reduce the total size of the backup, you may exclude the folders named
CacheandService Workerpresent under each profile folder. This will save you gigabytes of disk space when copying.
- To know the profile path for your Chrome profile, visit
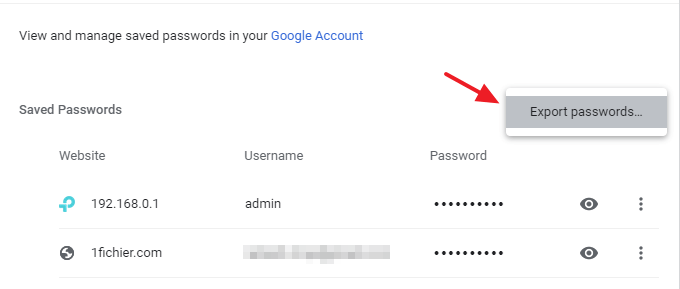
Passwords
Passwords need to be exported manually for each profile. For more information, check out the article Import or Export Google Chrome Passwords to a File.
Registry settings
- Start the Registry Editor (
regedit.exe) - Navigate to the following branch:
HKEY_CURRENT_USER\SOFTWARE\Google\Chrome\PreferenceMACs
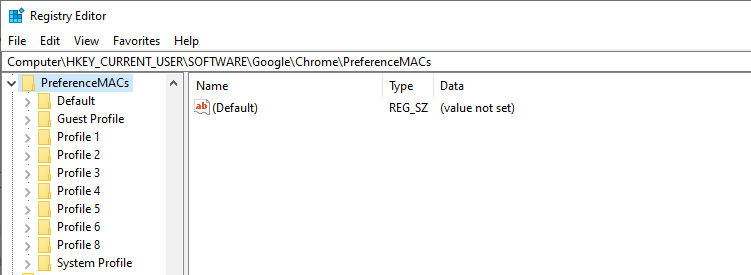
The above key stores some settings or hashes pertaining to individual Chrome extensions (for every Chrome profile), along with other preferences. - From the File menu, click Export and save the branch to a .reg file — e.g., chrome_prefs.reg.
Note: If you want to export the settings of a particular profile, then select that subkey (e.g., “Default, “Profile 2”, or “Profile 3”) and export it.
- Exit the Registry Editor.
Restore Google Chrome Profile(s) to Another Computer
To restore Chrome profiles from backup, follow these steps:
Profile folders
- Install Google Chrome on the new computer or user account.
- Make sure all instances of Google Chrome are closed.
- Using File Explorer, rename the
User Datafolder located at:%LOCALAPPDATA%\Google\Chrome\User Data\
Note: If you’re transferring only a specific Chrome profile from backup, then rename only the appropriate profile folder — e.g., “Default,” “Profile 2”, or “Profile 3,” etc., on your hard drive.
- Copy the User Data folder (or the specific profile folder) from your USB drive to the above location in the hard drive.
Registry settings
- Start the Registry Editor (regedit.exe)
- Navigate to the following branch:
HKEY_CURRENT_USER\SOFTWARE\Google\Chrome\PreferenceMACs
- Rename
PreferenceMACstoPreferenceMACs.Old - From the File menu, click Import…
- Browse to select the registry file (e.g., chrome_prefs.reg) you exported earlier (to your USB drive), and import it.
- Exit the Registry Editor.
Passwords
- Launch Google Chrome.
- If you see the following prompt, click OK. Don’t click Reset All Settings.
Some settings were reset

Chrome detected that some of your settings were corrupted by another program
and reset them to their original defaults.
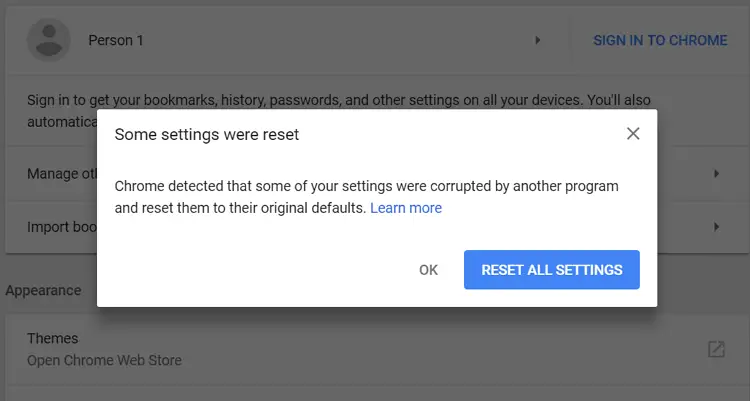
Due to the change in Machine ID and hash (HMAC) value, Chrome resets some settings found in the
Secure Preferencesfile for that profile. Settings that might automatically get reset are:- Default search engine
- Homepage
- Startup pages
- Pinned tabs
- Extensions
Note: Despite Chrome’s reset notification, none of the extensions were disabled during my testing. Also, most of the extension settings were successfully imported. Enterprise users seem to use the
Google Chrome Master Preferencesfile to deploy the settings. - Enable the following password import flag in Chrome via this link:
chrome://flags/#PasswordImport
(Full instructions are available in the article Import or Export Google Chrome Passwords.)
- Then, open the Passwords page directly without going through Settings. The URL is below:
chrome://settings/passwords
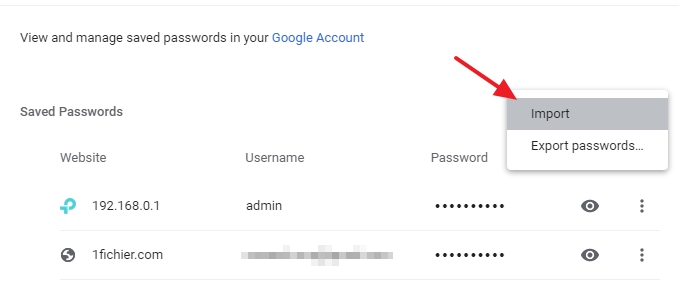
- Import the passwords from the CSV file in your USB drive.
- Close all instances of Chrome.
Start Google Chrome now. The bookmarks, extensions, extension settings, cookies, history, passwords, and most of the other settings should have been imported correctly. However, note that you’ll need to re-login to each website manually for the first time. You can use the password autofill, though.
[Tested on Chrome browser version 90.0.4430.212. Windows 10 OS Version 2009 or 20H2 (Build 19042.985)]
One small request: If you liked this post, please share this?
One "tiny" share from you would seriously help a lot with the growth of this blog. Some great suggestions:- Pin it!
- Share it to your favorite blog + Facebook, Reddit
- Tweet it!