Summary: In this article, we will see how to extract or convert install.esd to install.wim file format in the Windows 10 ISO image using DISM or other methods.
The Windows Imaging Format (WIM) is a file-based disk image format developed by Microsoft to help deploy Windows operating system. The DISM tool (Deployment Image Service and Management Tool) can perform servicing tasks on a WIM file. For example, you can add or remove a device driver from an offline image.
However, when you download Windows 10 using the Media Creation Tool or the Windows 10 Upgrade Assistant, you may find install.esd instead of install.wim. The install.wim has given way to install.esd, an Electronic Software Download (ESD) file format, due to its high compression ratio.
ESD is a highly compressed format whose file size comes around 80% compared to a WIM image. But the ESD image format is read-only and thus has drawbacks. For instance, it can’t be deployed using a WDS server. So you need to convert the ESD file to a WIM file to service the image or deploy it. You’ll need to convert install.esd to install.wim in the Windows source to integrate updates and drivers (a.k.a. slipstream) with the original setup disk.
Convert ESD to WIM
How to Convert ESD to WIM in Windows 10
Using NTLite
NTLite is an excellent tool that helps you integrate updates, drivers, automate Windows and application setup, speed up the Windows deployment process, and have it all set for the next time. It can easily convert an ESD file WIM format.
Start NTLite and add a source (image directory or point to a .esd file)
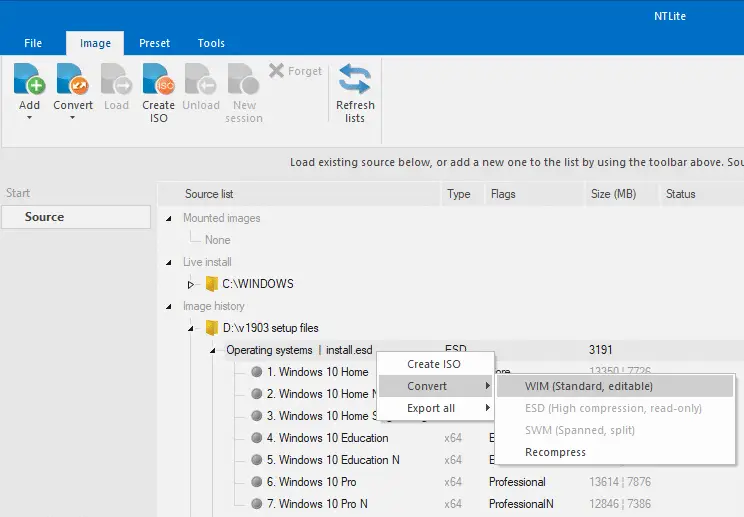
Right-click on the source, click Convert, and select WIM (standard, editable) from the submenu.
It asks for confirmation. The confirmation window also has a checkbox named Replace source image. Enable the option if you don’t want the source image (.ESD).
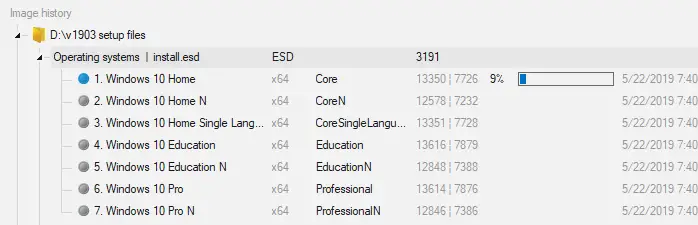
Note: You can also export an individual index or image (by right-clicking on a specific item) to a WIM file.
The ESD to WIM conversion (or vice versa) may take around 10 minutes to complete, depending upon the Windows 10 version and ESD/WIM file size.
Here you go!
It’s effortless using NTLite. If you prefer a native and command-line method, we have the DISM command-line to accomplish the task.
Using ESD2WIM Converter Command Script
The ESD2WIM command script or a batch file can convert the install.wim file to install.esd using DISM.
- Download the ESD2WIM-WIM2ESD.cmd file from GitHub.
- Right-click ESD2WIM-WIM2ESD.cmd and click Run as administrator.
- In the console window, type the path to
install.esdThe next screen will display the number of indexes (with the corresponding editions) in the WIM file.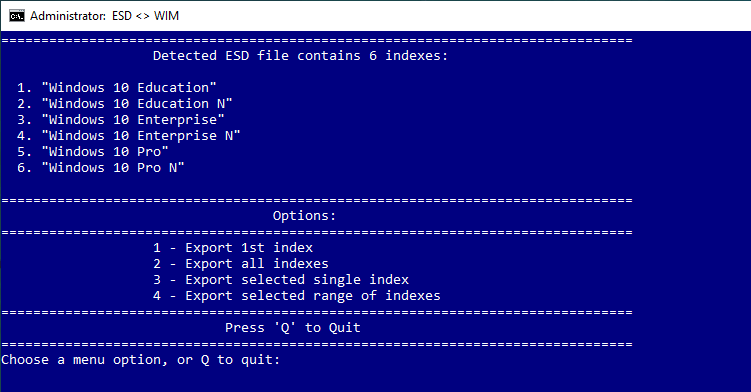
- Export 1st index
- Export all indexes
- Export selected single index
- Export selected range of indexes
- Select one of the options based on your requirement. The command script runs the relevant DISM command-line to convert or extract the ESD file(s) to WIM.
The output file install.wim is created in the same directory as the ESD2WIM-WIM2ESD.cmd command script file.
Convert ESD to WIM Using DISM or PowerShell in Windows 10
To convert an ESD file to WIM (e.g., install.esd to install.wim) manually using the Deployment Image Servicing and Management tool (DISM) in Windows 10, follow the steps below:
Step 1: Create a folder named Win10_ISO
- Create a folder on your hard disk and name it
Win10_ISO[D:\Win10_ISO] - If you already have a Windows 10 installation USB flash drive created using Media Creation Tool, copy
X:\Sources\install.esdtoD:\Win10_ISOfolder, whereX:\is the drive letter of your USB flash drive.Additional Notes:
#1. If you have a dual architecture Windows 10 Setup USB media, copy the
install.esdfile for correct bitness toD:\Win10_ISO. Windows 32-bit one is found under\x86\Sourcesfor 32 bit, and the 64-bit version is located under the\x64\Sourcesfolder. Maintain the same directory structure in the destination folder.#2. If you have the Windows 10 ISO image, mount the ISO by right-clicking it and clicking Mount. Access the mounted drive and copy the entire contents to the
D:\Win10_ISOfolder.
Step 2: Find the Windows Editions & Indexes Info in the ESD file
- Open an elevated Command Prompt window.
- Type one of the appropriate commands below to find the Windows editions (and their indexes) available in the ESD file.
(For more details, check out the article Find the Windows version, build, and edition from ISO or DVD.)(a) If ESD file was copied from USB flash drive to
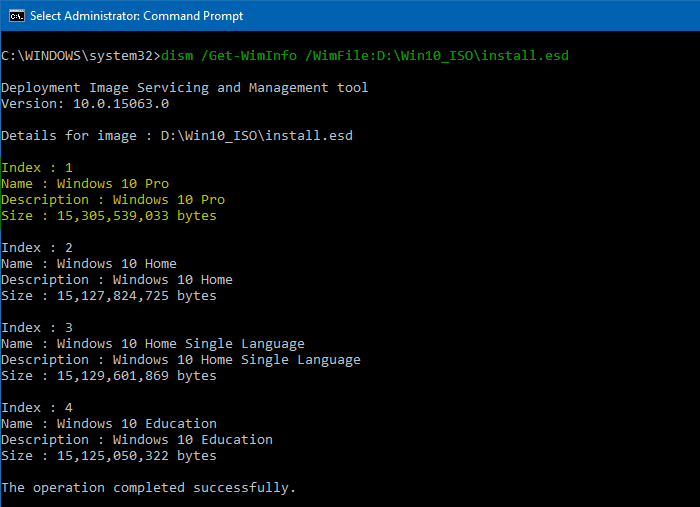
D:\Win10_ISO:dism /Get-WimInfo /WimFile:D:\Win10_ISO\install.esd
(b) If ISO contents were copied to
D:\Win10_ISO:dism /Get-WimInfo /WimFile:D:\Win10_ISO\Sources\install.esd
(c) If your ISO is dual-arch, use the appropriate path.
Windows 32-bit ESD file:
dism /Get-WimInfo /WimFile:D:\Win10_ISO\x86\Sources\install.esd
Windows 64-bit ESD file:
dism /Get-WimInfo /WimFile:D:\Win10_ISO\x64\Sources\install.esd
Alternately, you can run the following PowerShell command to get the above information. Make sure you run PowerShell as administrator.
Get-WindowsImage -Imagepath D:\Win10_ISO\install.esd
- Note down the index number for the preferred Windows 10 Edition (Home, Pro, etc.).
(You may see “Error 87” if you read an ESD file using DISM in Windows 8 and earlier.)
Step 3: Convert ESD to WIM Using DISM or PowerShell
For illustration, we’ll extract the Windows 10 Pro image (Index Number: 1 as in the above screenshot) to a WIM file.
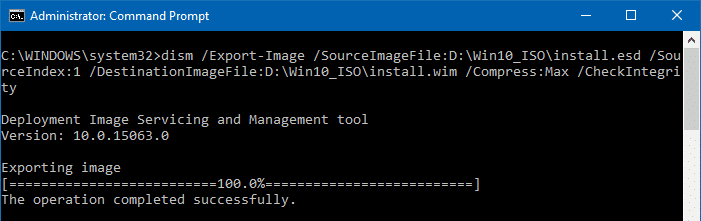
- Type the following command to convert ESD to WIM:
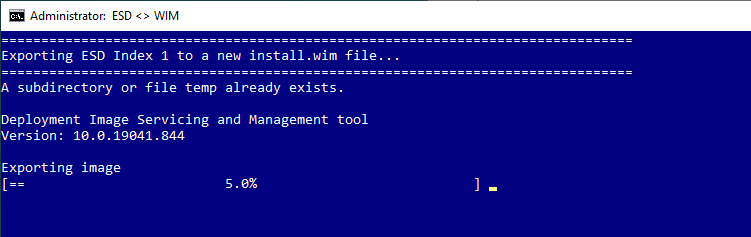
dism /Export-Image /SourceImageFile:D:\Win10_ISO\install.esd /SourceIndex:1 /DestinationImageFile:D:\Win10_ISO\install.wim /Compress:Max /CheckIntegrity
Alternately, you can use the following PowerShell command to accomplish the same task:
Export-WindowsImage -SourceImagePath D:\Win10_ISO\install.esd -SourceIndex 1 -DestinationImagePath D:\Win10_ISO\install.wim -CheckIntegrity
Export all indexes to a WIM file?
To export all the indexes (1-7), you need to run these commands one by one:
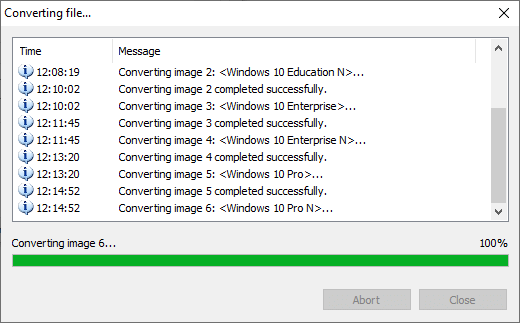
dism /Export-Image /SourceImageFile:D:\Win10_ISO\install.esd /SourceIndex:1 /DestinationImageFile:D:\Win10_ISO\install.wim /Compress:Max /CheckIntegrity
dism /Export-Image /SourceImageFile:D:\Win10_ISO\install.esd /SourceIndex:2 /DestinationImageFile:D:\Win10_ISO\install.wim /Compress:Max /CheckIntegrity
dism /Export-Image /SourceImageFile:D:\Win10_ISO\install.esd /SourceIndex:3 /DestinationImageFile:D:\Win10_ISO\install.wim /Compress:Max /CheckIntegrity
dism /Export-Image /SourceImageFile:D:\Win10_ISO\install.esd /SourceIndex:4 /DestinationImageFile:D:\Win10_ISO\install.wim /Compress:Max /CheckIntegrity
dism /Export-Image /SourceImageFile:D:\Win10_ISO\install.esd /SourceIndex:5 /DestinationImageFile:D:\Win10_ISO\install.wim /Compress:Max /CheckIntegrity
dism /Export-Image /SourceImageFile:D:\Win10_ISO\install.esd /SourceIndex:6 /DestinationImageFile:D:\Win10_ISO\install.wim /Compress:Max /CheckIntegrity
dism /Export-Image /SourceImageFile:D:\Win10_ISO\install.esd /SourceIndex:7 /DestinationImageFile:D:\Win10_ISO\install.wim /Compress:Max /CheckIntegrity
The above commands will extract every index/image from the ESD and create a multi-edition WIM file named
install.wim.As a side note, the PowerISO (trial version) can accomplish the above task easily.
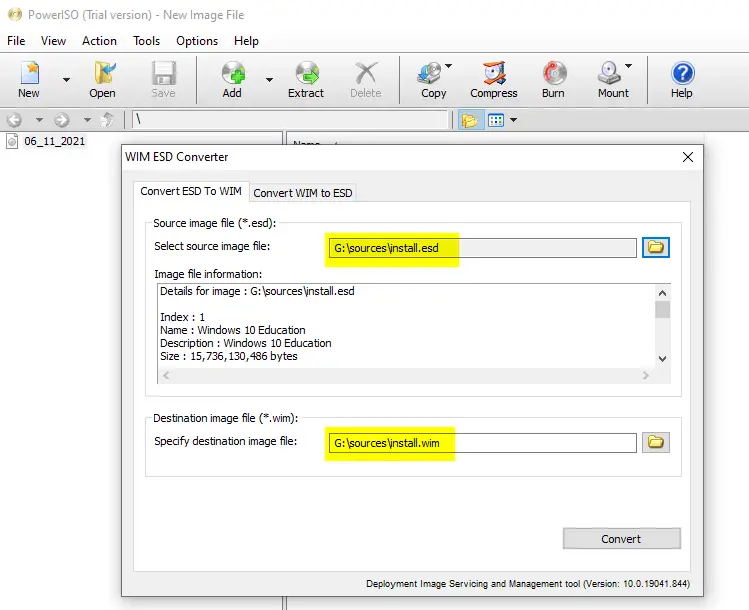
PowerISO’s ESD to WIM or WIM to ESD converter feature (via the Tools menu) runs the DISM command-line in the background.
PowerISO doesn’t have the option to extract a single index/image from a multi-edition ESD file. Also, PowerISO can convert a WIM file into ESD by using DISM in the background.
Additional Notes:
The source path in the above command applies if you copied the ESD file from the USB flash drive to
D:\Win10_ISO.Instead, if you copied ISO contents from a single architecture (32 or 64 bit) Media Creation Tool ISO to
D:\Win10_ISOfolder, use this source path:D:\Win10_ISO\Sources\install.esd
For dual architecture ISO image, the valid paths are below (for x86 and x64, respectively):
D:\Win10_ISO\x86\Sources\install.esd

or

D:\Win10_ISO\x64\Sources\install.esd
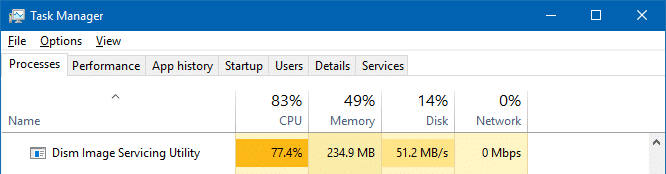
DISM starts extracting the ESD to WIM format. It’s a resource-intensive task that may take 10 minutes or so to complete.
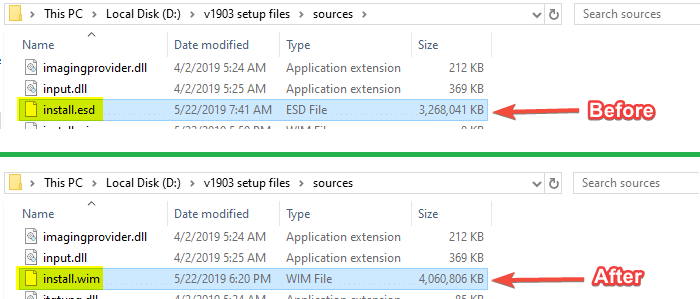
It’s done now. Compare the file sizes of
install.esdandinstall.wim.
- Copy
install.wimto your USB flash drive, and then delete theinstall.esdfile on your USB drive as well asD:\Win10_ISOfolder.
Note: If you have a multi-architecture ISO, repeat the process for the other bit version (x86 or x64) in the same way.
You’ve now converted the ESD file install.esd to WIM format (install.wim). You can now create an ISO (of D:\Win10_ISO folder contents) using NTLite, PowerISO, or any other software.
One small request: If you liked this post, please share this?
One "tiny" share from you would seriously help a lot with the growth of this blog. Some great suggestions:- Pin it!
- Share it to your favorite blog + Facebook, Reddit
- Tweet it!
I am running currently windows 8
Error 87 is coming after running dism /Get-WimInfo /WimFile:D:\Win10_ISO\Sources\install.esd command
Pls upload a screenshot of that error.
This does NOT work on Server 2012. You must do this from either a workstation or server 2016 and higher. Thanks for the how to!!!
Worked perfectly on windows 10. Thanks so much!