![]() In previous versions of Windows, you could save the current theme settings to a text-based file with a .theme extension. To apply the theme to another computer, you needed to manually include the mouse cursor, wallpaper images, icons, and other files (referenced in the .theme file). Windows 7 introduces a new theme file format (.themepack) which helps users to share themes.
In previous versions of Windows, you could save the current theme settings to a text-based file with a .theme extension. To apply the theme to another computer, you needed to manually include the mouse cursor, wallpaper images, icons, and other files (referenced in the .theme file). Windows 7 introduces a new theme file format (.themepack) which helps users to share themes.
A theme pack is a .cab file that contains not only the .theme file but also the files needed to implement the theme on another computer, such as sound files and images. Users can create theme packs through the Personalization Control Panel. Theme Pack can include the following types of files (REF: MSDN article Creating and Installing Theme Files.)
- .theme
- .jpg / .jpeg
- .bmp
- .dib
- .tif
- .png
- .wav
- .cur
- .ani
- .ico
Customize the Desktop Theme Settings
1. Right-click on the Desktop and choose Personalize.
2. Customize the following items:
- Desktop Wallpaper
- Desktop Slideshow
- Icons for various special folders
- Mouse Pointers
- Screensaver and timeout settings
- Window Color
- Sounds
- Window Metrics
3. In the Personalization page, click Save theme
4. In the Save as type drop-down, select Theme Pack (*.themepack)
5. Type a file name and press ENTER
The saved Theme Pack contains the .theme file and additional elements needed to implement the theme. To apply the theme in another computer, transfer the .themepack file to the target computer and simply double-click the file.
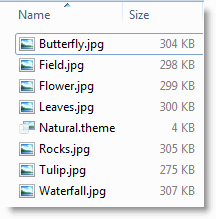
Additional Tip: To view the contents of a .themepack file, rename it to .cab extension and double-click to open the file.
One small request: If you liked this post, please share this?
One "tiny" share from you would seriously help a lot with the growth of this blog. Some great suggestions:- Pin it!
- Share it to your favorite blog + Facebook, Reddit
- Tweet it!
I’m on school computer 🙁