![]() You can create a system repair disk in Windows 7 to guard against being unable to start Windows correctly. The repair disk loads the Windows Recovery Environment, which contains the recovery tools to repair/recover your unbootable Windows system.
You can create a system repair disk in Windows 7 to guard against being unable to start Windows correctly. The repair disk loads the Windows Recovery Environment, which contains the recovery tools to repair/recover your unbootable Windows system.
Note that you can also use the Windows 7/Vista DVD to boot to Windows Recovery Environment. This guide is for those who own an OEM computer (with no Operating System CD/DVD), and those who want to maintain a CD exclusively for recovery scenarios.
Creating a System Repair Disk in Windows 7
Click Start, All Programs, Maintenance, Create a System Repair Disc
Insert a CD/DVD into the drive and press Create disc
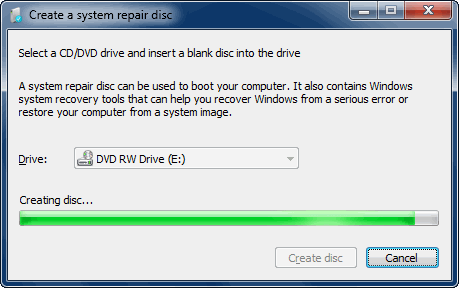
This creates the System Repair Disc. To start the Windows Recovery Environment, place the System Repair Disc into the drive and reboot the PC via the CD/DVD drive (Hint: Set CD/DVD as the first boot device in BIOS).
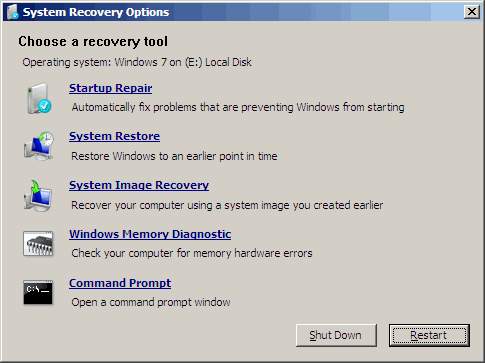
Select your Windows installation from the list when prompted. The System Recovery Options are now displayed. These are the recovery tools available:
- Startup Repair
- System Restore
- System Image Recovery
- Windows Memory Diagnostic
- Command Prompt
One small request: If you liked this post, please share this?
One "tiny" share from you would seriously help a lot with the growth of this blog. Some great suggestions:- Pin it!
- Share it to your favorite blog + Facebook, Reddit
- Tweet it!
Thanks for sharing this information on windows recovery disk