System Restore uses a considerable amount of disk space on the computer. While it’s not a problem for systems with bigger hard drives, you most likely would be running out of disk space in systems with a low-capacity drive such as a 150 GB hard disk, especially if you have Windows 10.
If you’re running short of disk space, you can analyze disk usage by files and programs, clear previous Windows installation files, and wipe out temporary & junk files using Disk Cleanup or CCleaner. In addition, you can lower the disk space allotted to System Restore to free up disk space in any version of Windows.
Increase or Decrease the Disk Space Used by System Restore
To alter the disk space allocation for System Restore, follow these steps:
Method 1: Using System Restore Properties
Using the Run dialog, launch SystemPropertiesProtection.exe to open the System Restore dialog. Alternately, run sysdm.cpl and select the System Protection tab.
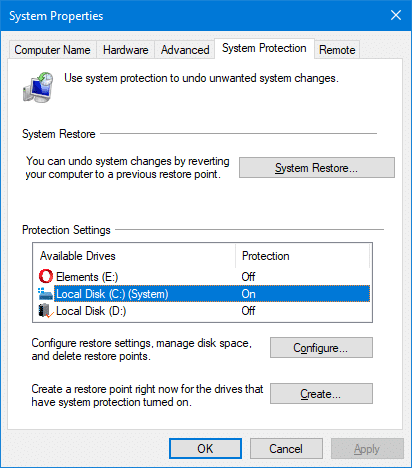
Select the drive for which you want to reduce the disk space allotment. Click Configure.
This tab shows the current disk usage by System Restore in the System Volume Information folder.
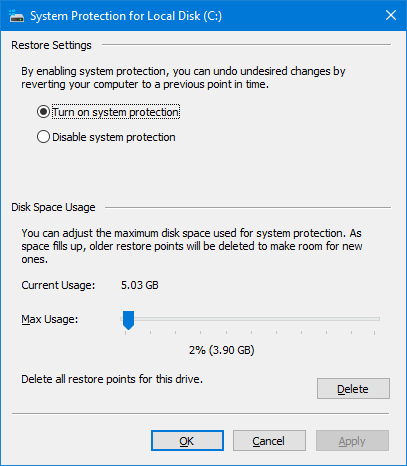
Move the Disk Space Usage slider as required, and click OK.
Or, to reduce the disk space slider in a granular fashion, click exactly on the pointer in the slider to select it. And use the left or right arrows on your keyboard. Each tap of the left or right arrow decreases or increases the disk usage slider by 1%.
If you reduce the slider to the left, the disk space allocation to the System Restore feature is lowered, which in turn keeps the System Volume Information folder size low. The oldest restore points are purged automatically (FIFO) so that the System Restore doesn’t use more space than what you allocated.
You also have the option to delete all the restore points for the drive. Press the Delete button if the system has very low disk space. If your anti-virus software warns of a virus in the System Volume Information folder, you may need to disable system protection and click Apply in the above dialog. This erases all your restore points. You can turn it back again.
And, you may be knowing that you can use Disk Cleanup to clear all but the latest Restore Point.
Method 2: Using Vssadmin command-line tool
View disk space used by System Restore
As System Restore is based on Shadow Copy, and thus it gets the allocated disk space information from the Volume Shadow Copy service. (The previous versions feature uses Shadow Copy as well.) To view or adjust the disk space allotted to System Restore, you can use the Vssadmin.exe built-in command-line tool.
To view the used space and maximum allotted space for System Restore, open elevated Command Prompt, and type the following command:
vssadmin list shadowstorage
It shows the allocated space for Shadow Copy for each drive in the system.
vssadmin 1.1 - Volume Shadow Copy Service administrative command-line tool
(C) Copyright 2001-2013 Microsoft Corp.

Shadow Copy Storage association
   For volume: (E:)\\?\Volume{e9b9bd9d-0000-0000-0000-100000000000}\
   Shadow Copy Storage volume: (E:)\\?\Volume{e9b9bd9d-0000-0000-0000-100000000000}\
   Used Shadow Copy Storage space: 6.46 GB (0%)
   Allocated Shadow Copy Storage space: 6.91 GB (0%)
   Maximum Shadow Copy Storage space: 46.6 GB (5%)

Shadow Copy Storage association
   For volume: (C:)\\?\Volume{098cc206-0000-0000-0000-500600000000}\
   Shadow Copy Storage volume: (C:)\\?\Volume{098cc206-0000-0000-0000-500600000000}\
   Used Shadow Copy Storage space: 0 bytes (0%)
   Allocated Shadow Copy Storage space: 0 bytes (0%)
   Maximum Shadow Copy Storage space: 3.89 GB (2%)
If you use a regular Command Prompt to run vssadmin.exe, you’ll see the following error message:
Reducing the disk space allocation for System Restore
To reduce the disk space used by System Restore and Shadow Copy using Vssadmin, use the following command-line syntax:
vssadmin resize shadowstorage /on=[drive]: /for=[drive]: /maxsize=[MaxSizeSpec]
MaxSizeSpec must be 300MB or greater and accepts the following suffixes: KB, MB, GB, TB, PB, and EB. If a suffix is not supplied, MaxSizeSpec is in bytes. If MaxSizeSpec is not specified, then there will be no limit to the amount of space it may use.
Examples:
To allot Shadow Copy 2 GB of space for shadow copy on C: drive, use this command:
vssadmin resize shadowstorage /for=c: /on=c: /maxsize=2GB
To allot Shadow Copy 700MB, use this command:
vssadmin resize shadowstorage /for=c: /on=c: /maxsize=700MB
After running the command, you should see the message Successfully resized the shadow copy storage association in the Command Prompt. You can verify the allotted space by running the vssadmin list shadowstorage command.
Important: Resizing the storage association may cause shadow copies to disappear. The System Restore window may report “No restore points have been created on your computer’s system drive.“
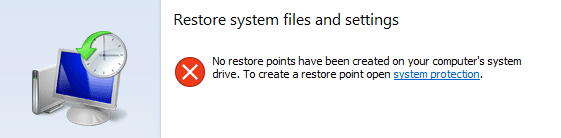
Also, setting the MaxSizeSpec value less than 300 MB will wipe out all the shadow copies, and thus clears out all the System Restore points.
Hope you were able to free up disk space by lowering/reallocating the disk space for System Restore and shadow copy.
One small request: If you liked this post, please share this?
One "tiny" share from you would seriously help a lot with the growth of this blog. Some great suggestions:- Pin it!
- Share it to your favorite blog + Facebook, Reddit
- Tweet it!