A theme is a combination of desktop background pictures, Window colors, sound scheme and a screensaver. Windows 7 introduces a new file format (.themepack) which is basically a .cab file that can contain images, audio files for sound scheme, mouse cursors, icons and the .theme file itself. This file format was introduced so that it’s easier to share themes to other Windows 7 systems. Another format with .deskthemepack extension was introduced in Windows 8, which can also be used for this tutorial. Instructions in this post works in Windows 7, 8 and Windows 10 systems as well.
When a .themepack or .deskthemepack file is run, it extracts the contents automatically to the following folder:
%localappdata%\Microsoft\Windows\Themes
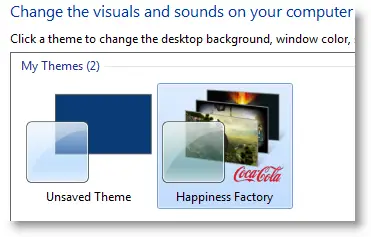
As you see, it’s stored within the user profile folder, and the theme is available only for that user, and listed under "My Themes" in Personalization applet.
If another user in the same computer needs this theme, they need to run the theme pack file again, from their user account. This article tells you how to make available a Desktop Theme for all users in a computer, so that there are no redundant copies of theme files in the system.
Install a Theme For All User Accounts
I’ll how you how to install a desktop theme for all users. For illustration purposes, we’ll use the following themes as samples, and make them available in the Personalization page for ALL user accounts.
- HappinessFactory (Coca-Cola) Theme
- Fruit Ninja Theme (this would be in Page 2 of the article)
Before starting, uncheck the "Hide extensions for known file types" setting in Folder Options – View tab. (REF Show or hide file name extensions)
HappinessFactory
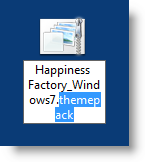
Download the Happiness Factory theme from Microsoft and save to Desktop. Rename Happiness Factory_Windows7.themepack to Happiness Factory_Windows7.cab.
Create a folder on your Desktop, and name it as HappinessFactory.
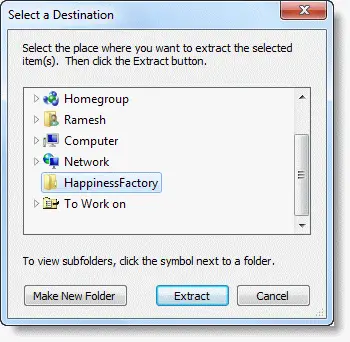
Double-click the file Happiness Factory_Windows7.cab to view its contents. Select all files, right-click and choose Extract…
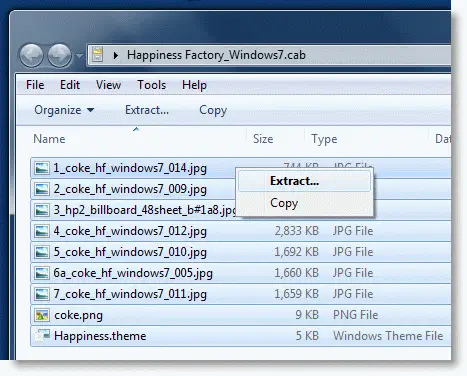
Select the HappinessFactory folder and click Extract
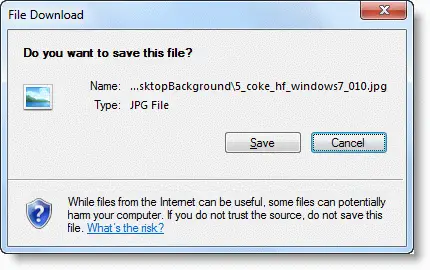
Click Save. Do this for every file.
Double-click HappinessFactory folder, and create a sub-folder named DesktopBackground
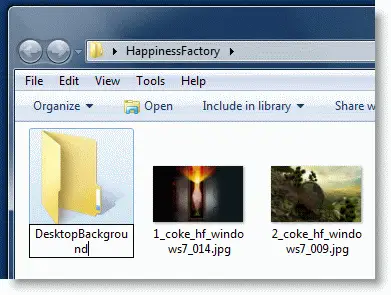
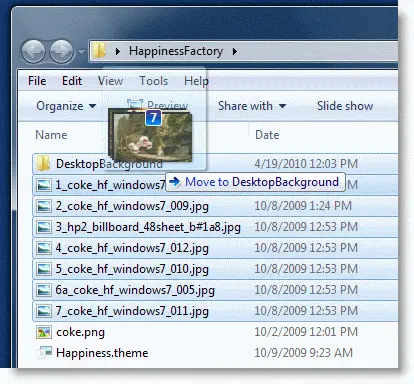
Move all the JPG images to the DesktopBackground folder.
Open the .theme file (Happiness.theme) using Notepad, and input the correct paths for the wallpaper, desktop slideshow, screensaver, brand logo and other resources.
Updating the Brand Logo image path:
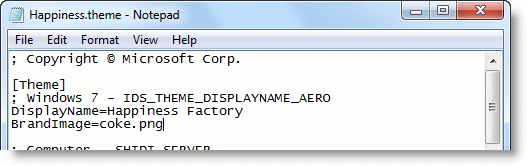
We’ll change that to:

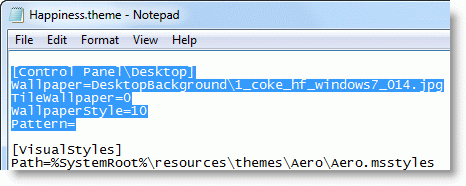
Originally the Wallpaper path was as in the image below.
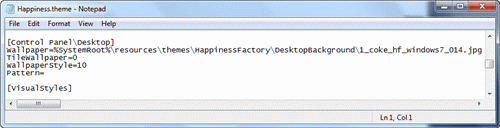
We’ll change that to the following absolute path, as we’re eventually going to place the theme under the C:\Windows\Resources\Themes folder.
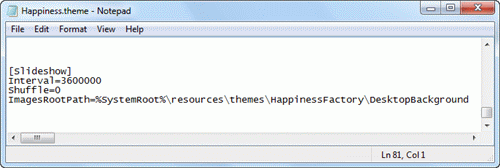
Then scroll down to the [Slideshow] section, and delete the ImagesRootPIDL entry.
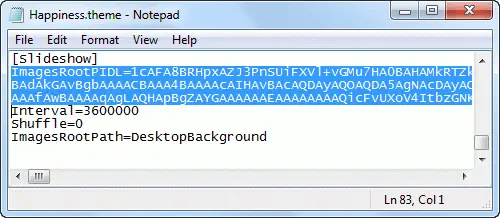
Update the location for the ImagesRootPath accordingly (as below)
Save the .theme file and close Notepad.
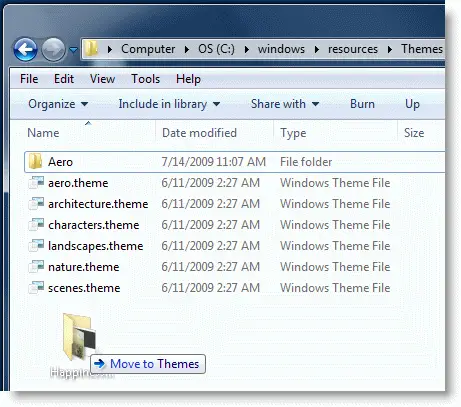
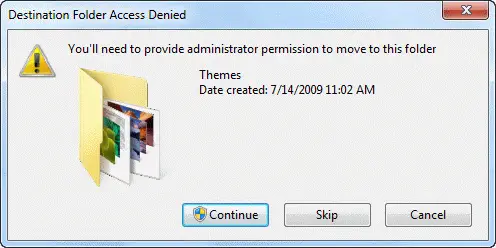
Move the folder HappinessFactory from your Desktop to C:\Windows\Resources\Themes
Click Continue when you see the User Account Control prompt. You may have to type the administrator password if prompted.
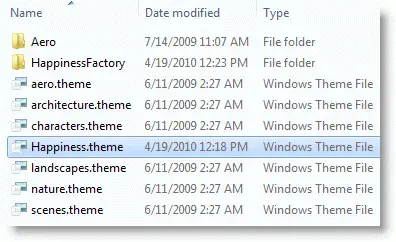
Now move the file Happiness.theme from the HappinessFactory folder to its parent folder, which is C:\Windows\Resources\Themes
Right-click on your desktop, and choose Personalize.
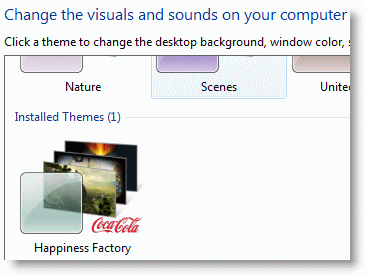
The Happiness Factory Theme is now listed under Installed Themes, which is accessible for all users in the system.
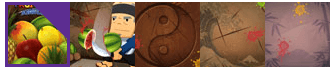
Check Page 2 of this article to see another example, using the colorful Fruit Ninja Theme!
One small request: If you liked this post, please share this?
One "tiny" share from you would seriously help a lot with the growth of this blog. Some great suggestions:- Pin it!
- Share it to your favorite blog + Facebook, Reddit
- Tweet it!
For users who commented in this page, please check Page 2 for a new write-up using another sample, the colorful Fruit Ninja theme 🙂 https://www.winhelponline.com/blog/share-desktop-theme-common-all-users/2/