Recently, I stumbled upon an excellent tool to resize images via the right-click menu in Windows. It’s the Image Resizer utility written by Brice Lambson. This utility is similar to Microsoft’s Image Resizer PowerToy for Windows XP. And Brice Lambson’s utility works fine in all versions of Windows, including Windows 10.
2020 Update: The Image Resizer utility is integrated into the Microsoft Windows 10 PowerToys project. Although Brice Lambson’s software works in all versions of Windows, the Windows PowerToy one supports only Windows 10. For legacy systems, you can download Brice’s software from here. Here are the screenshots of Brice Lamson’s version of the software:

Resize Images via the Right-click menu in Windows 10
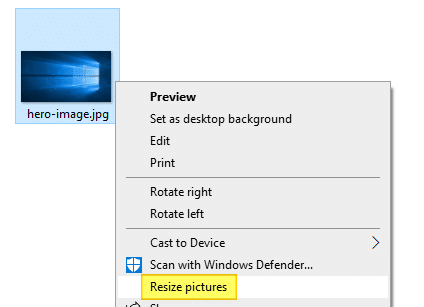
Download and Install Image Resizer (part of Microsoft PowerToys) from this GitHub page. This program adds the Resize pictures command to the right-click menu for image file types.
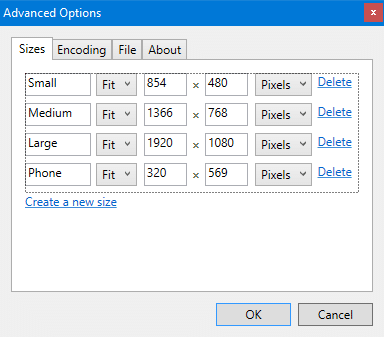
The resize dialog lists four preset options and also allows you to choose a custom setting where you can specify the output file dimensions:
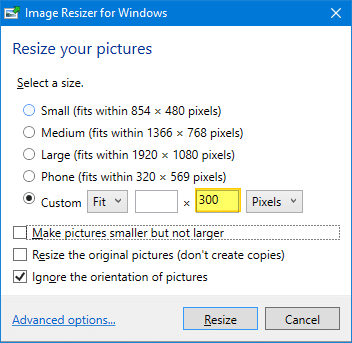
The Resize the original pictures (don’t create copies) option is unchecked by default to prevent accidentally overwriting the source image.
When you choose the custom option, the output files will have the suffix (Custom) — e.g., hero-image (Custom).jpg
Image Resizer – Advanced Options
To customize the output file name, open Microsoft PowerToys Settings from the Start menu.
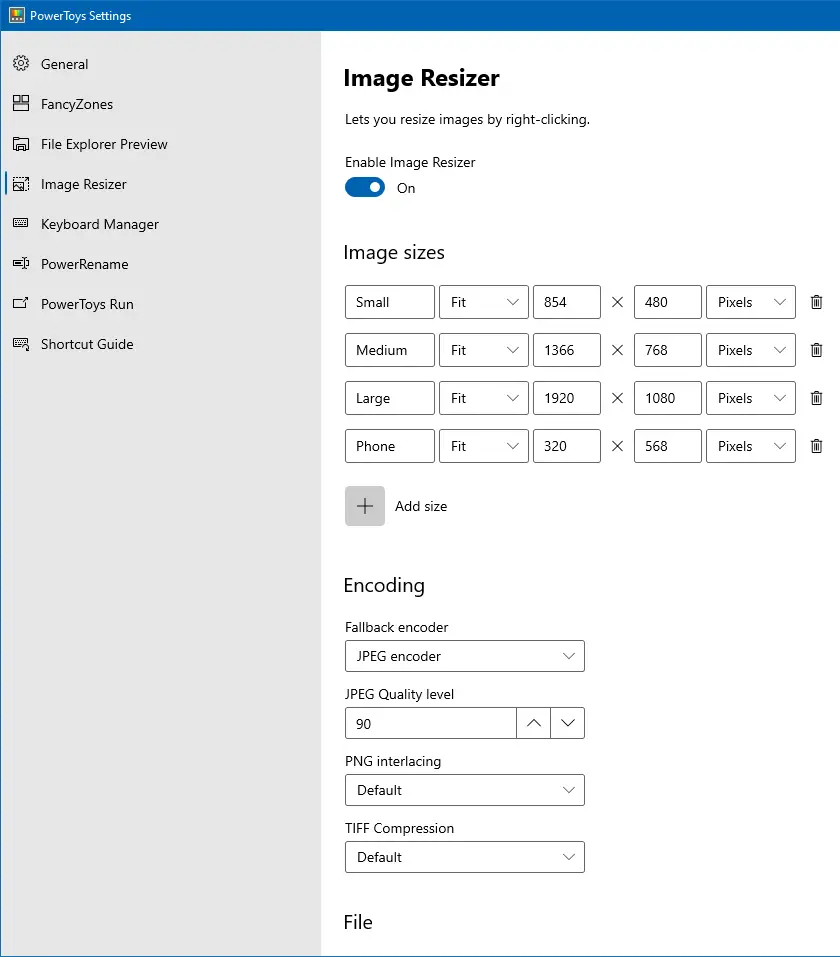
Under Sizes, you can remove or customize the four preset options and add your own options to the list with custom dimensions. These sizes mentioned here will show up in the resize pictures dialog’s pre-configured list.
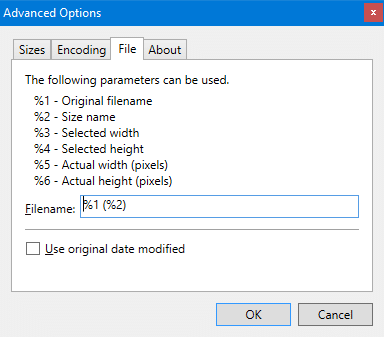
In the PowerToys settings page, under the File section, you can change the output file name suffix as desired:
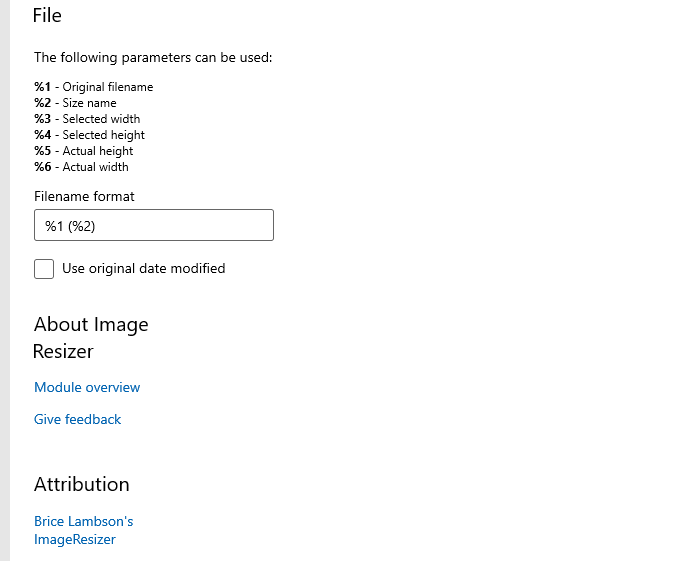
For example, setting the parameter to %1 (%3 x %4) will result in the image dimensions suffixed with the output file name. See 3rd file listed in the following image.

Under Encoding, you can set the Fallback encoder, JPEG quality level, PNG interlacing, and TIF compression settings.
One small request: If you liked this post, please share this?
One "tiny" share from you would seriously help a lot with the growth of this blog. Some great suggestions:- Pin it!
- Share it to your favorite blog + Facebook, Reddit
- Tweet it!