System Restore is a valuable feature in Windows that helps you easily recover the system in the event of any misconfiguration. If you’ve been using the System Restore feature regularly, then you need to know how to create System Restore Points with a single click using the command-line. You can also do this by scripting it using WMI or PowerShell.
This article discusses some methods to quickly create a System Restore point in a single click in Windows 11, Windows 10, and earlier Operating Systems.
Contents
Create System Restore Points using Command-line or Script
Three methods are discussed for quick restore point creation: using the WMI command-line, PowerShell, or VBScript.
Method 1: Restore Point creation using WMIC
- Open an elevated (admin) Command Prompt.
- Type the following command and press ENTER:
Wmic.exe /Namespace:\\root\default Path SystemRestore Call CreateRestorePoint "My Restore Point", 100, 7
(or)
Wmic.exe /Namespace:\\root\default Path SystemRestore Call CreateRestorePoint "My Restore Point", 100, 12
(or)
Wmic.exe /Namespace:\\root\default Path SystemRestore Call CreateRestorePoint "%DATE%", 100, 1
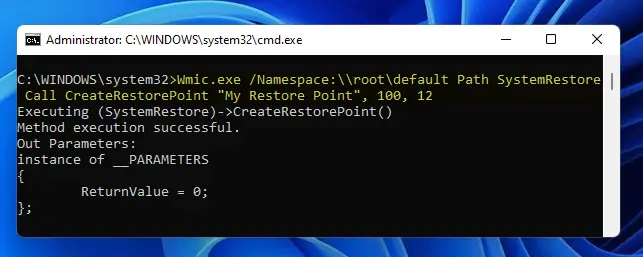
You should see the following output. The return value
0indicates that the restore point creation was successful.Note that if the above command-line outputs the return value
0too quickly (within a few seconds), then it’s possible that a restore point already exists/was created within the last 24 hrs; so WMIC didn’t create a new one. Yet, you’ll see the return value0(“Success”) in the output.Executing (SystemRestore)->CreateRestorePoint() Method execution successful. Out Parameters: instance of __PARAMETERS { ReturnValue = 0; };If the System Restore feature has been disabled, the above WMIC command will throw the following error:
Executing (SystemRestore)->CreateRestorePoint()
ERROR:
Description = The service cannot be started, either because it is disabled or because it has no enabled devices associated with it.
To enable System Restore, open System Properties (sysdm.cpl) → System Protection → Configure → Enable the “Turn on system protection” option.
- Exit the Command Prompt window.
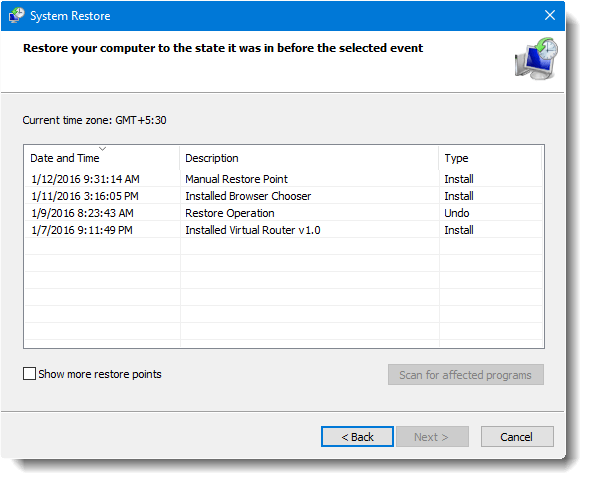
This creates a restore point automatically. You can open the System Restore (rstrui.exe) window to verify.
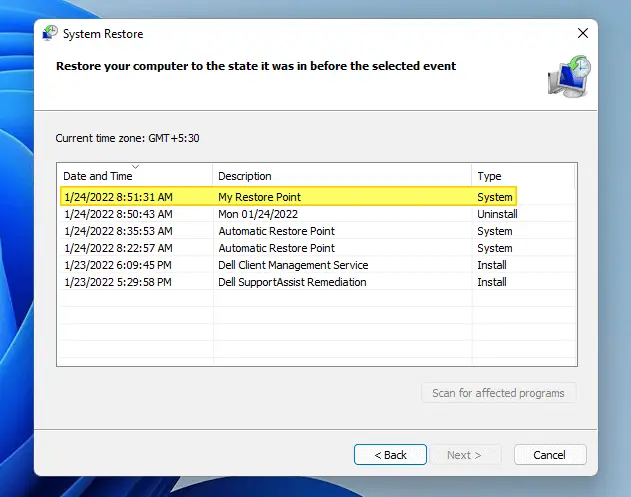
Note that the customized label/description (“My Restore Point”) for the restore point is working. It doesn’t when you use the script method.
Optionally, you may create a desktop shortcut to the above WMIC command-line, assign an icon (from rstrui.exe) and set it to run as administrator when double-clicked.
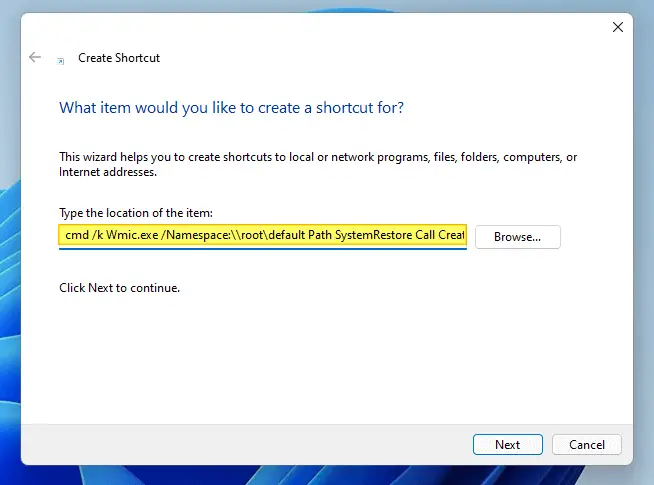
(Prefix the target path with cmd /k (and space) command before the wmic.exe command-line.)
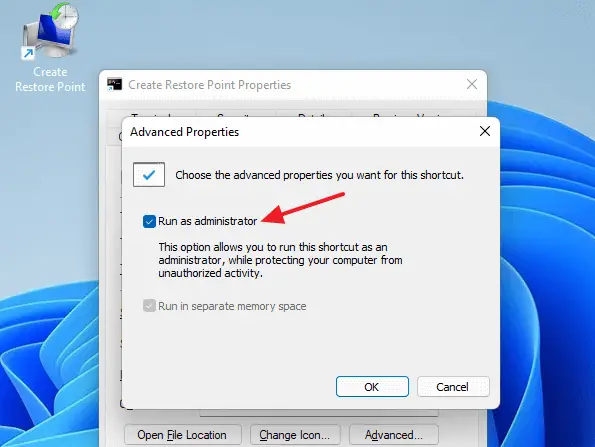
Double-click the shortcut whenever you want to to create a System Restore point.
Method 2: Restore Point creation using PowerShell command-line
To create a restore point using PowerShell:
- Right-click on the desktop and click New. Select shortcut
- Type the following command-line for the shortcut target:
PowerShell -NoProfile -ExecutionPolicy Bypass -Command "& {Start-Process PowerShell -ArgumentList '-NoProfile -ExecutionPolicy Bypass -NoExit -Command "Checkpoint-Computer -Description "MyRestorePoint" -RestorePointType "MODIFY_SETTINGS"; " ' " -Verb RunAs}" - Assign a name for the shortcut (say,
Create Restore Point) - Double-clicking the shortcut will create a system restore point automatically. You’ll be asked for elevation permission.

Method 3: Restore Point creation using Script
The script method has a couple of advantages. It allows you to assign a custom restore point description in pre-Windows 10 systems. Secondly, on Windows 8, Windows 10, and Windows 11, the script can create a restore point even if an earlier restore point was created in the last 24 hours; refer to the SystemRestorePointCreationFrequency registry value mentioned at the end of this post. This is not possible if you use the command-line or PowerShell method.
- Download create_restore_point.zip
- Extract the VBScript to a folder of your choice, say
D:\Scripts. - Double-click the file create_restore_point.vbs to run it.
You’ll see the elevation prompt, and after you provide your consent, the script creates a restore point automatically in Windows 11/10.
(The script does not show a confirmation message box if the operation has been successful. But, if the script encounters an error, it shows you the error code encountered.)
Script behavior in Windows 8 and earlier
You’ll see the following input box prompt to assign a custom description for it. This prompt appears only if you’re running Windows 8 or earlier.
When you see the following prompt, type the description and press ENTER. The description you provided here will reflect in the System Restore dialog.
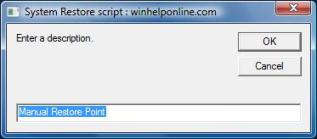
The input box is prepopulated with the phrase Manual Restore Point. You may use the default description or modify it accordingly before clicking OK.
Tip #1: If you want to use the default description and don’t want the input box to appear, edit the file create_restore_point.vbs using Notepad, and delete line #37 (the line that starts with the following code), and save the file.
sDesc = InputBox ("Enter a description.".......
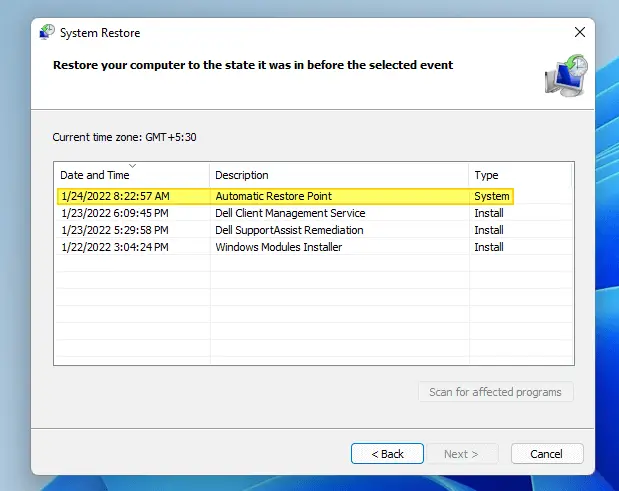
Note: You won’t see the above input box if the script detects you’re using Windows 11/10. That’s because due to a change in Windows 10 v1607 and higher, custom restore point descriptions don’t work. In Windows 10/11, automated or scripted restore points are always named Automatic Restore Point.
Tip #2: You may create a shortcut to the script, place it in your Start menu or taskbar, and customize the shortcut icon accordingly. You can use the restore point icon in C:\Windows\System32\rstrui.exe.
To pin the shortcut to the script to Taskbar or Start menu, edit the script shortcut’s properties and include wscript.exe before the target path.
Troubleshooting: Restore Point not created when using WMIC or PowerShell method?
In Windows 8 and higher, if an application or script calls the CreateRestorePoint method to create a restore point, Windows skips creating this new restore point if any restore points have been created in the last 24 hours.
So, if the above PowerShell or WMIC command-line doesn’t create a restore point for you, it’s probably because there is another restore point created within the last 24 hours. In that case, the PowerShell method may show the following warning:

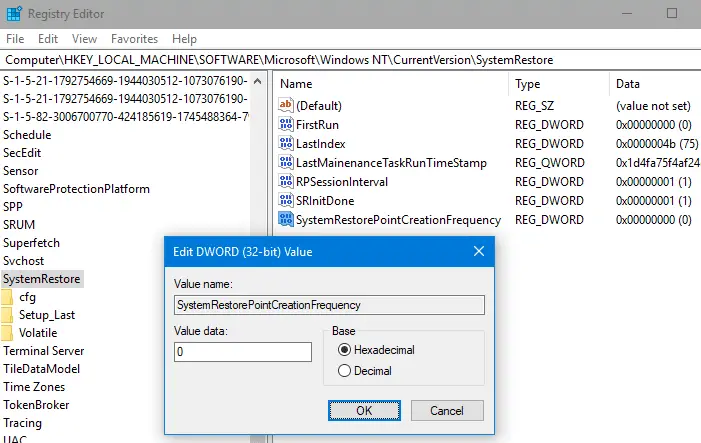
The frequency of restore point creation can be changed by creating the DWORD value SystemRestorePointCreationFrequency under the registry key:
HKLM\Software\Microsoft\Windows NT\CurrentVersion\SystemRestore
The value data of this registry value indicates the necessary time interval (in minutes) between two restore point creation. The default value is 1440 minutes (24 hours).
- If the application calls
CreateRestorePointto create a restore point, and the registry key value is 0, system restore does not skip creating the new restore point. - If the application calls
CreateRestorePointto create a restore point, and the registry key value is the integer N, system restore skips creating a new restore point if any restore points were created in the previous N minutes.
Related articles
- How to Create Automatic Restore Points Daily Using Task Scheduler
- How to Create a Restore Point or Roll-back to Previous Restore Point
- How to Delete Individual System Restore Points in Windows
If you’re aware of any other command-line or script method to automate system restore point creation, let’s know in the Comments section below.
One small request: If you liked this post, please share this?
One "tiny" share from you would seriously help a lot with the growth of this blog. Some great suggestions:- Pin it!
- Share it to your favorite blog + Facebook, Reddit
- Tweet it!
I put the WMIC script to use. Short, elegant, powerful. Thanks for the tip. One thing bothers me though – running this WMIC command seems to kill older restore points. Is that by design? Any way to leave older restore points as a just-in-case
Would this be possible for me to use the same createrestorepoint cmd line script from advanced settings in booting mode.
Since I am unable to boot up windows 10 even after trying to to use the the restore point using rstuie.Exe
HELP – nothing works
“the service cannot be started, either because it is disabled or because it has no enabled devices associated with it.”
line: 38
char: 3
code: 80070422
source: SWbemObjectEX
@Irwin: Make sure that the “Windows Management Instrumentation” service is running (verify via services.msc)
I’m not well-versed in this subject at all and still I found this post very helpful.
I am a newbie with VBS and restore points but shouldn’t the VBS file for SRP Create Restore Point be 100, 7 instead of sOut = SRP.createrestorepoint (“Manual Restore Point”, 7, 100)
I state this only because when I see Powershell or WMIC commands it usually has the parameters 100,7 in that order or even 100, 12.
Thanks for any feedback.
Sincerely and respectfully
Peter
@Peter: When you use the
createrestorepointmethod in script, RestorePointType comes first, followed by the EventType.Ref: https://docs.microsoft.com/en-us/windows/win32/sr/createrestorepoint-systemrestore
It’s the opposite if you create a restore point using WMIC. You can find the parameters sequence by running this WMIC command:
Thank you I figured it was a case of parameter order. Thanks again, Peter
@Peter: You’re welcome.
Thanks, this is a great script is there any way to enable system restore with this too?
Bonjour,
Finally I found here why I can’t create by script a Restore Point when I need using your Powershell shortcut and having the message which explain me the problem on my Windows 10 64 bits on my new computer :
« AVERTISSEMENT : Impossible de créer un point de restauration du système, car il en a été créé un au cours des dernières 1440 minutes. La fréquence des opérations de création de points de restauration peut être modifiée. Pour cela, créez la valeur DWORD SystemRestorePointCreationFrequency sous la clé de Registre HKLM\Software\Microsoft\WindowsNT\CurrentVersion\SystemRestore. En effet, la valeur de cette clé de Registre indique l’intervalle requis entre deux opérations de création de points de restauration (en minutes). La valeur par défaut est de 1440 minutes (24 heures).
PS C:\Windows\system32> »
Thank yoy so veru much for this great tutorial !
@Rotor: Excellent. Thanks for the feedback.
I really can’t get it to work, I press Enter and the response I get is:
ERROR
Description = Not found
I am using the command prompt from the mode that you have to press the power button 3 times to activate
@Cristian: Can you upload a screenshot via Imgur?
Also, what command prompt mode are you referring to?
Same here
Error
Description = not found
A fantastic script and series of details outlining it. Thanks Very Much!