A comma-separated values (CSV) file is a delimited text file that uses a comma to separate values. Each line in a .csv file is a data record consisting of one or more fields, with each field separated by a comma. A .csv file can be imported to and exported from programs that store data in tables, such as Microsoft Office Excel, LibreOffice, or OpenOffice. When you open a .csv file in a spreadsheet, the spreadsheet uses the comma as the field separator (delimiter).
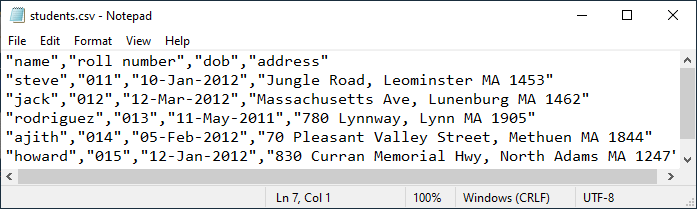
Here are the contents of a sample .csv file:
"name","roll number","dob","address"
"steve","011","10-Jan-2012","Jungle Road, Leominster MA 1453"
"jack","012","12-Mar-2012","Massachusetts Ave, Lunenburg MA 1462"
"rodriguez","013","11-May-2011","780 Lynnway, Lynn MA 1905"
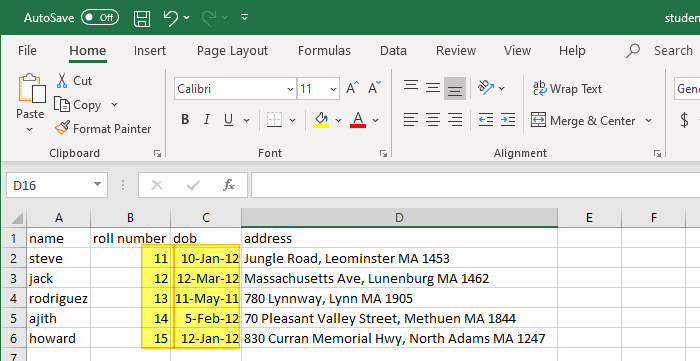
When you open a .csv file in Microsoft Excel, it converts the text format to number or date format depending upon the data pattern in the .csv file. The automatic transformation of the data format may be undesirable in some cases. For instance, you may have a .csv file with the following contents:
In the above example, the roll number field has a leading zero, and the date of birth is specified in dd-mmm-yyyy format. But, when you open the .csv file in Excel, it truncates the leading zero(es) and formats the date fields into dd-mmm-yy format automatically. Here is an example:
With the automatic data type conversion, problems can happen when the .csv file contains the ZIP or postal codes, telephone numbers, or government-issued ID card numbers.
You may want to preserve the leading zero(es) and the original date format, and wondering how to prevent Excel from automatically transforming the data type.
Stop Excel from Converting Text to Number or Date format when Importing a CSV file
Option 1: Rename .csv to .txt and then open in Excel
To prevent Excel from automatically changing the data format to number/date format, you can rename the .csv file to .txt. Then open the .txt file from the File menu in Microsoft Excel.
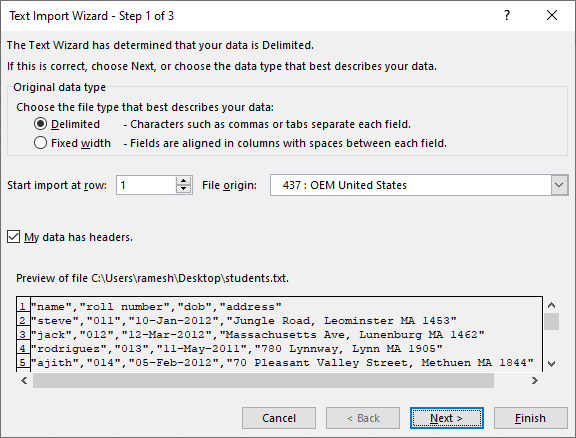
Go through the following Text Import Wizard, select Text format for the required columns, and complete the process.
In Step 1, select Delimited (with is the default selection, anyway). And, choose the My data has headers options if your .csv file’s 1st line represents the caption or header text.
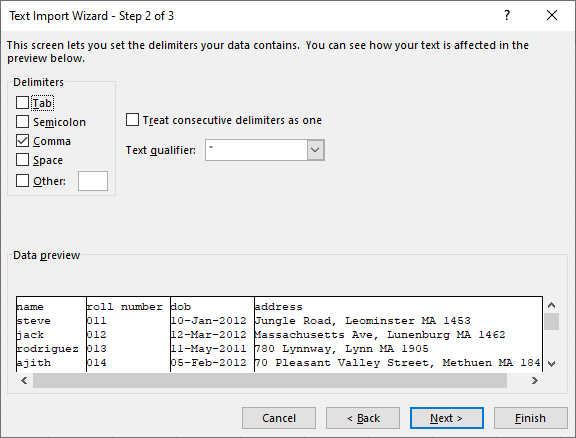
In Step 2 of 3, Excel defaults to Tab as the delimiter, as we’re opening a file with extension .txt, not .csv.
Deselect Tab and select Comma, and click Next.
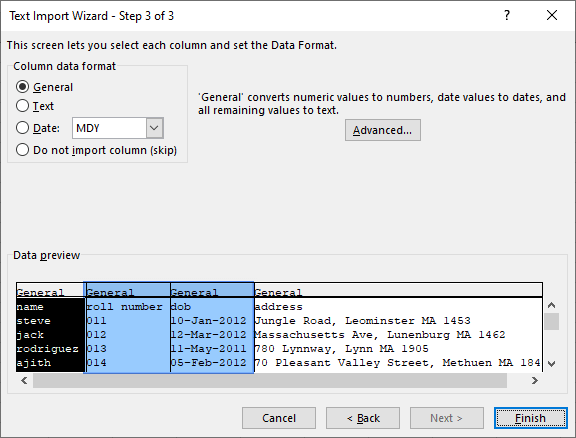
Step 3 of 3 is an important step. You’ll see that General option is chosen as the default in the Column data format section. What the General option does is that it converts numeric values to numbers, date values to dates, and all remaining values to text. This is exactly what we do not want.
Select the column — “roll number” — and select Text as the data format. Similarly, repeat the step for the Date column.
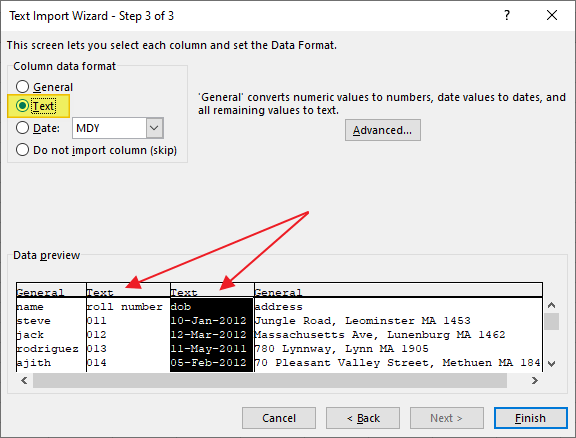
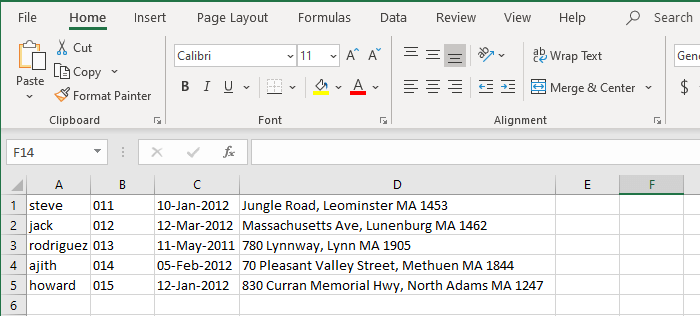
Click Finish. Excel should now import the values exactly as in the .csv file, without truncating the leading zeroes or changing the date/time format.
Don’t prefer renaming the .csv file to .txt every time? Then try Option 2.
Option 2: Import .csv file using the Import Data Sources feature
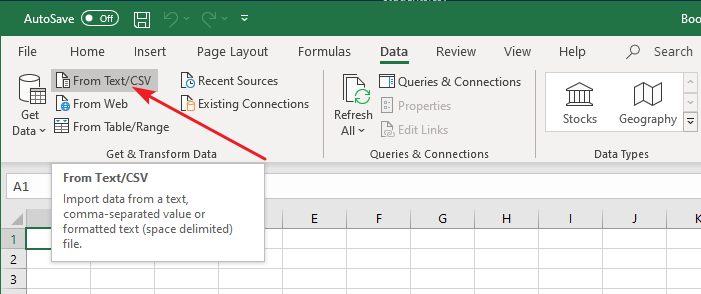
To preserve the original data (format) when opening a .csv in Excel, use the “Import data” option in Excel’s Data tab.
Select the Data tab in Excel, and click From Text/CSV
Browse to locate the .csv file from which you want to import the contents. You’ll see the preview window below where you can define the file origin, and change the delimiter if required. If the preview looks good, click on the Load button.
But, in this example, the leading zero in the roll number field is truncated — also, the date field in different data type than what’s in the original .csv file. So, we want to transform it back to the original format.
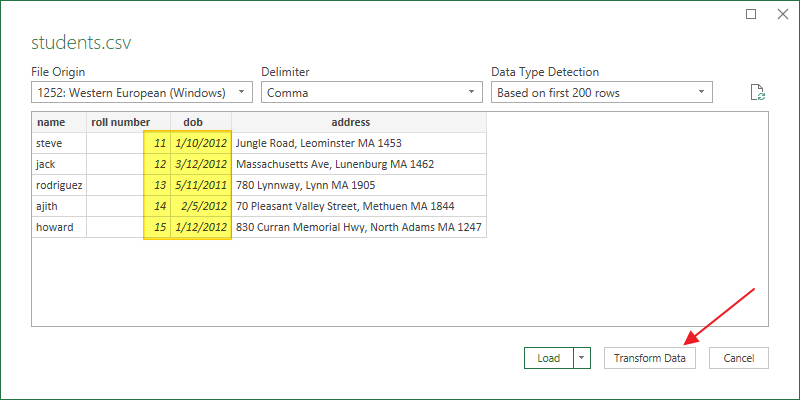
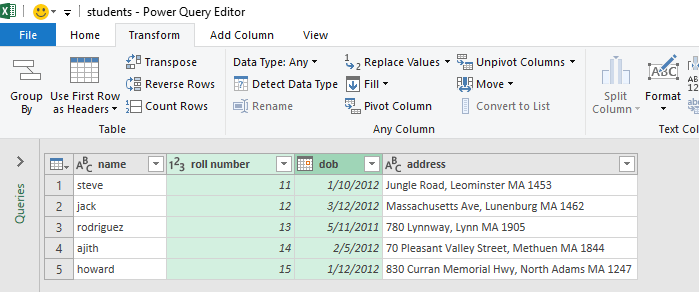
Click on the Transform Data button. This opens the Power Query Editor which shows exactly what you saw in the preview dialog above.
Important: If you are using Excel 2013 or earlier versions of Excel, you may need to enable Power Query in Excel. You can also download and install the most recent version of Power Query for Excel, which automatically enables it.
Select the columns which you want to transform (to Text format.)
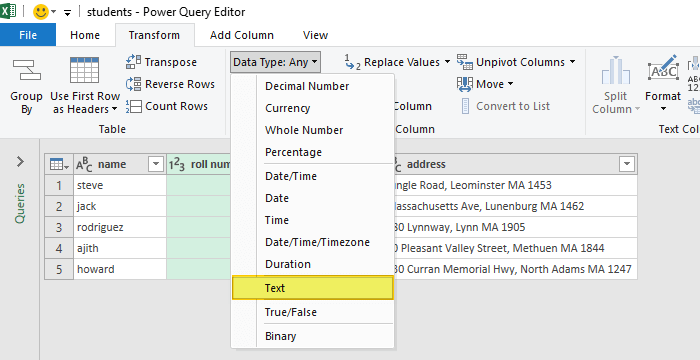
From the Transform tab, click Data Type: and select Text (instead of General) from the drop-down box.
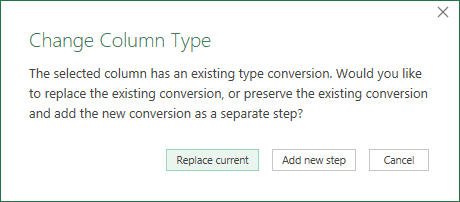
Click Replace current when you see the Change Column Type dialog.
Selecting the Text option makes Excel import the contents of the .csv file “as is,” without intelligently converting the fields to number or date format.
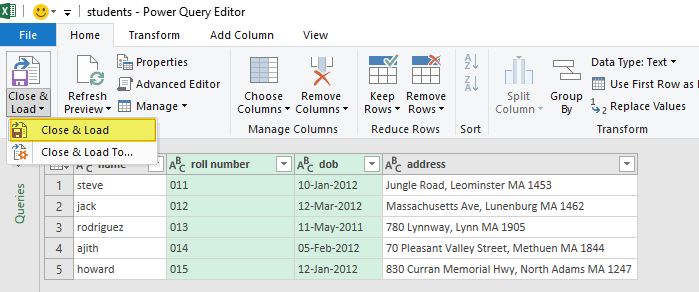
Verify the fields and if you’re satisfied with how Excel is displaying the contents, click on the Close & Load button in the Home tab. This closes the Power Query Editor and loads the data in your worksheet.
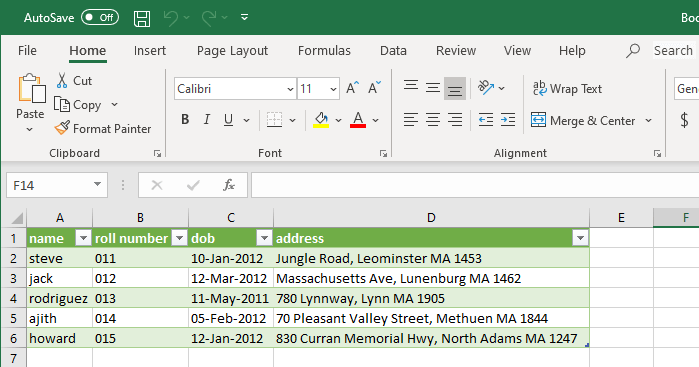
That’s it! You’ve now imported a .csv file into Excel without changing the data formats.
Option 3: Formatting the CSV file so that Excel doesn’t convert the data format
You can format the .csv file in such a way that opening it normally in Excel (not importing via the Data tab) doesn’t transform the data format from text to number or date. For example, prefix the date and roll number fields with "=" and suffix them with two double-quotes (""), like below:
"steve","=""011""","=""10-Jan-2012""","Jungle Road, Leominster MA 1453"
instead of:
"steve","011","10-Jan-2012","Jungle Road, Leominster MA 1453"
The “Equal To” symbol makes Excel import the field as a formula, and hence the field’s data format won’t be changed.
- Note: If you’re using a program or script to output .csv files, you can export the file using the above format. However, note that the above workaround may not be helpful in all situations. For instance, it may not help if the field data also contains double-quotes or the “equal to” symbol.
Now, open the .csv file in Microsoft Excel by double-clicking on it.
Excel should render the contents correctly (date & roll number fields) as in the .csv file.
One small request: If you liked this post, please share this?
One "tiny" share from you would seriously help a lot with the growth of this blog. Some great suggestions:- Pin it!
- Share it to your favorite blog + Facebook, Reddit
- Tweet it!
I don’t know if this case was covered in this article, but when I EXPORTED a spreadsheet to CSV format, cells containing a catalog number (“08/03”) turned into “08-Mar” in the output file. The cells were formatted as Text before the export operation. I even tried Automatic and other formats (anything but a Date format), and Excel CORRUPTED my data, nevermind that any date format with Day before Month is nonsensical and ambiguous in itself. Exporting as a Tab-Delimited file didn’t have this problem. What an infuriating oversight in Microsoft programming; makes Excel really trashy.
Thanks for the options. I am just wondering that this issue has been existing for ever and Microsoft hasn’t figured it out to fix it.
Also, sorting the date in pivot table where it reads it as text not date.
Microsoft office team that supports or develops excel is pathetic.
Vikas
It is not working. even though i have followed all steps as explained in option1 still excel converting values in numbers but i want numbers as text, in excel 2010.
Using copy/paste into Excel from a TSQL source. Changing the select statement to add an equal sign and surround in quotes worked like a charm. Thanks!!!
select ‘=”‘ + MyFunkyField + ‘”‘ as [AwesomeData]
i have an issue when i double click on a csv file and open in excel it creates a space between the the lines. not sure how to solve this?
Great info! I’ve been Googling around to find a solution to this problem as our new vendor provides data downloads in this format. I have been so frustrated with how my Excel 2013 converts certain columns to date format. Thank you!
Another option is to use a schema.ini – this is great for files you need to import again and again in a consistent format.
https://learn.microsoft.com/en-us/sql/odbc/microsoft/schema-ini-file-text-file-driver?view=sql-server-ver16