Summary: This post explains how to increase the size of the EFI partition to 250 MB without using any paid software.
The EFI system partition stores the boot configuration database (BCD) and the boot files needed to boot a UEFI system. By default, the Windows setup creates a 100 MB EFI partition, which may be insufficient sometimes.
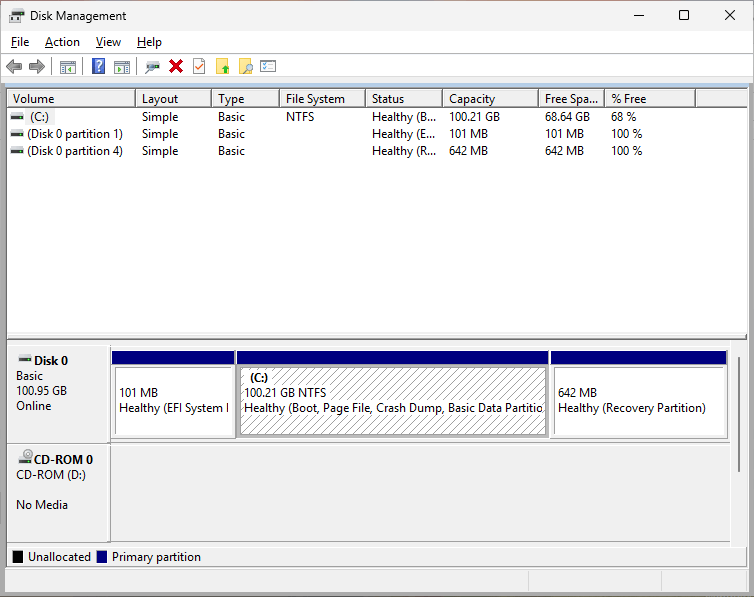
OEMs dump the BIOS update images into the EFI partition, thus consuming the entire space in that volume. If the EFI partition is full, Windows updates will roll back with the error code 0x800F0922, and Feature updates will fail with the error code 0xc1900201 or the error message “Failed to upgrade the system reserve partition.”
As mentioned in the above articles, you can delete the font files (.ttf) and BIOS update images from the EFI partition whenever it becomes full. However, that’s only a workaround. A permanent fix is to resize the EFI partition to 200 MB or more. The built-in Disk Management console doesn’t help because it doesn’t let you extend a partition if the free space is not adjacent to that partition.
AOMEI Partition Assistant Standard (free) can resize the EFI partition easily.
Resize the EFI System Partition
(This article assumes that your OS disk has the default UEFI layout — i.e., EFI, MSR, OS partition, and the Recovery partition)
Please follow these steps to extend the EFI partition.
Download AOMEI Partition Assistant Standard and install it.
https://www.aomeitech.com/pa/standard.html
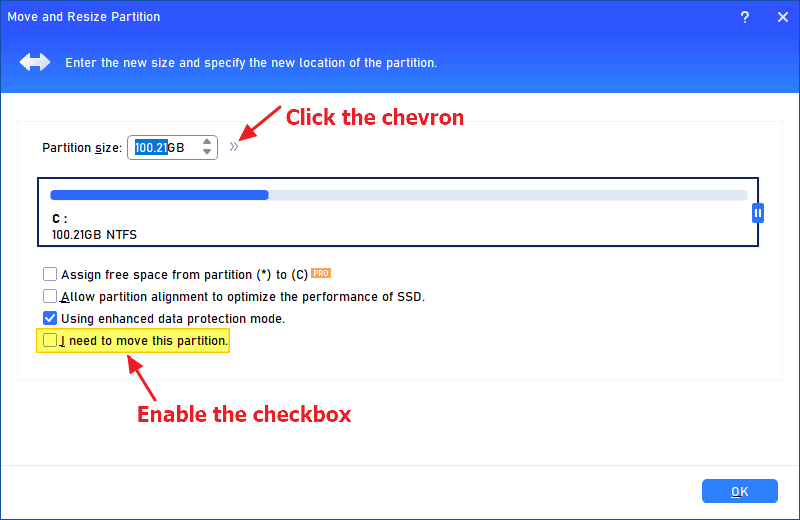
Select the C drive, and click “Resize/Move Partition.”

In the “Move and Resize Partition” dialog, enable “I need to move this partition“. You should now see the drag handles on both sides of the partition.
Also, click the right arrows next to the “Partition size” text box.
Configure the options as below — i.e., approximately 150 MB of unallocated space before the partition, and click OK.
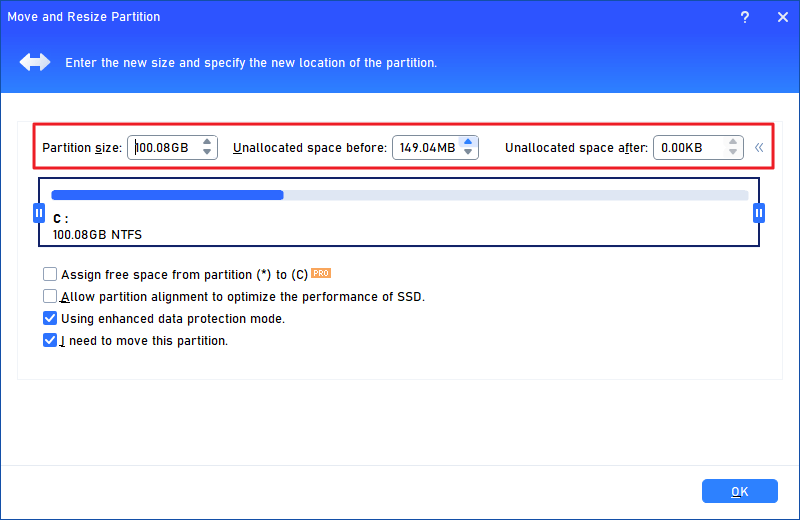
You’ve created an unallocated space before the C drive (i.e., after the Microsoft Reserved partition.)
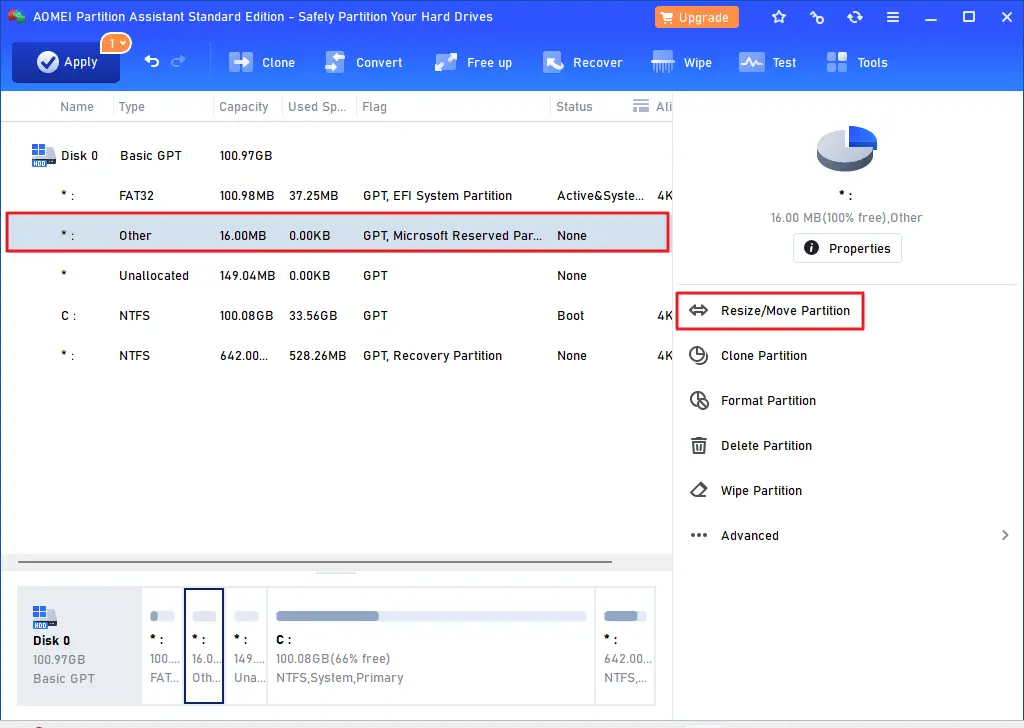
You should now move the Microsoft Reserved (MSR) partition to the right of the unallocated space.
To do so, select the 16 MB MSR partition and click “Resize/Move Partition.”
In the “Move Partition” dialog, select the MSR partition and drag it to the extreme right.
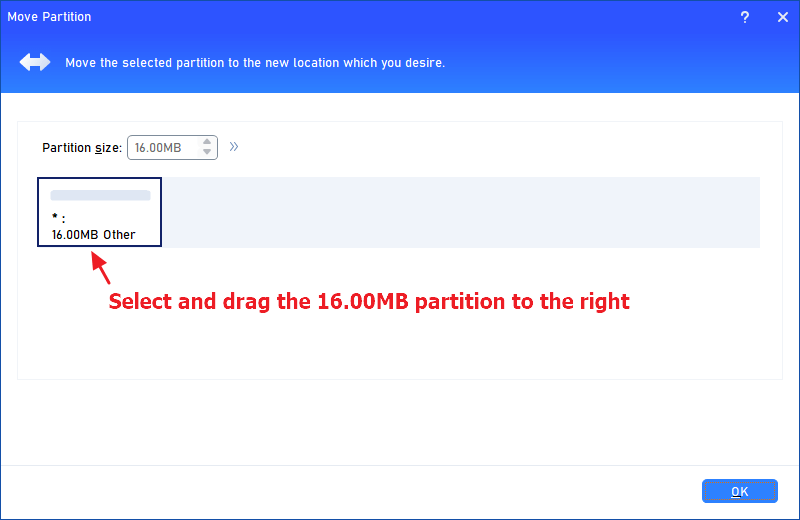
It should look like the following screenshot. Click OK to continue.
The unallocated space has been moved next to the EFI partition—i.e., between EFI and MSR.
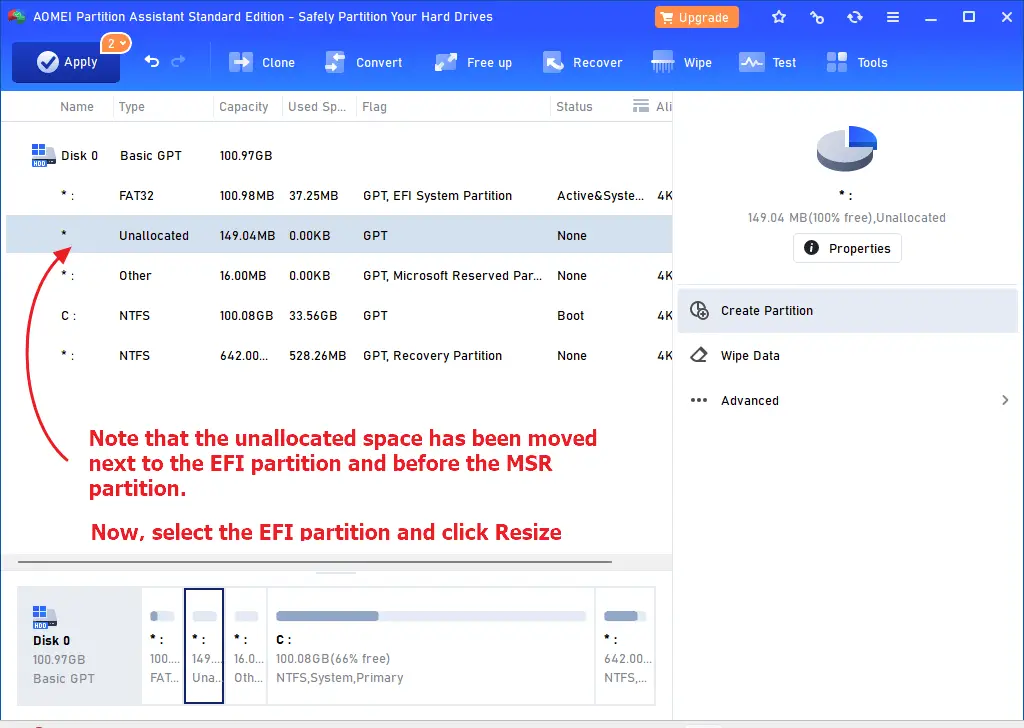
Select the EFI System Partition and click “Resize/Move Partition”.
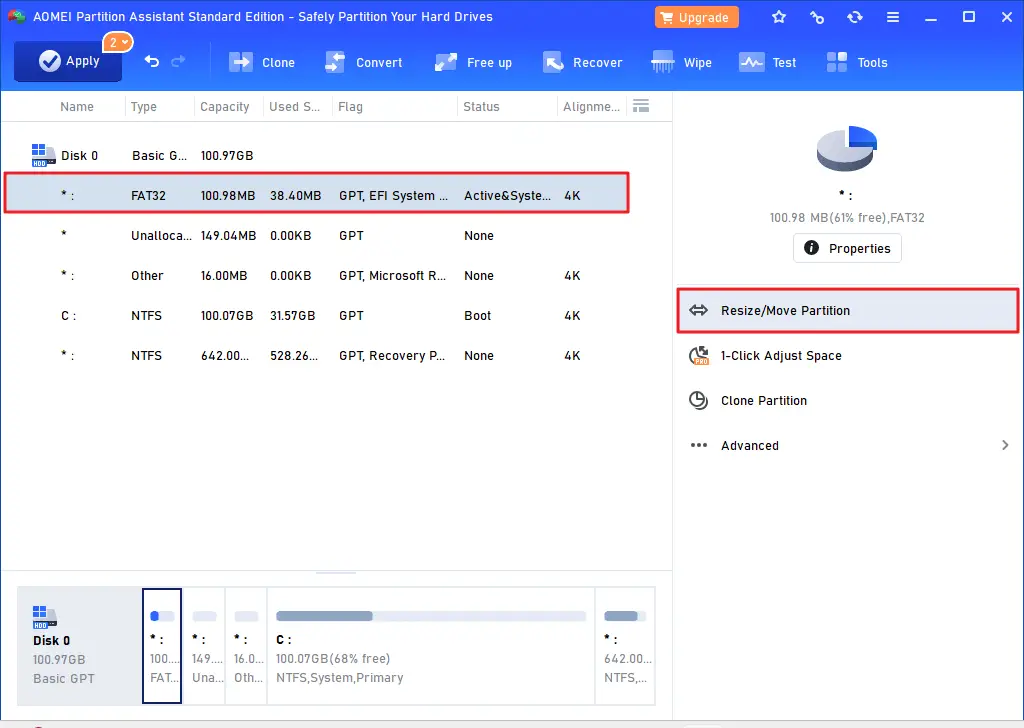
You’ll see the “Move and Resize Partition” dialog below.
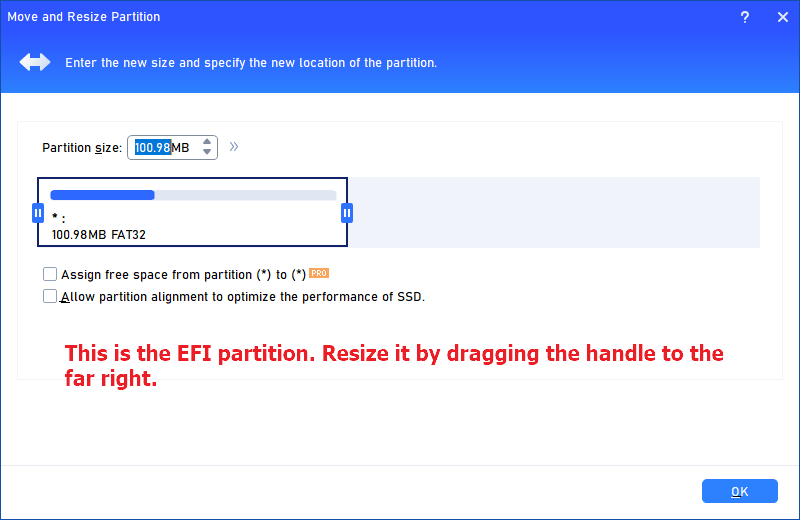
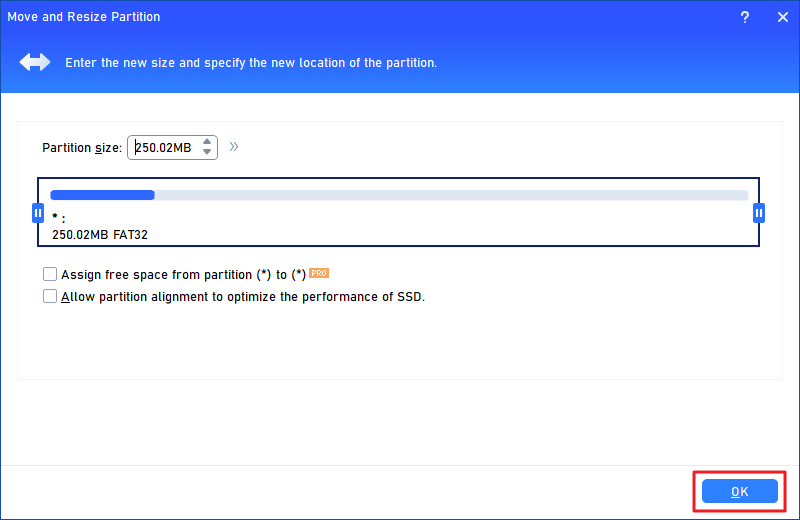
Click the drag handle and move it to the right. This extends the EFI partition, wholly occupying the unallocated space next to the partition. Now, the partition is 250 MB in size, but the changes have not yet been applied.
Click OK to continue.
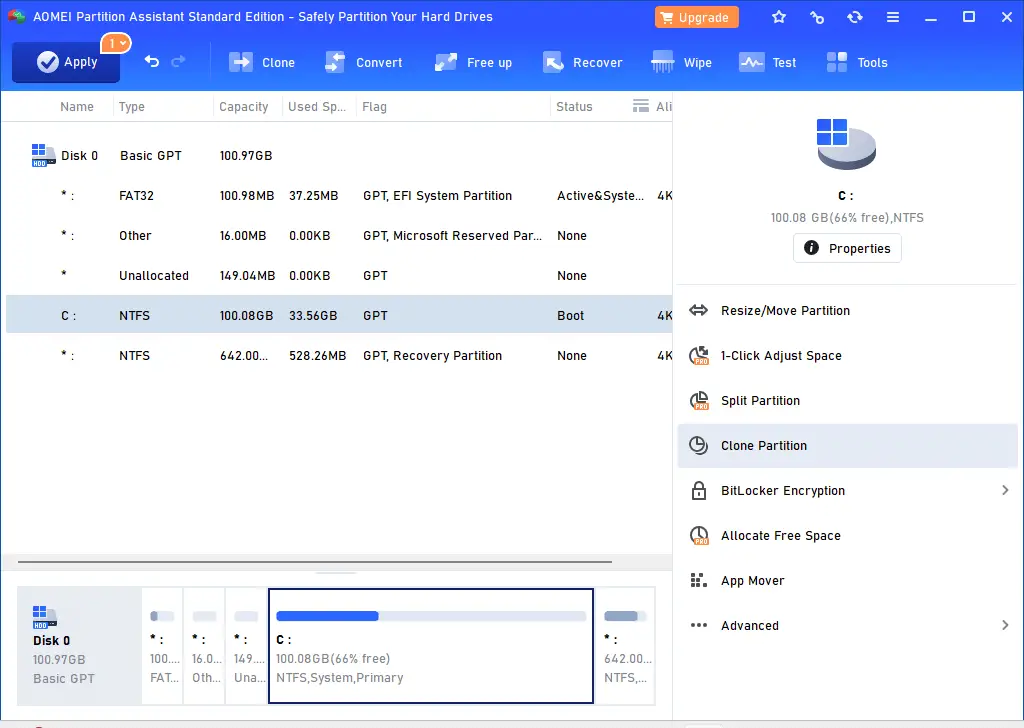
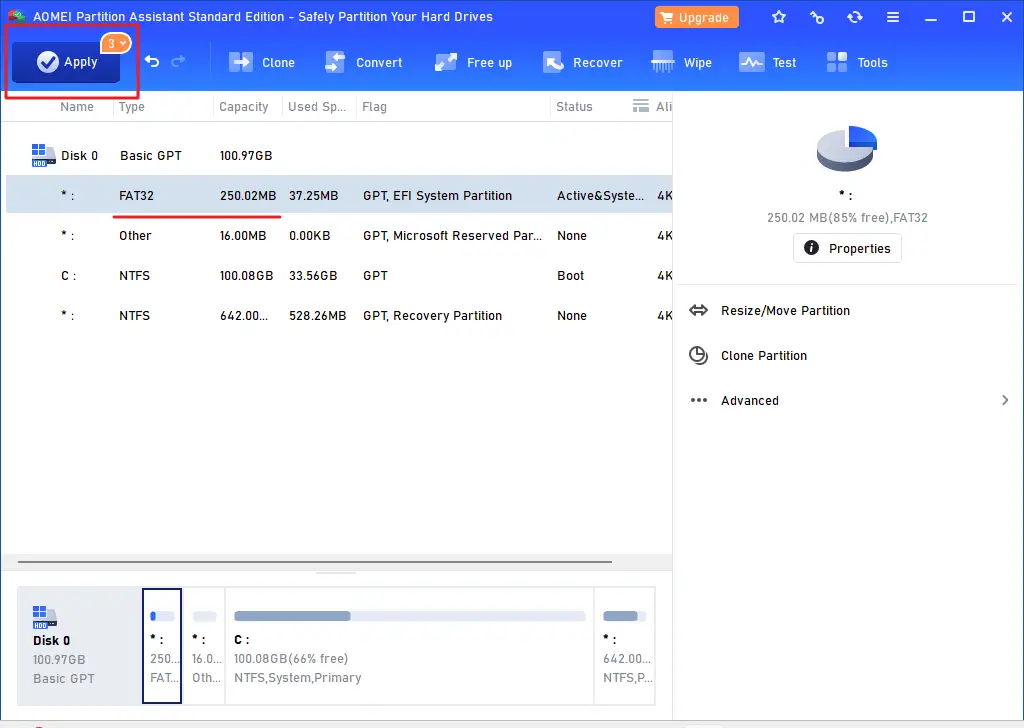
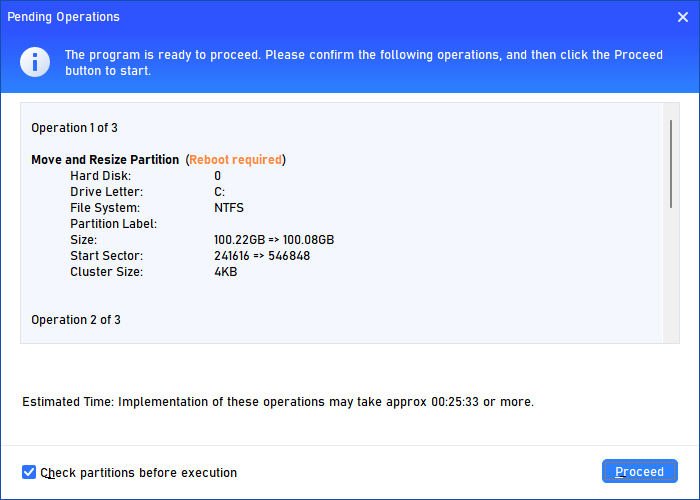
On the AOMEI dashboard, you’ll see the “Apply” button indicating pending changes.
Click Apply.
AOMEI will summarize the pending operations. Click “Proceed”.
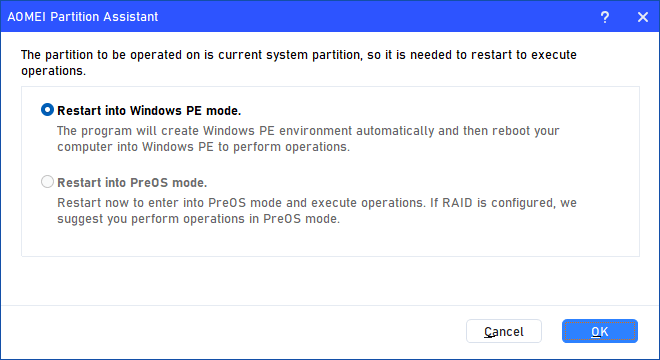
Click OK with the “Restart into Windows PE mode” option enabled.
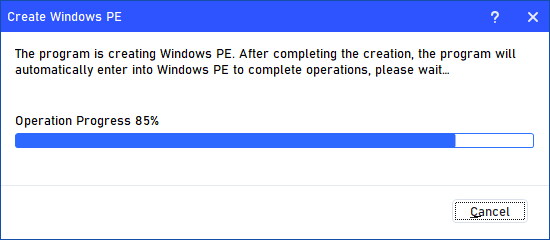
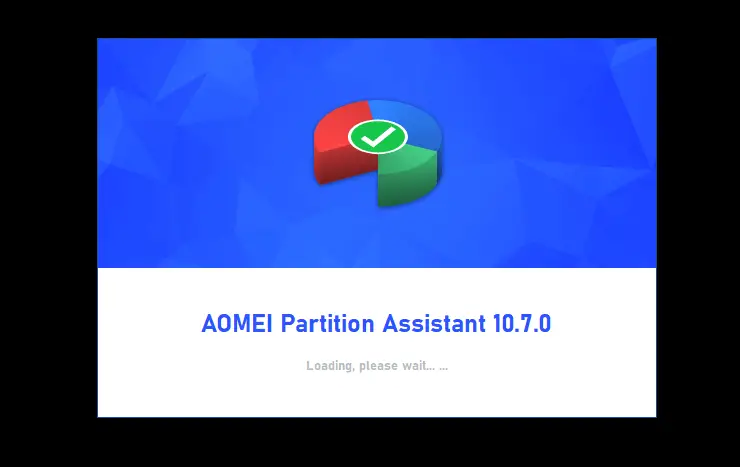
Windows will automatically restart, and the system enters WinPE mode, where AOMEI commits all the pending actions (i.e., Shrinking the C drive and creating the unallocated space before the partition, moving the MSR partition, and resizing the EFI partition).

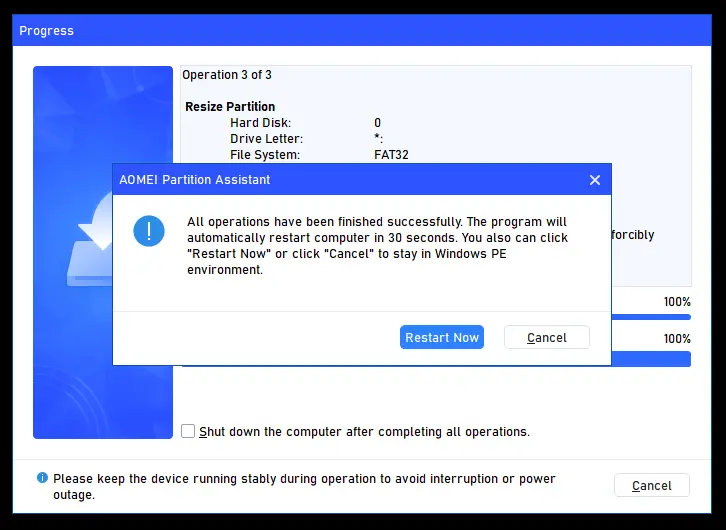
Once done, click “Restart Now“.
The system will reboot into Windows.
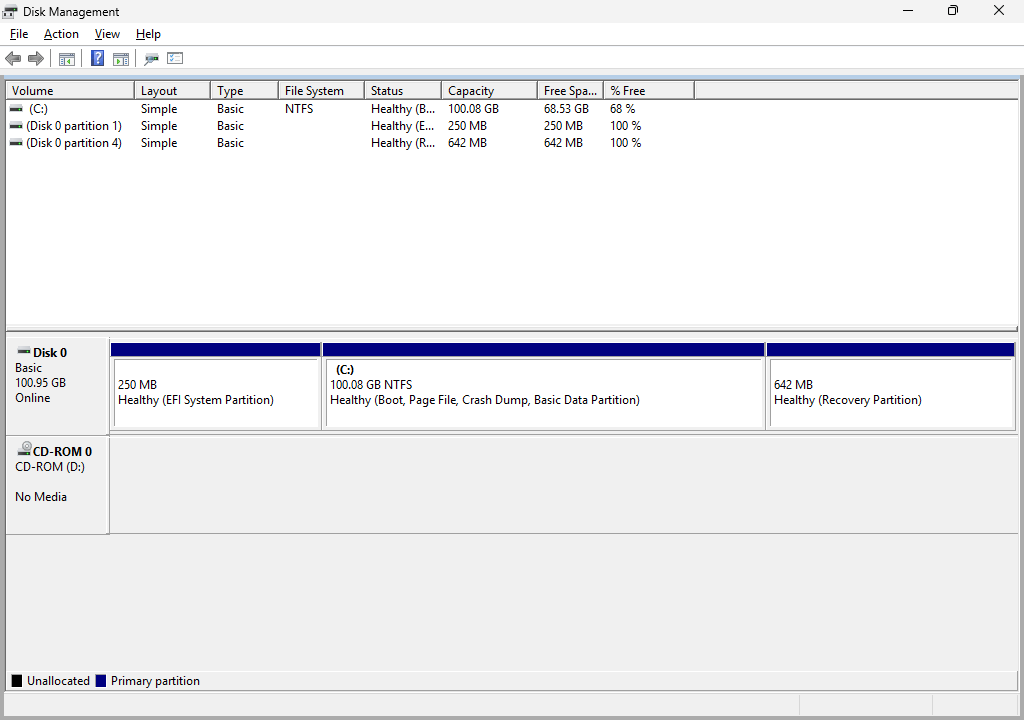
Open Disk Management. You’ll see that the EFI partition has been resized successfully.
Related articles
How to Resize the Recovery Partition in Windows
MBR2GPT | Too many MBR partitions found, no room to create EFI system partition
How to Move EFI System Partition to Another Drive in Windows 10 or 11
How to Fix the EFI Boot Partition’s ID Using DiskPart
[Fix] EFI System Partition Appears in Explorer
How to Rebuild the EFI Boot Partition, BCD and Boot Files
One small request: If you liked this post, please share this?
One "tiny" share from you would seriously help a lot with the growth of this blog. Some great suggestions:- Pin it!
- Share it to your favorite blog + Facebook, Reddit
- Tweet it!
Thanks. Finally I found a proper solution. This was really good solution.
Thank you this helped me after months of suffering.
I didn’t really want to do this operations on my work laptop, but with the instraccion it looked safer than in my head!
Don’t!!! perform this on a Dell Laptop. My laptop has become bricked from this process!
Any solutions for Dell laptop? I’ve tried endless solutions for this on my Alienware machine and they just don’t work. The changes don’t apply when I reboot.
Thank you so much! Your advice turned out to be really helpful. It’s amazing how everything works when you carefully follow the instructions.
P.S. I’d like to add that it’s important to be patient during the last step — when the system is loading in WinPE mode, it took about 15–20 minutes for me, but everything worked fine in the end.
It helped to continue with W11 update 24H2 on my HP ProBook 450.
Many thanks. This is a good solution. i resized an hp Probook 400 and was able to upgrade to 24H2. And an excellent selling point for AOEMI. Great interface
As of Oct. 19th 2025 this no longer works. AOMEI now requires a paid license to use the resize/move partitions functionality.
No it doesn’t. I downloaded the free version of AOMEI today and it worked like a charm.
Yes, new version i think 10.10.x AOMEI now requires a paid license to use the resize/move partitions functionality. But don’t despair. I had the same problem. Download version 10.9.1 and everything can be solved according to the instructions. Don’t update this version.
FANTASTIC!!! 22 Nov 2025. I downloaded today the free aomei and followed your instructions which worked like a charm. I can now upgrade to Windows 11.
Thank you very much for your help and advice.
Yes, AOMEI version 10.10.x now requires a paid license to use the resize/move partitions functionality. But don’t despair. I had the same problem. Download version 10.9.1 and everything can be solved according to the instructions. Don’t update this version.