The Photos screensaver that comes in-built in Windows Vista and higher, can be used as the logon screensaver as well. The logon screensaver kicks off after the specified wait time in the logon screen when no user is logged on. There are instructions all over the web on how to apply the screensaver settings to the logon desktop in Windows 2000 and XP systems. The steps meant for Windows XP don’t work in the latest Operating Systems, and if you apply those steps for Windows Vista/7 and higher, all you get is a blank screen in the logon desktop after the wait time.
For Windows Vista and higher, implementation of the logon screensaver setting is slightly different. This post guides you through the process.
Step 1: Configure the screensaver & export the settings
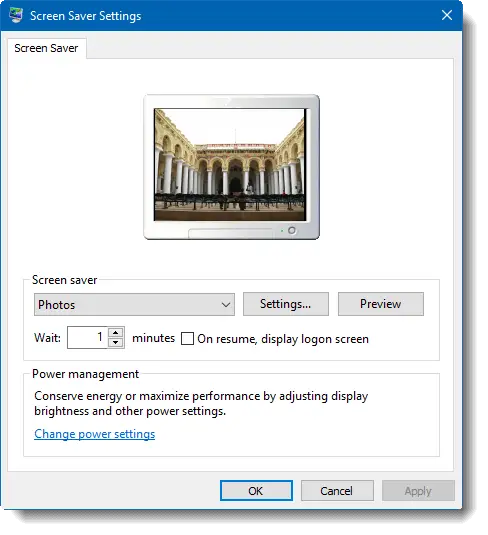
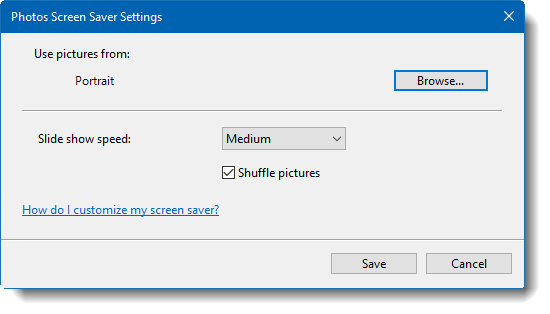
First configure the screensaver in your user account. Set the timeout, speed and other settings accordingly, click OK and close the dialog.
The settings are applied for the logged on user account, and we’ll have to apply the same to the logon desktop. To so this, start the Registry Editor (Regedit.exe) and go to this location:
HKEY_CURRENT_USER\Control Panel\Desktop
Export the branch to a REG file, say Settings-1.reg.
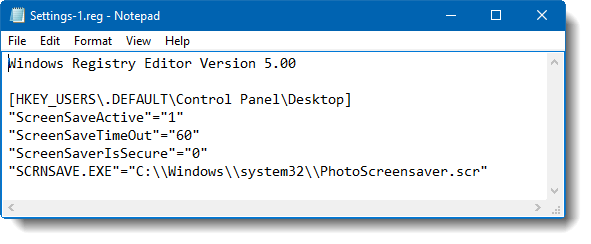
Open the REG the file using Notepad and remove all the values, except these four values:
- ScreenSaveActive
- ScreenSaverIsSecure
- ScreenSaveTimeOut
- SCRNSAVE.EXE
Using the Replace option in Edit menu in Notepad, replace every occurrence of the string HKEY_CURRENT_USER with HKEY_USERS\.DEFAULT. Save the file. Note that there is a dot (.) before the word DEFAULT
The modified file should look like this:
Step 2: Export the Photo screensaver specific settings
Next, browse to the following branch in the Registry Editor and export the branch to a REG file, say Settings-2.reg.
HKEY_CURRENT_USER\SOFTWARE\Microsoft\Windows Photo Viewer\Slideshow\Screensaver
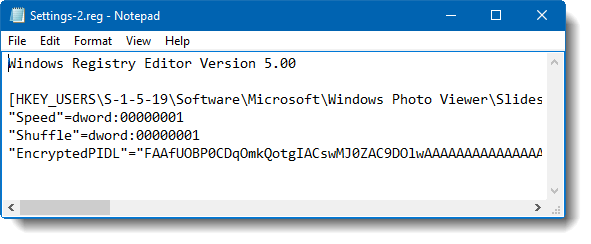
Open the REG file Settings-2.reg using Notepad, and replace every occurrence of the string HKEY_CURRENT_USER with HKEY_USERS\S-1-5-19
Editor’s note: S-1-5-19 is the SID of the Local Service account, under which the PhotoScreensaver.scr will run while in the logon screen. So you’ll essentially want to add the Photos screensaver-specific settings in that hive, rather than .DEFAULT
Additional step for Windows 7: In Windows 7 and higher, the image folder path isn’t stored in clear text, but in encrypted format in a value named EncryptedPIDL. The thing is, when the above registry location that contains the lengthy EncryptedPIDL value data, is exported to a REG file, the string is incorrectly formatted — it adds line-breaks which need to be fixed. Otherwise the EncryptedPIDL value can’t be imported back at all. It appears like this:
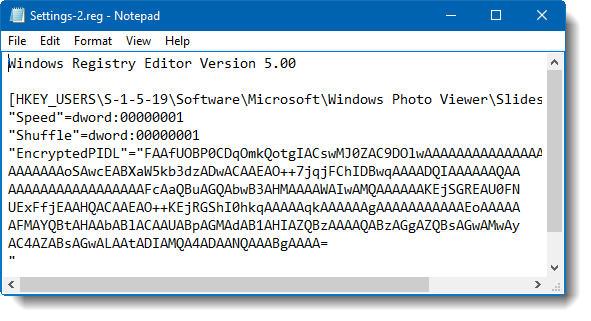
The line breaks should be removed manually (Thanks for the tip, Michael) so that the string takes one line… as seen below. Save the file.
Save the file (Settings-2.reg).You now have the two files (Settings-1.reg and Settings-2.reg) that need to be merged with the registry. To do so, simply double-click on each REG file. The settings should apply to the logon screen. Logoff and wait for a minute (60 second timeout configured) and be prepared to enjoy the Photos screensaver that kicks in!
One small request: If you liked this post, please share this?
One "tiny" share from you would seriously help a lot with the growth of this blog. Some great suggestions:- Pin it!
- Share it to your favorite blog + Facebook, Reddit
- Tweet it!
I’m sorry Ramesh but all I get is a blank screen. I’ve done this any number of times thinking I need to have the photos in a particular folder, I used lower/upper case, upper case, different screensaver options like the 3D letters. Blank screen. Some websites say to use an XP screensaver but the directions for that are unclear. Any suggestions?
I originally had a blank screen until I moved the photo folder to a location outside of my own user account. Then I checked permissions in the Security Tab on the photo folder and added ‘Everyone’ as having full permissions to ensure that the System wouldn’t be prevented from accessing. Then the tips above worked. : )