Windows Fax and Scan stores the scanned images and fax documents in the Scanned Documents folder located under your Documents folder. If the Documents folder is relocated, the Windows Fax and Scan follows the Documents folder.
If you want to move the Scanned Documents folder to a different directory or drive without relocating the Documents folder, here are a couple of options for you.
How to Move the Scanned Documents Folder in Windows
Option 1: Redirect the folder using a symbolic link
A symbolic link, also known as a soft link, is a special kind of file that points to another file or folder, much like a shortcut in Windows. By creating a directory symbolic link to your Scanned Documents folder on a different path or drive, you can make Windows Fax and Scan save scanned images and faxes to the target path automatically.
To create a symbolic link to Scanned Documents, follow these steps:
(Let’s say you want to relocate the Scanned Documents folder to D:\Scanned Documents.)
- Open your Documents folder.
- Move the Scanned Documents folder to the desired path — e.g.,
D:\Scanned Documents - Open an elevated or admin Command Prompt window and type the following command:
mklink /d "C:\Users\%username%\Documents\Scanned Documents" "D:\Scanned Documents"
 You’ll see the message symbolic link created for c:\Users\[username]\Documents\Scanned Documents <<===>> D:\Scanned Documents.
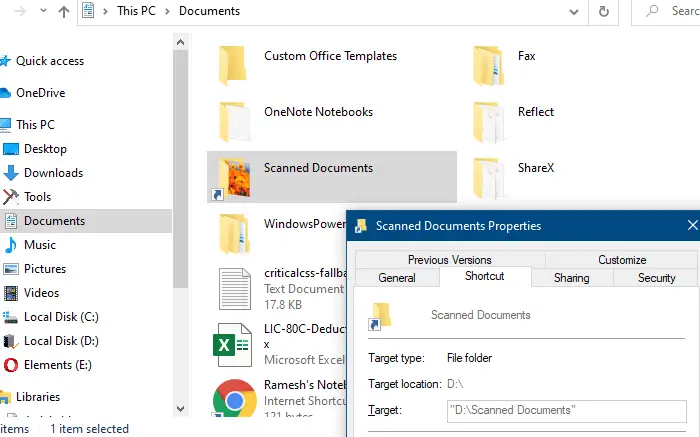
 If you see the error message Cannot create a file when that file already exists in the output, it means you haven’t moved the Scanned Documents folder from the default location. You need to move the folder to your desired location beforehand.After running the command successfully, when you open the Documents folder, you’ll see a special shortcut file that looks like a folder shortcut with the shortcut overlay.
 The shortcut properties dialog shows the target folder, but the options would be grayed out.
From now on, when an application tries to save to C:\Users\%username%\Documents\Scanned Documents folder, the files will actually be saved to D:\Scanned Documents automatically. It’s nothing but a redirection method.
How to revert to the original location
To reverse the above changes to restore the original Scanned Documents path, delete the Scanned Documents symbolic link from your Documents folder. Then, create or move your Scanned Documents folder into your Documents folder.
Editor’s note: This article assumes you haven’t relocated your Documents folder to OneDrive. If that’s the case, the Scanned Documents folder would be located here:
C:\Users\%username%\OneDrive\Documents\Scanned Documents
You’ll need to use the appropriate path when creating the symbolic link. If OneDrive doesn’t let you create a symbolic link in the above location, you may try the alternate method (“Option 2”) below.
Option 2: Temporarily change the Documents shell folder path
Upon startup, the Windows Fax and Scan program reads the Documents folder path and remembers it until you close the program. So, by temporarily changing the Documents shell folder path in the registry just before launching Windows Fax and Scan, you can make WFS save files to the custom location.
After Windows Fax and Scan loads, you can restore the original path for the Documents folder. All these can be done using a script.
'File: redirect_scanned_documents.vbs
'------------------------------------
'Description: Redirect Windows Fax and Scan (WFS) to a custom folder for saving scanned images and faxes.
'Created on 14-Nov-2020 by Ramesh Srinivasan - Winhelponline.com

'The script does the following:
'Step 1: Modifies the Documents shell folder path in the registry.
'Step 2: Launches WFS. WFS uses the modified path for the session.
'Step 3: After WFS opens, the script waits 5 seconds
'Step 4: Restores the orignal path for Documents shell folder.

Set WshShell = CreateObject("WScript.Shell")
Dim strCurrDocsPath, strRedirPath
strCurrDocsPath = WshShell.SpecialFolders("MyDocuments")
strRedirPath = "D:\Documents"
WshShell.RegWrite "HKCU\SOFTWARE\Microsoft\Windows\CurrentVersion\Explorer\User Shell Folders\Personal", strRedirPath, "REG_SZ"
WshShell.Run "%windir%\system32\WFS.exe", 1, False
WScript.Sleep 5000
WshShell.RegWrite "HKCU\SOFTWARE\Microsoft\Windows\CurrentVersion\Explorer\User Shell Folders\Personal", strCurrDocsPath, "REG_SZ"
Set WshShell = Nothing
(You may modify the parent folder path as you wish by changing the strRedirPath value in line 13 of the above script file.)
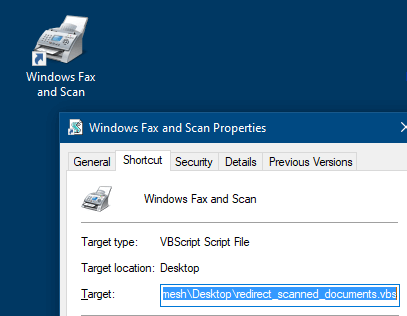
Download the above script redirect_scanned_documents.vbs , and save it to a permanent location. You may create a shortcut to the script and change the icon accordingly if desired.

The Windows Fax and Scan executable is located at C:\Windows\System32\WFS.exe. You can use its icon for the above script shortcut.
Whenever you want to launch Windows Fax and Scan, double-click the script or its shortcut. Windows Fax and Scan would now use D:\Documents\Scanned Documents to save your incoming & outgoing faxes and scanned images.
Closing Words
The above workarounds are unnecessary if you are OK with moving the entire Documents folder to the desired location or drive. When you move the Documents folder, the Windows Fax and Scan automatically follows the Documents folder.
One small request: If you liked this post, please share this?
One "tiny" share from you would seriously help a lot with the growth of this blog. Some great suggestions:- Pin it!
- Share it to your favorite blog + Facebook, Reddit
- Tweet it!
Lots of good information here, I’m sure.
Unfortunately, you make the same mistake that most gifted programmers do. You assume that everyone speaks the same language you do.
In the first line, “Windows Fax and Scan stores the scanned images and fax documents in the Scanned Documents folder located under your Documents folder”, you make three assumptions. Where is the “Windows Fax and Scan” file? This is where the scanned documents are stored. I have that. Then it says in a file called “scanned documents”. I see this wording all over the place. What window is this in or page it is on. Then you say it is under my “documents” folder. Is this “after” my “documents” folder. file vs folder? You see what I mean. It is safe for you to assume one thing. The person you are dealing with knows nothing. until proven otherwise.