Summary: This article tells you how to restore your user account’s lost administrator rights and privileges in Windows 10 and 11.
If your user account has lost admin rights, you may also have inadvertently set yourself a “Standard User” via Account Settings or incorrectly configured the Local Security Policy or user account group membership. In some cases, malware could be the root cause.
You may be unable to run any program elevated if your user account has become a standard or a guest account and no other admin account exists on the system. The Yes button in the UAC dialog will be missing.
This means you can’t return to the User Account settings page and set yourself as the administrator.
However, there is a simple trick to regain the lost administrator rights for your account!
Have you lost the account password? It’s a different issue.
![]() If you have forgotten the passwords for the built-in administrator and the user accounts and cannot log in, this article doesn’t apply. It’s a different scenario, and the solution is available in the article Windows 10/11 Password Reset Methods for Lost Password Scenario.
If you have forgotten the passwords for the built-in administrator and the user accounts and cannot log in, this article doesn’t apply. It’s a different scenario, and the solution is available in the article Windows 10/11 Password Reset Methods for Lost Password Scenario.
(I had to split the content into two articles for better clarity. The article addresses the “lost admin rights” issue, and the linked article above addresses the “lost password” issue.)
Resolution
Fix your account using built-in Administrator via Safe mode
Log in to the built-in Administrator account via Safe Mode and then promote your user account to an administrator. The built-in Administrator account password has a blank password by default. However, if you have set a password earlier, this method assumes you remember the “Administrator” account password.
![]() The built-in “Administrator” account shows up on the sign-in screen while in Safe Mode if no other administrator account user exists on the computer; it doesn’t matter whether the “Administrator” account is active or not.
The built-in “Administrator” account shows up on the sign-in screen while in Safe Mode if no other administrator account user exists on the computer; it doesn’t matter whether the “Administrator” account is active or not.
- Click Start, click the Power button, press and hold the Shift key down, and click Restart. This starts the Windows Recovery Environment.For other methods to access WinRE, see the article How to access Windows Recovery Environment.
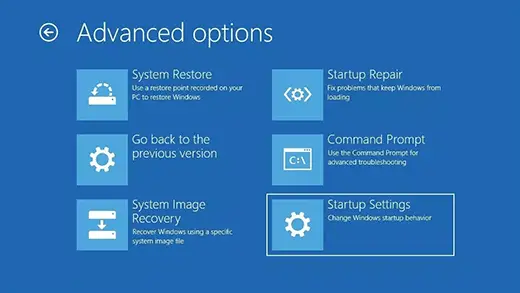
- In Windows RE, click Troubleshoot → Advanced options → Startup Settings.
.png)
.png)
- In Startup Settings, press the 4 or F4 button on your keyboard.
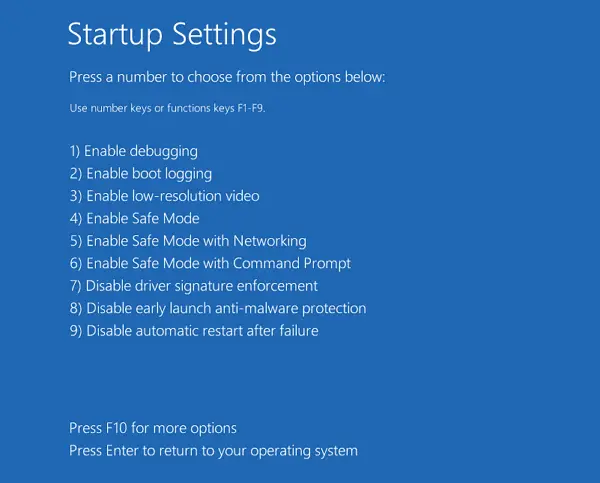
- Windows will now restart in Safe Mode.
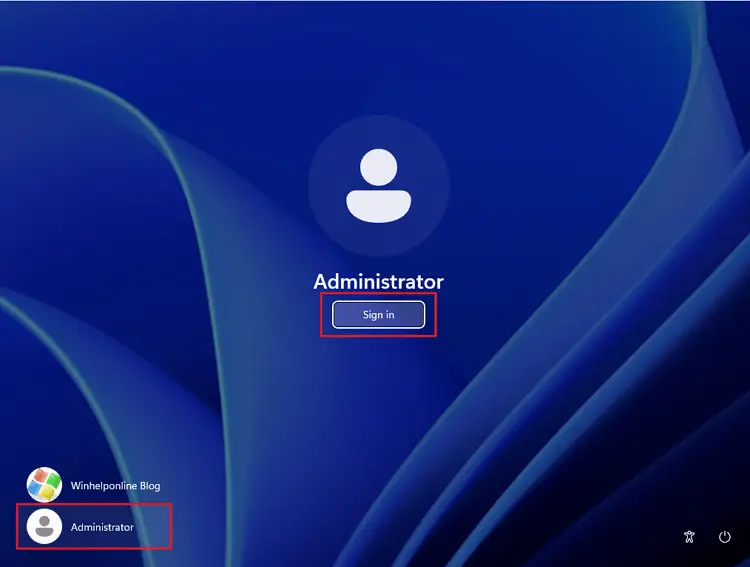
- Click “Administrator” and sign in to the account. It has a blank password by default.
- Press Win + R, type
control userpasswords, and click OK. This opens the classic User Accounts Control Panel.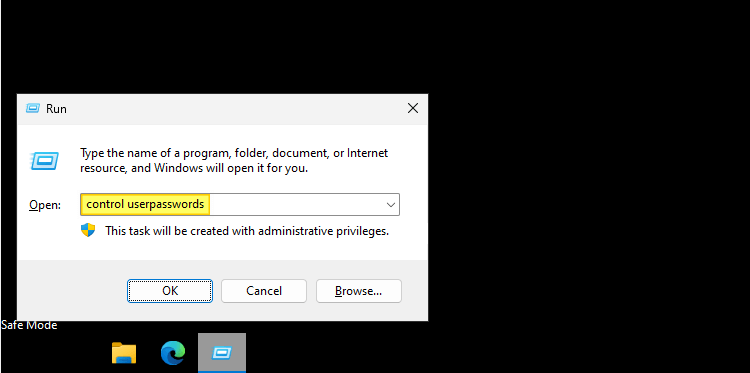
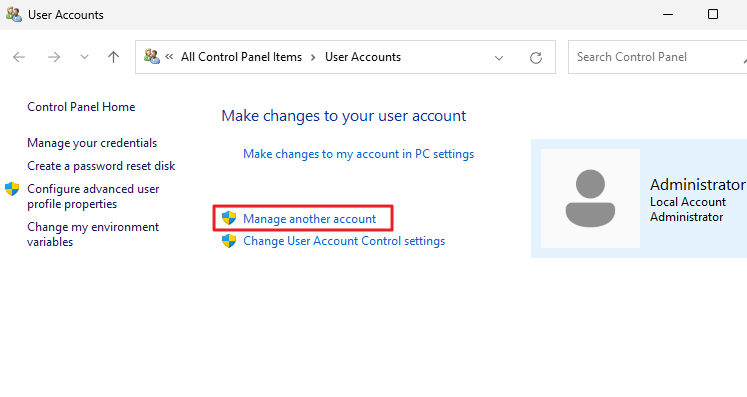
- In the User Accounts applet, click “Manage another account“.
- In the “Manage Accounts” applet, select the account that has lost its admin privileges.

- Click “Change the account type”.

- Choose the “Administrator” option, and click the “Change Account Type” button.
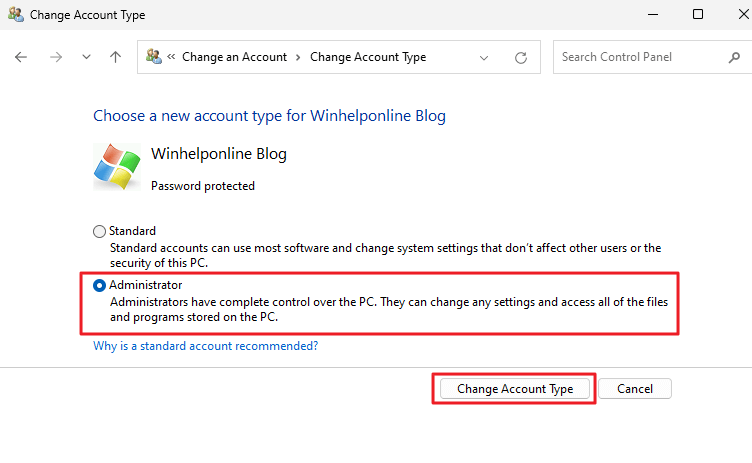
You’ve now changed your account type to an administrator.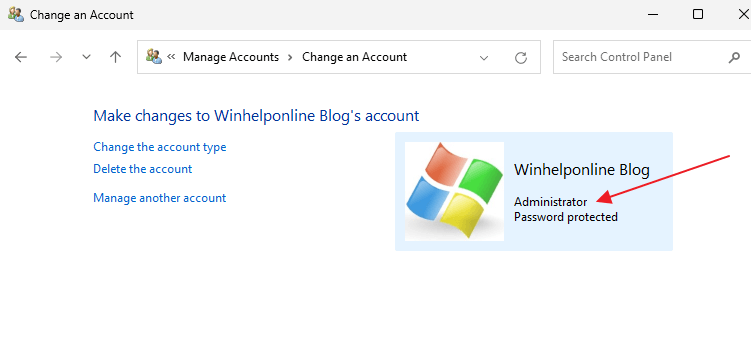
- Log off from the built-in Administrator account.
- Restart Windows.
- Log in to your original account now — e.g., Ramesh
This restores administrator privileges for your user account.
Alternate methods while you’re in Safe mode
You can also change your account’s group membership (i.e., set it as an administrator) using Command Prompt or the Netplwiz.exe dialog from the “Administrator” account.
Follow steps 1 to 5 in the previous section to access Safe mode and log in as “Administrator”. Then, follow one of the following methods.
Option 1: Using Command Prompt
Open Command Prompt, and use the following command-line syntax:
net localgroup administrators {username} /addExample: If the username is RobertM, run this command:
net localgroup administrators RobertM /add

This makes the RobertM account an administrator account.
Option 2: Using Netplwiz.exe
You can view and change the group membership of accounts by running the netplwiz.exe or control userpasswords2 command from the Run dialog.
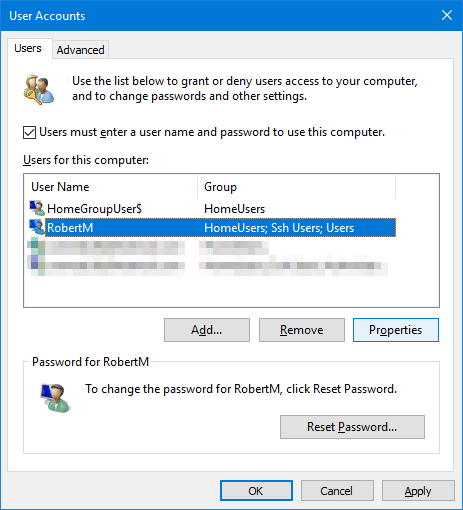
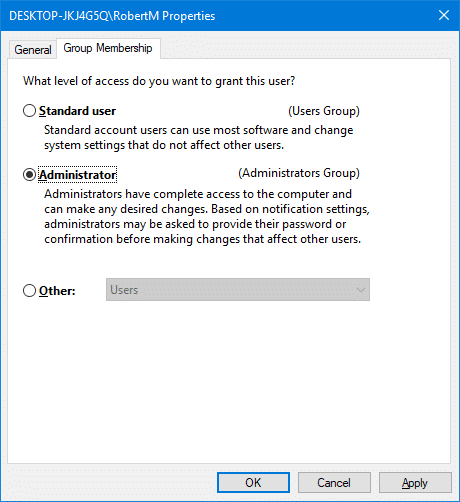
To fix the user account group membership and make it an administrator, from the user accounts dialog shown above:
- Select your account → Properties → Group Membership → Administrator → OK.
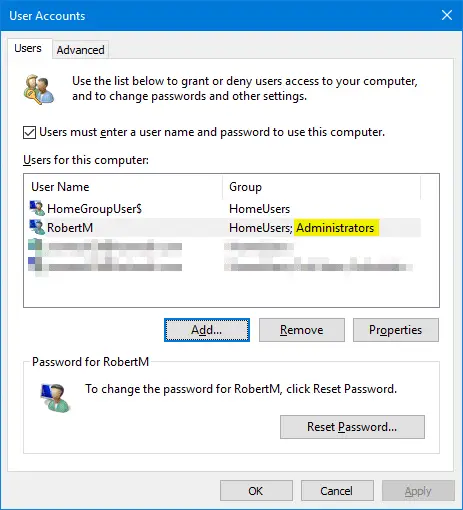
Close and reopen the control userpasswords2 dialog. You’ll see that the account RobertM , in this example, is made an administrator.
Restart Windows and log in to the user account. The admin rights should be restored.
![]() If you’ve forgotten the built-in administrator password, the above method will not help. In that case, see the article Windows 10/11 Password Reset Methods for Lost Password Scenario to regain access to your account and promote it to an administrator.
If you’ve forgotten the built-in administrator password, the above method will not help. In that case, see the article Windows 10/11 Password Reset Methods for Lost Password Scenario to regain access to your account and promote it to an administrator.
I hope this guide helped you restore administrator rights for your user account in Windows 10/11 and earlier.
One small request: If you liked this post, please share this?
One "tiny" share from you would seriously help a lot with the growth of this blog. Some great suggestions:- Pin it!
- Share it to your favorite blog + Facebook, Reddit
- Tweet it!
I would like to say thank you to Ramesh and his winhelponline.com for an excellent problem solving article. I had somehow been relegated to a Guest account on my own computer and could not find a way to get my Admin privileges back until I found this article. Now I am happily back to normal and I didn’t have to reinstall my operating system to do it. This page will be permanently bookmarked for future use and reference.
Very helpful ?
How to Get Your Admin Privileges Back
I was reading everything I could find to get my admin privileges back, and not one article helped me. Some articles that had good intentions required admin privileges just to do the steps required to get those privileges back. I spent so much time researching I was getting very discouraged. Once I found the solution, I vowed to share it just in case this solution I found would help others in my situation. So try this if all else fails for you.
Open Task Manager. You can do this by right clicking on Start, then select Task Manager.You can also press Win key + X together to do this.
Next you want to click on the tab “App History” in Task Manager. Scroll down until you find “Windows Terminal” and you click it once to highlight it, then go up and click on File, then click on “Run New Task”. That will open up System Configuration. Click on the Tools tab, then scroll down to the Command Prompt, click on it, then down at the right lower bottom, click on the Launch button.
You should now have your Admin privileges back.
Please let me know if you liked this article, and it helped you!
What you have written is nothing more than a convoluted route to opening the Command Prompt. You can do that by pressing and typing “cmd”! Not helpful.
Very helpful, keep up the good work
Using this approach, you need admin privileges to access Task Manager which is what I was trying to restore. This didn’t work, either.
Thank you so much- this helped me get my administrator rights back!
Thanks It worked ?.
Hey, I used compmgmt.msc to access the users and groups and added administrators to one of my accounts.
either way, thanks for reminding me about this. It’s been at least ten years since I’ve made this mistake.
I doubt your going to see this, but this is the only command that I’ve got to open and when I try to change the group either of my users are in I keep getting errors like “Access is Denied” or one or more errors have occurred. what would you recommend?