After you upgrade to Windows 10 or install a Windows 10 Feature update, you’ll be able to go back to your previous version of Windows within a limited time of 10 days. This can be done by opening Settings → Update & Security → Recovery → Go back to the previous version of Windows 10.
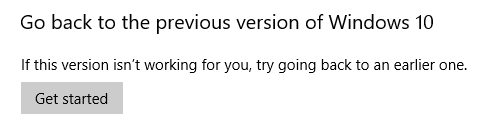
(If you have upgraded from Windows 7, you’ll see Go back to Windows 7 instead.)
Rolling back to the previous version using this method keeps your personal files, but it’ll remove your customizations, apps, and drivers installed after the upgrade. By default, you have ten days, before which you can roll back to the previous version of Windows.
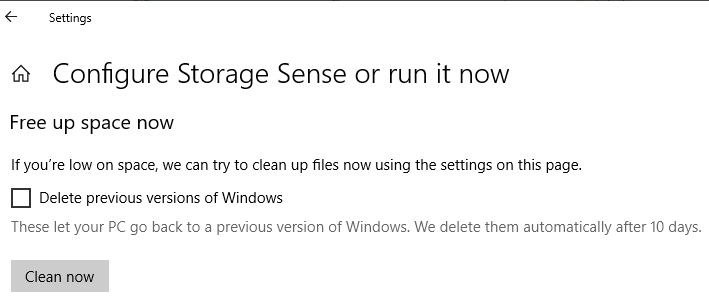
Uninstalling the current version and going back to the previous version of Windows also frees up gigabytes of data on your hard disk, as the Windows.old folder is deleted.
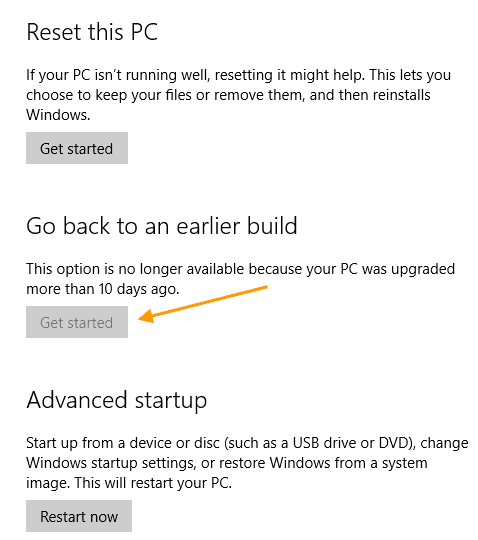
After the 10-day window, the previous Windows installation files under the Windows.old directory would be automatically erased (maybe using Disk Cleanup) by the Operating System. The Get started button would then be grayed out.
In Windows 10 versions before the Anniversary Update (v1607), the rollback timeframe was 30 days. Since the Anniversary Update, Microsoft has reduced the uninstall window to 10 days. As per Microsoft, it was a data-driven decision (based on telemetry) to change the rollback timeframe from 30 to just 10 days. Quoting the source:
Based on our user research, we noticed most users who choose to go back to a previous version of Windows do it within the first several days. As such, we changed the setting to 10 days to free storage space used by previous copies.
Evaluating an Operating System may need more time for end-users, and a 10-day window is insufficient for most people. The good news is that you can increase the Go back to the previous version of Windows to a maximum of 60 days manually.
This article tells you how to extend the 10-day rollback window on your Windows 10 computer.
Extend the 10-day limit to Go back to the previous version
Using the DISM utility, you can do the following:
- Find out how many days after an upgrade that an OS can be uninstalled.
- Initiate an uninstall or roll back to the previous OS or version.
- Remove the ability to uninstall a Windows upgrade.
- Set the number of days that a user has to uninstall a Windows upgrade.
(Reference: DISM Operating System uninstall Command-Line Options.)
Find the rollback timeframe (number of days)
To determine the uninstall window timeframe (days) of your existing Windows installation, run this command from admin Command Prompt:
DISM /Online /Get-OSUninstallWindow
You’ll see the following output:
Deployment Image Servicing and Management tool
Version: 10.0.19041.572

Image Version: 10.0.19042.661

Uninstall Window : 10
The operation completed successfully.
Increase the rollback timeframe (number of days)
Run this command to set the number of days after an upgrade that an uninstall can be initiated.
Syntax:
DISM /Online /Set-OSUninstallWindow /Value:<days>
The value (i.e., number of days) must be in the range of 2 to 60. If the value you input doesn’t fall in that range, the default value of 10 will be set.
Example:
DISM /Online /Set-OSUninstallWindow /Value:30
You should see the message “The operation completed successfully” in the output.
The above command-line sets the rollback window to 30 days. Windows won’t erase the Windows.old folder before 30 days.
Set the Rollback timeframe via the Registry
You can set the rollback window timeframe by editing the registry, as well.
- Start the Registry Editor, and go to the following branch:
HKEY_LOCAL_MACHINE\SYSTEM\Setup
- Create a new DWORD value named
UninstallWindowif it doesn’t already exist. - Double-click
UninstallWindow, select Decimal, and type in the desired value (>2to<60), and click OK.
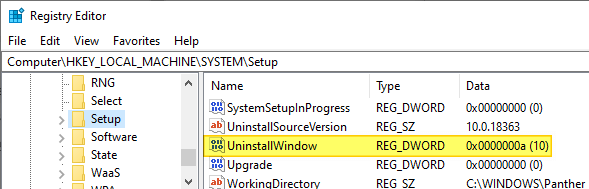
Note that if the above registry value doesn’t exist, “10” days will be the default threshold limit used by Windows. - Exit the Registry Editor.
After the registry modification, it’s better that you restart Windows, though the DISM Get-OSUninstallWindow command would reflect the registry change even if you don’t reboot.
Additional Tip
There are two more DISM switches namely, Initiate-OSUninstall and Remove-OSUninstall that you may like to know about. The former is to initiate a rollback using command-line, and the latter is to remove the ability to rollback by users.
The Remove-OSUninstall switch would gray out the Get Started button under the Go back to the previous… section. The command deletes the following registry values from the abovesaid branch. It may also remove the corresponding BCD data and the Windows Recovery Environment entry named “Go back to the previous build.”
Registry values:
- UninstallActive
- UninstallGUID
- UninstallMark
- UninstallScenario
Error: 1168 – Element not found
In some cases, the error 1168 (‘element not found’) may occur when running the DISM Get-OSUninstallWindow or Set-OSUninstallWindow command.
Deployment Image Servicing and Management tool
Version: 10.0.19041.572

Image Version:

Error: 1168

Element not found.

The DISM log file can be found at C:\WINDOWS\Logs\DISM\dism.log
The DISM.log file would show the following entries:
Error pGetUninstallInterfaceCommon: Failed loading the setupplatform, hr = 0x80070490 [gle=0x00000003]
Error DISM DISM SetupPlatform Provider: PID=3944 TID=9192 Failed getting UninstallInterface Online. - CSetupPlatformManager::GetUninstallWindow(hr:0x80070490)
Error DISM DISM SetupPlatform Provider: PID=3944 TID=9192 Failed to get the uninstall window. - CSetupPlatformManager::ProcessCmdLine_GetUninstallWindow(hr:0x80070490)
Error DISM DISM SetupPlatform Provider: PID=3944 TID=9192 Failed while processing command get-osuninstallwindow. - CSetupPlatformManager::ExecuteCmdLine(hr:0x80070490)
Error 1168 (0x80070490), which denotes “Element not found”, occurs if the Windows.old folder (especially the subfolder $WINDOWS.~BT) has been deleted by Windows after the rollback window has expired.
It’s also possible that you’ve manually cleared the “Previous Windows installation(s)” files using Disk Cleanup or Storage settings to recover the disk space.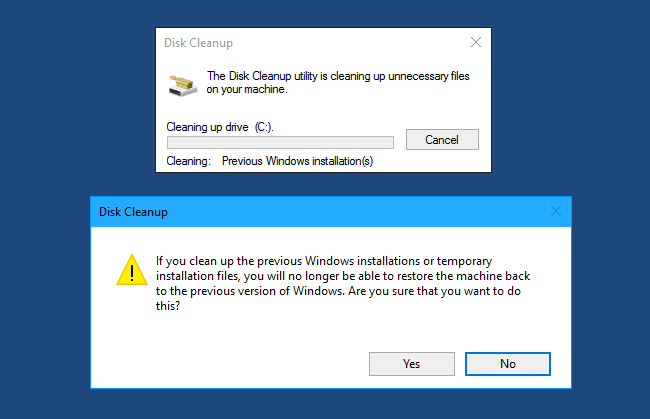
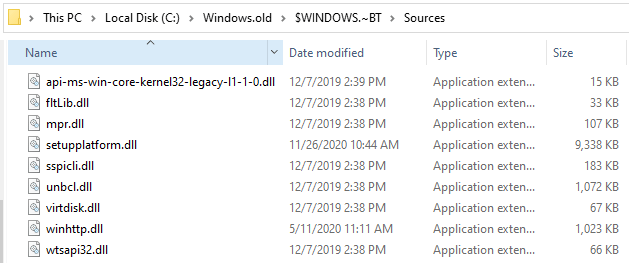
The DISM DISM Get-OSUninstallWindow and Set-OSUninstallWindow commands would need the following files in order to work correctly:
C:\windows.old\$WINDOWS.~BT\Sources\api-ms-win-core-kernel32-legacy-l1-1-0.dll
C:\windows.old\$WINDOWS.~BT\Sources\fltLib.dll
C:\windows.old\$WINDOWS.~BT\Sources\mpr.dll
C:\windows.old\$WINDOWS.~BT\Sources\setupplatform.dll
C:\windows.old\$WINDOWS.~BT\Sources\sspicli.dll
C:\windows.old\$WINDOWS.~BT\Sources\unbcl.dll
C:\windows.old\$WINDOWS.~BT\Sources\virtdisk.dll
C:\windows.old\$WINDOWS.~BT\Sources\winhttp.dll
C:\windows.old\$WINDOWS.~BT\Sources\wtsapi32.dll
If Windows.old or its subfolder $WINDOWS.~BT is missing, or if some of the DLLs are missing in that location, you’ll get one of the following errors:
Error: 1168

Element not found.

The DISM log file can be found at C:\WINDOWS\Logs\DISM\dism.log
Error: 126

The specified module could not be found.

The DISM log file can be found at C:\WINDOWS\Logs\DISM\dism.log
Error 3: The system cannot find the path specified
![]() Despite this, you should be able to set the uninstall threshold or timeframe using the registry method described above.
Despite this, you should be able to set the uninstall threshold or timeframe using the registry method described above.
Closing words
It’s unclear whether the uninstall window you set using DISM or the registry will the preserved or not if you install an update (Feature Update) in the future.
![]() Of course, the ultimate trick of renaming
Of course, the ultimate trick of renaming C:\Windows.old and C:\$Windows~BT would prevent Windows 10 from erasing them automatically. By renaming the folders, you get unlimited time to go back to the chosen version.
One small request: If you liked this post, please share this?
One "tiny" share from you would seriously help a lot with the growth of this blog. Some great suggestions:- Pin it!
- Share it to your favorite blog + Facebook, Reddit
- Tweet it!
DISM /Online /Set-OSUninstallWindow /Value:30
You need an elevated command prompt to preform these functions… WTF?
Open it as an administrator same thing happened to me
I used your tip and first go it didn’t work. It indicated the command was wrong but I couldn’t see this. I looked up the DISM command reference and your commands were correct so I must have stuffed it first go. I repeated the commands in lowercase only and it worked. Thank you. My Win 11 install now has a 60 day rollback out to about the end of October 2021. Sorry I don’t do social media so no sharing on SM.
So how do you go back after the 10 days is up is the real question?
You can’t. You’ll need to clean install your previous version of windows
Thank you so much. Both commands still work as of now (Jan. 2023).