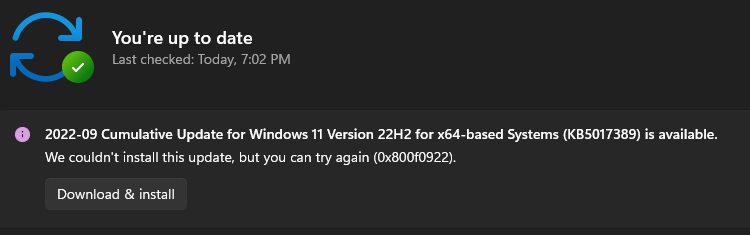
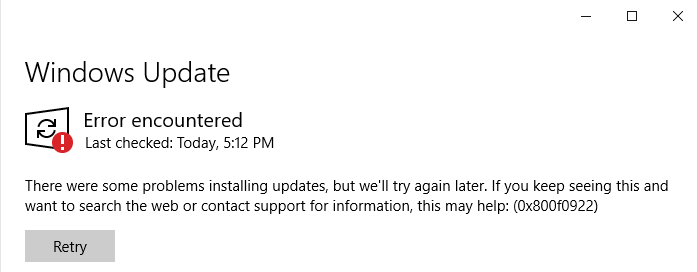
When installing an update, especially a Cumulative Update or .NET Framework package in your Windows 10 or 11 computer, the update installation may fail with an error code 0x800F0922 (“CBS_E_INSTALLERS_FAILED“) or 0xc1900104 or the error message “Something didn’t go as planned”.
In some cases, you may receive the following error:
Something didn't go as planned. Undoing changes.
(or)
Windows couldn't be installed.

We couldn't update the system reserved partition.
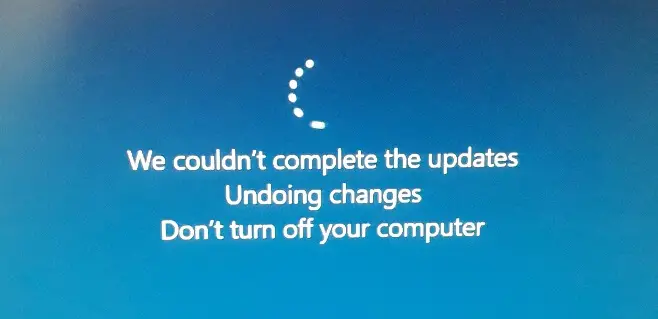
The update process will continue normally, and during the restart phase, you’ll see the following message:
We couldn't complete the updates.

Undoing changes. Don't turn off your computer.
The computer would restart three times as if it were going on a restart loop. It’s not a restart loop, actually. During the third reboot, you’ll see the Windows Update files getting cleaned up and the system rolled back to the previous configuration.

Cleaning up
After which, the computer will boot the Welcome screen.
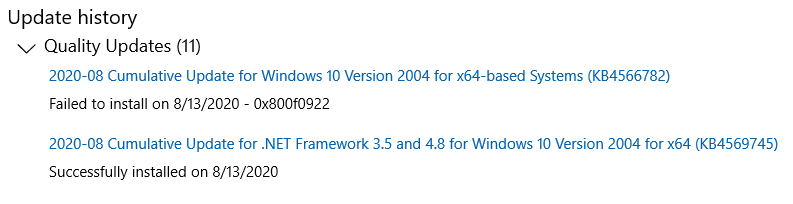
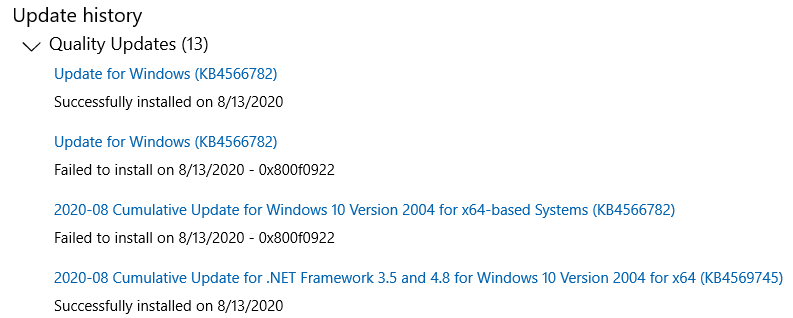
The Windows Update history page would show up the list of failed updates.
The result will be the same if you try downloading the Cumulative Update .msu package from the Microsoft Update Catalog and installing it.
The most common cause for the error 0x800f0922 is the lack of free space in the System Reserved Partition. But that’s not the only reason. For a proper diagnosis, inspect the CBS.log thoroughly.
Now, let’s see how to fix the Windows Update errors 0x800F0922 and We couldn't update the system reserved partition.
Cause
The Windows Update error 0x800F0922 can occur due to one of the following reasons.
- App Readiness service is disabled.
- The EFI or System Reserved partition has less than 15 MB of free space.
- The EFI boot partition is missing or has a wrong identifier.
- Windows Sandbox or Hyper-V is installed.
- Microsoft Edge has been uninstalled.
- Third-party Antivirus or Malwarebytes Anti-malware blocking the installation.
- Performance counters are damaged.
October 2025 cumulative updates fail with the error 0x800f0922.
Please see the following article for the fix.
Fix: Windows Update error 0x800F0922
Step 1: Start the App Readiness service
To fix the error 0x800F0922, enable the App Readiness Service using the following steps:
- Right-click Start, and click Run.
- Type
services.mscand click OK. - Double-click App Readiness and set its start type to Manual.
- Click OK, and close the Services console.
- Restart Windows.
- Attempt to install the Windows Update(s) now.
Additional note: If App Readiness service is the issue, the CBS log would have the following entries — especially the error “0x80070422” (decimal equivalent is “1058”) (“ERROR_SERVICE_DISABLED”):
Info CSI 00000560 The queue has completed running, and AI failures have occured.
Info CSI 00000561 ==Error Summary Start==
Error CSI 00000562 (F) Installer: AppX Registration Installer Binary Name: appxreg.dll ErrorCode: 80070422 Phase: 38 Mode: Install (upgrade) Component: Microsoft-Windows-MicrosoftEdge.appxmanifestcustomized, Culture=neutral, PublicKeyToken=31bf3856ad364e35, ProcessorArchitecture=amd64, versionScope=NonSxS[gle=0x80004005]
Error CSI 00000563 (F) Installer: AppX Registration Installer Binary Name: appxreg.dll ErrorCode: 80070422 Phase: 38 Mode: Install (upgrade) Component: UserExperience-Desktop, Culture=neutral, PublicKeyToken=31bf3856ad364e35, ProcessorArchitecture=amd64, versionScope=NonSxS[gle=0x80004005]
Info CSI 00000564 ==Error Summary End==
Error CBS Startup: Failed to process advanced operation queue, startupPhase: 0. A rollback transaction will be created. [HRESULT = 0x800f0922 - CBS_E_INSTALLERS_FAILED]
Info CBS Setting ExecuteState key to: CbsExecuteStateInitiateRollback | CbsExecuteStateFlagAdvancedInstallersFailed
or
CSI    000006fe@2023/1/16:15:17:18.460 (F) onecore\base\appmodel\inboxappinstallerai\appxreg.cpp(124): Error HRESULT_FROM_WIN32(1058) originated in function Windows::WCP::AppXRegistration::BasicInstaller::Install expression: RDSAppXOnlineNotifyPackageChanges(APPCHANGETYPE_INBOX)
[0x018051] CSI    000006ff (F) Failed execution of queue item Installer: AppX Registration Installer ({f1aab1ba-6ee0-4d94-baeb-c9fd61f365cf}) with HRESULT HRESULT_FROM_WIN32(1058).  Failure will be ignored: The failure was encountered during rollback; installer is reliable[gle=0x80004005]
“App Readiness” keeps getting disabled after a restart?
If the App Readiness service gets disabled after every restart, a third-party service may be the culprit. To resolve the issue, disable all third-party services and reboot Windows.
- Launch msconfig.exe
- Select the Services tab.
- Enable “Hide all Microsoft services”
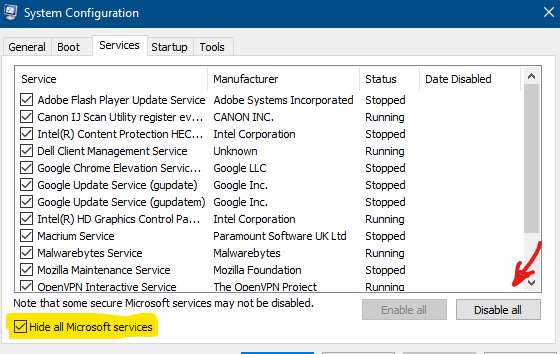
- Click Disable all.
- Reboot the computer.
- Re-enable “App Readiness” and “Storage service” (set them to “Manual”)
- Reboot the computer.
- Check the status of the App Readiness service. Install the cumulative update only if the App Readiness service startup setting is retained (“Manual”).
The above should fix the problem in most cases. If it doesn’t help, proceed to Step 2.
Step 2: Free up disk space in the System Reserved partition
The errors 0x800F0922 and We couldn't update system reserved partition can occur if the System Reserved Partition (SRP) is full. The System Reserved Partition is a small partition on your hard drive that stores boot information for Windows.
Some third-party anti-virus and security apps write to the SRP and can fill it up. Also, there are many unused font (*.ttf) files inside the SRP that you can remove to free up disk space.
The System Reserved partition doesn’t have a drive letter assigned by default. If you have an MBR partition, you can use Disk Management to assign a drive letter for the System Reserved partition and browse the contents with File Explorer. For GPT disks, you need to use the mountvol command to assign a drive letter.
Let’s now access the SRP and delete the unused font files from the Boot\Fonts directory inside SRP.
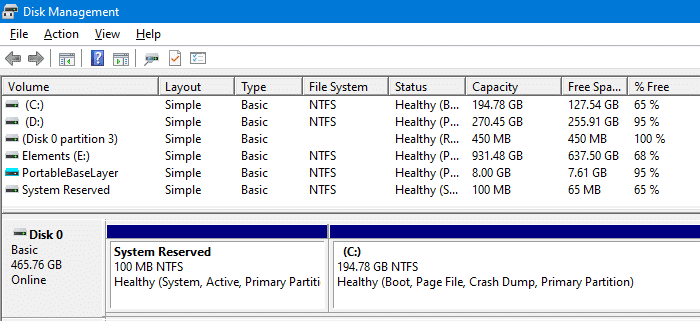
Find if the disk is MBR or GPT
- Right-click Start, and click Disk Management.
- Right-click on the Disk (such as Disk 0) that contains the System Reserved Partition, and select Properties.
 Note that you’ll need to right-click on the Disk # on the left. Instead, if you right-click on the SRP partition itself, you won’t see the Properties option.
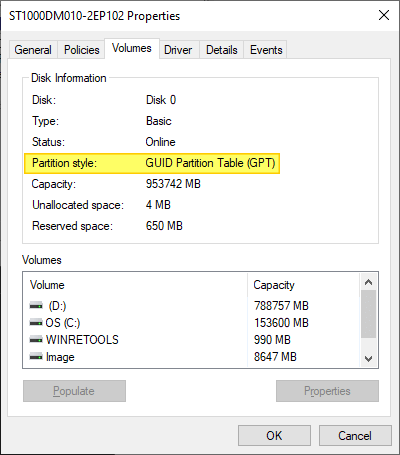
 - In the Volumes tab, you can determine the Partition Style. It may either be GUID Partition Table (GPT) or Master Boot Record.
Instructions for GPT disk:
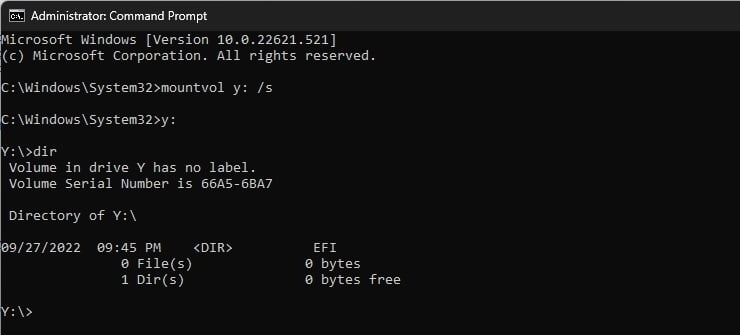
- For UEFI/GPT disks, you’ll need to open an admin Command Prompt window and mount the System Reserved partition to a drive letter using
mountvolcommand.mountvol y: /s
The above command mounts the System Reserved partition to Y:\ drive letter. You can’t explore the drive using File Explorer, though.
- Switch to the Y drive by typing the following, and press Enter.
Y:
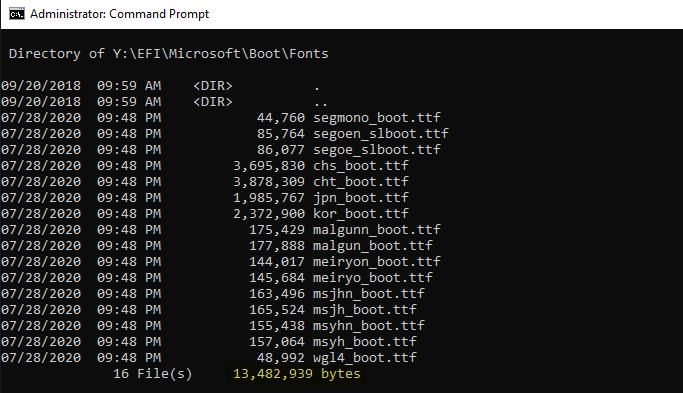
- Then, navigate to the Fonts folder by typing:
cd EFI\Microsoft\Boot\Fonts
- Once there, type the following to delete font files.
del *.ttf
or
del *.*
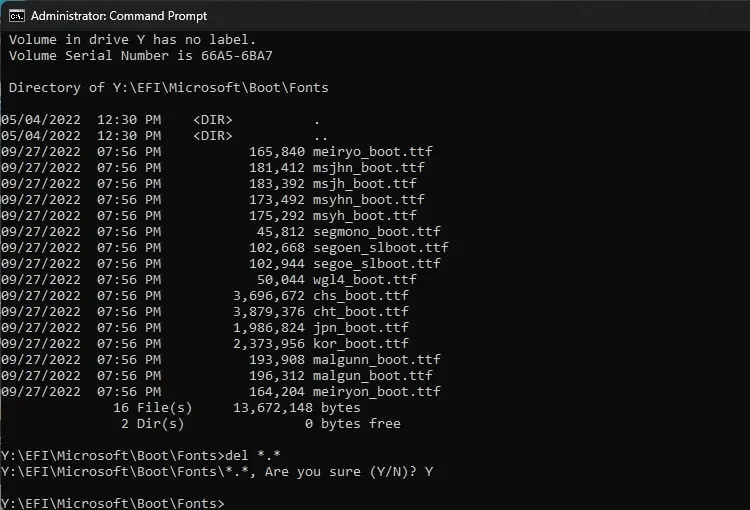
(when the system asks you for confirmation, press Y and then Enter to continue.)
The above command deletes all the files from the Fonts folder and frees up disk space to the tune of 13 MB approximately.
Instructions for MBR disk:
- Right-click Start, and click Disk Management.
- Select the partition marked System Reserved.
- Right-click on it and select Change Drive Letter and Paths.
- Choose Add.
- Enter Y for the drive letter.
- Click OK.
- Open a Command Prompt window under
TrustedInstallerrights. To see how to open Command Prompt under Ti rights, see the article How to Run Programs as TrustedInstaller.Note that the files inside the System Reserved partition are owned by TrustedInstaller. - In the command prompt, type
Y:and hit enter to switch to that drive. - Then, navigate to the Fonts folder by typing:
cd Boot\Fonts
- Make sure you are located in
Fontslocation (Y:\Boot\Fonts). Then, type the following command to delete font files.del *.*
(The system would ask you if you are sure to continue, press Y and then Enter to continue.)
- Go back to Disk Management and Refresh the data to confirm if the SRP now has a greater percentage of free space. If so, the drive letter can be removed at this point.
- Right-click the System Reserved Partition.
- Select Change Drive Letter and Paths.
- Choose the
Y:drive. - Select Remove.
- Click OK.
Additional Information
Other than the font files, some applications may have placed some troubleshooting tools into the System Reserved or EFI partition. Also, Dell BIOS update installers place the BIOS update files in the EFI/System Reserved partition.
It’s advisable to remove those extra files from the EFI/System Reserved partition or move the files somewhere else.
The CBS.log contents are from a system that encountered the error 0x800F0922 when installing the Cumulative Update KB5017389 on a Windows 11 computer. The installation reached 98%, then it encountered a problem and rolled back. At the end, the error 0x800f0922 was displayed. An archived copy of CBS.log (CbsPersist_nnnnnnnn.log) contained the following events:
Info                  CSI    00000df5 BFSVC: 'BfspCopyFile(C:\WINDOWS\boot\EFI\fr-CA\bootmgfw.efi.mui, \\?\GLOBALROOT\Device\HarddiskVolume2\EFI\Microsoft\Boot\fr-CA\bootmgfw.efi.mui) failed! (Attempt 1 of 60) Last Error = 0x70'

Info                  CSI    00000df6 BFSVC: 'BfspCopyFile(C:\WINDOWS\boot\EFI\fr-CA\bootmgfw.efi.mui, \\?\GLOBALROOT\Device\HarddiskVolume2\EFI\Microsoft\Boot\fr-CA\bootmgfw.efi.mui) failed! (Attempt 2 of 60) Last Error = 0x70'

Info                  CSI    00000df7 BFSVC: 'BfspCopyFile(C:\WINDOWS\boot\EFI\fr-CA\bootmgfw.efi.mui, \\?\GLOBALROOT\Device\HarddiskVolume2\EFI\Microsoft\Boot\fr-CA\bootmgfw.efi.mui) failed! (Attempt 3 of 60) Last Error = 0x70'

Info                  CSI    00000df8 BFSVC: 'BfspCopyFile(C:\WINDOWS\boot\EFI\fr-CA\bootmgfw.efi.mui, \\?\GLOBALROOT\Device\HarddiskVolume2\EFI\Microsoft\Boot\fr-CA\bootmgfw.efi.mui) failed! (Attempt 4 of 60) Last Error = 0x70'

Info                  CSI    00000df9 BFSVC: 'BfspCopyFile(C:\WINDOWS\boot\EFI\fr-CA\bootmgfw.efi.mui, \\?\GLOBALROOT\Device\HarddiskVolume2\EFI\Microsoft\Boot\fr-CA\bootmgfw.efi.mui) failed! (Attempt 5 of 60) Last Error = 0x70'

Info                  CSI    00000e31 BFSVC: 'Error copying boot files from C:\WINDOWS\boot\EFI to \\?\GLOBALROOT\Device\HarddiskVolume2\EFI\Microsoft\Boot! Last Error = 0x70'

Info                  CSI    00000e32 BFSVC: 'ServicingBootFiles failed. Error = 0x70'

Error      [0x018049] CSI    00000e36 (F) Failed execution of queue item Installer: Boot File Servicing (BFSVC) Installer ({c5f0e9d7-e844-4507-89e4-701b5a747221}) with HRESULT HRESULT_FROM_WIN32(ERROR_DISK_FULL).  Failure will not be ignored: A rollback will be initiated after all the operations in the installer queue are completed; installer is reliable[gle=0x80004005]
From another section of the log:
Error                 CSI    000014e3 (F) Installer: Boot File Servicing (BFSVC) Installer Binary Name: bfsvc.dll  ErrorCode: 80070070 Phase: 31   Mode: Delta Component: NONE[gle=0x80004005]
Info                  CSI    000014e4 ==Error Summary End==
Error                 CBS    Startup: Failed to process advanced operation queue, startupPhase: 0.  A rollback transaction will be created. [HRESULT = 0x800f0922 - CBS_E_INSTALLERS_FAILED]
It’s evident that the setup encountered the error 0x80070070 (ERROR_DISK_FULL) when copying the .mui files for various locales to the EFI System Reserved Partition. As the System Reserved Partition had 0 bytes of free space, ERROR_DISK_FULL was encountered, and then the error 0x800f0922.
Deleting the unneeded font files freed up approximately 15 MB of disk space. The issue was immediately resolved as the .mui files use only ~6 MB of space.
RELATED: How to Resize the EFI System Partition using AOMEI Partition Assistant
You should be able to install the Windows Update or .NET Framework update now. If not, proceed to Step 3.
Step 3: Fix the EFI System partition’s Identifier
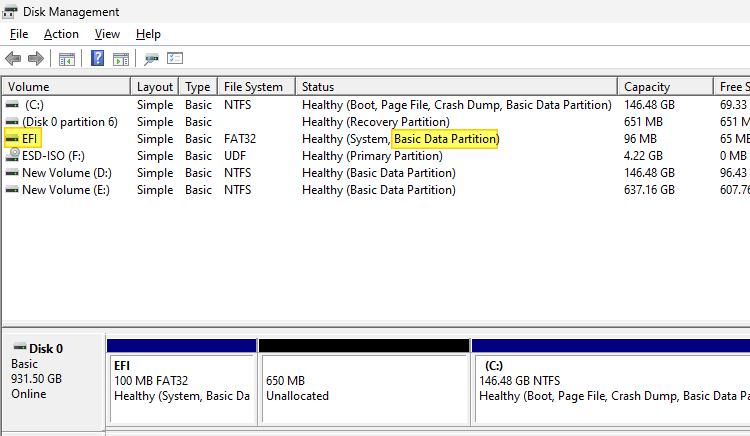
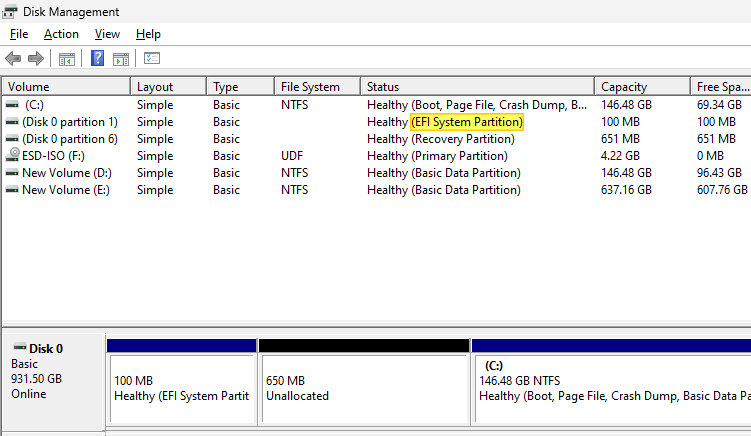
On UEFI/GPT-based systems, ensure that the EFI partition exists and is identifier is set correctly. If Disk Management shows the EFI partition as the “Data partition”, it may be the root cause for the Windows Update rollback error 0x800F0922.
For example, in the following screenshot, the EFI partition shows up as “Basic Data Partition,” and it needs to be fixed.
To fix the identifier for the EFI system partition, open admin Command Prompt and run these commands:
diskpart
list volume
Note the volume number for the FAT32 partition, which is your EFI boot partition. The partition size typically ranges from 100 MB to 500 MB.
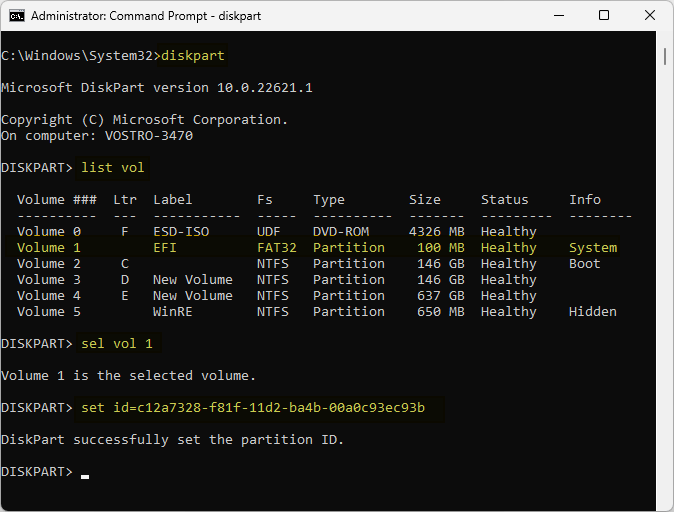
In this example, the EFI boot partition (FAT32) is “Volume 1”.
So, run the next command:
select volume 1
And then, set the correct identifier by running the following command:
set id=c12a7328-f81f-11d2-ba4b-00a0c93ec93b
You should see the message “DiskPart successfully set the partition ID.” as the output.
Virtual Disk Service error:
The device is in use.

The selected volume or partition is in use.
To continue with the operation use the OVERRIDE parameter.
If closing Disk Management and rerunning the command doesn’t help, run the following command instead:
set id=c12a7328-f81f-11d2-ba4b-00a0c93ec93b override
Type exit to quit the DiskPart environment.
Type exit again to quit the Command Prompt window.
Close Disk Management and re-launch it. It should show the EFI partition as “EFI System Partition” underneath the “Status” column.
See if you can install Windows Updates now.
RELATED: How to Rebuild the EFI Boot Partition, BCD and Boot Files
Additional Info: If the Windows Update rollback is due to the EFI partition issue, the CBS logs may mention the error code 80073bc3 or 0xc0000452.
Error                 CSI    000011c0 (F) Installer: Boot File Servicing (BFSVC) Installer  Binary Name: bfsvc.dll  ErrorCode: 80073bc3 Phase: 31   Mode: Delta Component: NONE[gle=0x80004005]
Error                 CBS    Startup: Failed to process advanced operation queue, startupPhase: 0.  A rollback transaction will be created. [HRESULT = 0x800f0922 - CBS_E_INSTALLERS_FAILED]
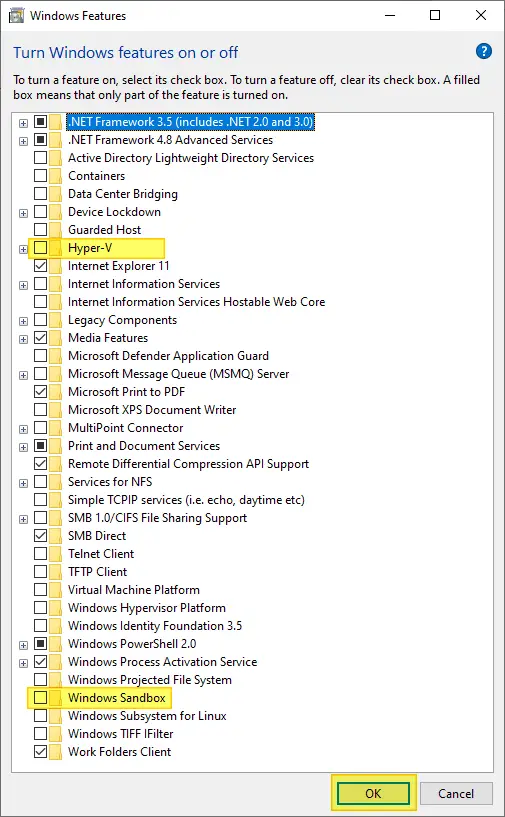
Step 4: Uninstall Windows Sandbox and Hyper-V
If Hyper-V or Windows Sandbox is installed, uninstall it.
You can uninstall them by launching optionalfeatures.exe.
Restart Windows when prompted.
Attempt to install the updates now.
Step 5: Reinstall Microsoft Edge (or) Delete the Edge folder
The error 0x800F0922 can occur if Microsoft Edge has been removed from the system. To fix the issue, do one of the following:
a) Reinstall Microsoft Edge. Visit https://www.microsoft.com/en-us/edge/launch/try-edge-cle?form=MA13M0 to download Edge.
(or)
b) If you don’t want to reinstall Edge, delete the “C:\Program Files (x86)\Microsoft\Edge” folder completely (if you’ve earlier uninstalled Edge.)
Step 6: Third-party AV blocking the installation.
If you’re using a third-party antivirus solution, completely uninstall it and install the Windows update.
If you have Malwarebytes installed, please uninstall it. Additionally, use the Malwarebytes Support Tool to remove it cleanly.
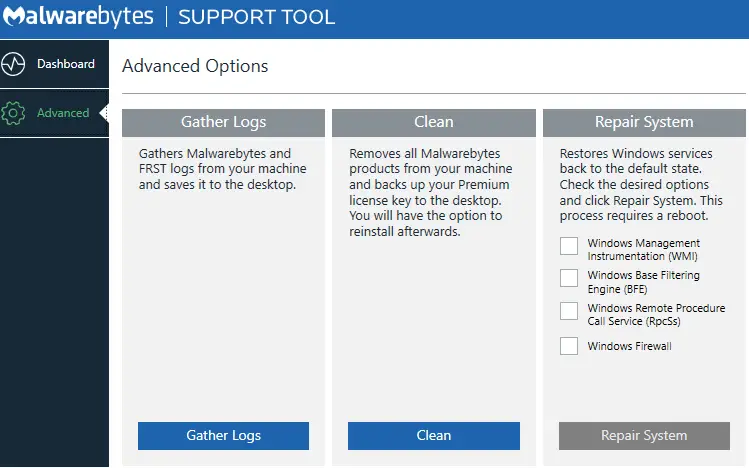
After a reboot, attempt to install the Windows update(s).
Step 7: Repair/rebuild the rebuilt performance counter setting
This step ought to fix the issue, especially if the CBS log file has one or more entries containing the line PerfCounterInstaller Error: Counter database is corrupted. Follow these steps to fix the problem.
- Open an admin Command Prompt window.
- Type the following commands and press Enter after each command:
cd c:\windows\system32
lodctr /R
cd c:\windows\sysWOW64
lodctr /R
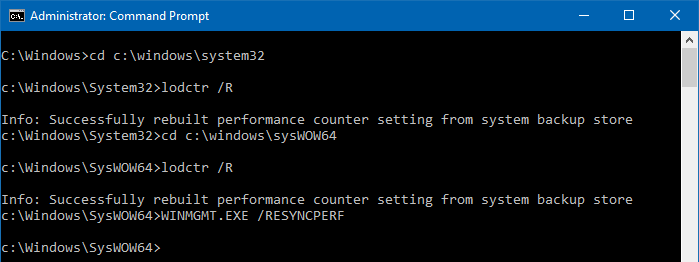
The above commands manually rebuild the Performance Counter Library values stored in the
Perfh009.datfile, and in thePerfLibregistry key.Note: The parameter
/Ris case-sensitive. If the command was successful, you should see the messageInfo: Successfully rebuilt performance counter setting from system backup storein the output. - Then, run the following command to resync the counters with WMI:
WINMGMT.EXE /RESYNCPERF
- Exit the Command Prompt window.
Additional Information
Your CBS.log might show something like the following:
Info  CSI    00000331 hvhostsvcstats (uninstall): CntrtextUnloadV2Provider() returns 0.
Error CSI    00000332 (F) PerfCounterInstaller Error: LastCounter and LastHelp are inconsistent (9380,9847).
[gle=0x80004005]
Error CSI    00000333 (F) PerfCounterInstaller Error: Counter database is corrupted, run 'lodctr /R' to fix it.
[gle=0x80004005]
Error CSI    00000334 (F) PerfCounterInstaller Error: PERFLIB V2 CounterSet "{9ff69334-839c-41fe-96e0-c5189ac431f2}" counter number mismatch, initial 9847, current 9848.
[gle=0x80004005]
Error CSI    00000335 (F) hvhostsvcstats (install): CntrtextLoadV2Provider() returns ERROR_INVALID_DATA.
[gle=0x80004005]
Info  CSI    00000336
CSI Advanced installer perf trace:
CSIPERF:AIDONE;{b1498a21-0405-4959-adaa-7e78686acfbe};(null);168505us
Info  CSI    00000337 End executing advanced installer (sequence 0)
Completion status: HRESULT_FROM_WIN32(ERROR_INVALID_DATA)
Error [0x018017] CSI    00000338 (F) Failed execution of queue item Installer: Counters Installer ({b1498a21-0405-4959-adaa-7e78686acfbe}) with HRESULT HRESULT_FROM_WIN32(ERROR_INVALID_DATA).  Failure will not be ignored: A rollback will be initiated after all the operations in the installer queue are completed; installer is reliable.
CBS.log (Another section)
CBS.log under C:\WINDOWS\Logs\CBS

Error CBS Startup: Failed to process advanced operation queue, startupPhase: 0. A rollback transaction will be created. [HRESULT = 0x800f0922 - CBS_E_INSTALLERS_FAILED]
Info CBS Setting ExecuteState key to: CbsExecuteStateInitiateRollback | CbsExecuteStateFlagAdvancedInstallersFailed
Info CBS SetProgressMessage: progressMessageStage: -1, ExecuteState: CbsExecuteStateInitiateRollback | CbsExecuteStateFlagAdvancedInstallersFailed, SubStage: 0
Info CBS Progress: UI message updated. Operation type: Update. Stage: 1 out of 1. Rollback.
Info CBS Setting original failure status: 0x800f0922, last forward execute state: CbsExecuteStateResolvePending
I hope one of the above procedures has helped you install Windows Updates without getting the error 0x800F0922 (“CBS_E_INSTALLERS_FAILED“).
That’s it!
One small request: If you liked this post, please share this?
One "tiny" share from you would seriously help a lot with the growth of this blog. Some great suggestions:- Pin it!
- Share it to your favorite blog + Facebook, Reddit
- Tweet it!
thanks. this helped solve my problem
Did not fix my error, Updates gives “We couldn’t complete the. . . ” These fixes maybe obsolete.
Administrator: Command Prompt:
C:\Windows\system32>lodctr /R
Error: Unable to rebuild performance counter setting from system backup store, error code is 2
C:\Windows\system32>cd c:\windows\system32
C:\Windows\system32>lodctr /R
Error: Unable to rebuild performance counter setting from system backup store, error code is 2
C:\Windows\system32>cd c:\windows\sysWOW64
c:\Windows\SysWOW64>lodctr /R
Error: Unable to rebuild performance counter setting from system backup store, error code is 2
App Readiness running.
SFC -> no errors
DISM.exe /Cleanup-image /Scanhealth (run separately) -> no component store corruption detected
Disk Check/Virus scan -> no issues
Firewall Off
Recovery Partition Disk Management does not allow or have option for drive letter for either EFT System Partition or Recovery Partition -> both indicating Healthy and 100% Free. There is no system reserve partition.
@noko: About the
lodctr /R command, some users have indicated that running the command(s) for the 2nd time helped. Check out this Microsoft forum link:LODCTR /R Error Code 2
Thanks, it was really helpfull and precise!
May 24, 2021:
A lot of people are still having the problem. I will be providing the correct solution for those of you that are still getting this error after trying all the solutions posted on the internet, albeit they all fail to solve the problem. I intend to post the solution to the issue on Twitter in the next couple of days. All the articles regarding this issue says the same things, but for all those Windows users that are still unable to Update Windows (Cumulative Updates), you will soon have the fix. Stay tuned. Solution is coming.
Solution for many of you that are still having the issue.
https://answers.microsoft.com/en-us/windows/forum/windows_10-update/error-0x800f0922-for-cumulative-updates-for/471d0728-0ae5-4521-964c-f3f3cece4b33
I confess; I deleted Edge, but left the Edge directory behind, causing 0x800f0922 during updates.
https://www.ghacks.net/2021/05/13/try-this-if-you-are-getting-error-code-0x800f0922-on-windows-10/
Thank you Ramesh. I had tried many things to solve the cumulative update issue but failed. when I tried Readiness Service – Manual it worked.
Thanks, this process works for Windows 11 as well.
The App Readiness service was disabled and the Perfmon database was corrupted. Fixing both of those using your procedure outlined above solved the problem.
WOW! finally got the solution to my update problem.
I have been trying for the past many days to get the latest 2022-08 Cumulative Update for Windows 10 Version 21H2 for x64-based Systems (KB5016616) to complete with no luck.
Your solution worked, it just needed to remove unnecessary files from the EFI boot partition (I used rEFInd in the past & it was taking a lot of space in the 100 MB partition).
So removing that& the fonts allowed me to complete the update.
Again thanks!
thanks this solved my issue.
i had to: Start the App Readiness service
thanks this solved my issue.
i had to: Start the App Readiness service
Fix the EFI System partition’s Identifier fixed my 0x800F0922 issue.
Couldn’t install Update 22H2 (KB5049981)
Fixing the EFI System partition’s Identifier fixed my 0x800F0922 issue.
Thank you for the awesome guide !
The Best Guide I’ve Run Across
CSI 00001de9 ==Error Summary End==
CBS Startup: Failed to process advanced operation queue, startupPhase: 0. A rollback transaction will be created. [HRESULT = 0x800f0922 – CBS_E_INSTALLERS_FAILED]
CBS Setting ExecuteState key to: CbsExecuteStateInitiateRollback | CbsExecuteStateFlagAdvancedInstallersFailed
CBS SetProgressMessage: progressMessageStage: -1, ExecuteState: CbsExecuteStateInitiateRollback | CbsExecuteStateFlagAdvancedInstallersFailed, SubStage: 0
CBS Progress: UI message updated. Operation type: Update. Stage: 1 out of 1. Rollback.
CBS Setting original failure status: 0x800f0922, last forward execute state: CbsExecuteStateResolvePending
CBS Attempting to remove poqexec from SetupExecute
CBS Removed poqexec from SetupExecute.
CBS Configured poqexec to not pend to SetupExecute.
CSI 00001dea (F) Installer: Task Scheduler Binary Name: wmicmiplugin.dll ErrorCode: 80070005 Phase: 39 Mode: Delta Component: NONE[gle=0x80004005]
CSI 00001deb Rolling back transactions…
@fenn: Can you share the CBS logs on GoFile.io and post the link here? Or, visit Sysnative.com and post the issue there.
YES! Step 3 fixed it for me! A backup restore messed up EFI system partition’s identifier. So glad I found this post!