There are many different types of diagnostic logs in Windows. Each log is to diagnose a specific component. The Windows Update client creates the Windows Update ETL or Windows Update log files, the Component-Based Servicing uses “cbs.log”, and the DISM tool writes to “dism.log”, etc.
Besides the native logs, you can use specialized tools (e.g., Autoruns, FRST64, Process Monitor, etc.) to collect information for troubleshooting.
Contents
CBS and DISM Logs
The CBS log is used by Component Based Servicing (TrustedInstaller.exe), which is responsible for applying updates and features. Every update you install or every component you remove or repair (using DISM or PowerShell) is recorded in the CBS.log. Additionally, the System File Checker (Sfc.exe) logs the repair operations in CBS.log. The CBS.log file is located here:
C:\Windows\Logs\CBS\
CbsPersist_<timestamp>.cabExample:CbsPersist_20221220170129.cabThe DISM log is created when you run the DISM.exe console tool. It contains the summary of events that occurred when running a DISM command. The DISM.log file is located here:
C:\Windows\Logs\DISM\
![]() When DISM installs or repairs a component or feature, it logs the details into CBS.log. Hence it’s recommended to collect both CBS and DISM logs for analysis.
When DISM installs or repairs a component or feature, it logs the details into CBS.log. Hence it’s recommended to collect both CBS and DISM logs for analysis.
Collecting the CBS and DISM logs
To collect the CBS and DISM logs so you can share them with someone, follow these steps:
- Open the folder “
C:\Windows\Logs\“ - Select the two folders, namely, CBS and DISM.
- Right-click on the selection, and click Send to → Compressed (zipped) folder.
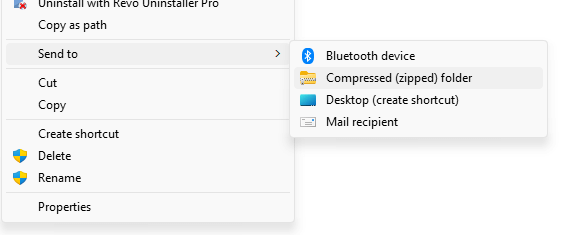
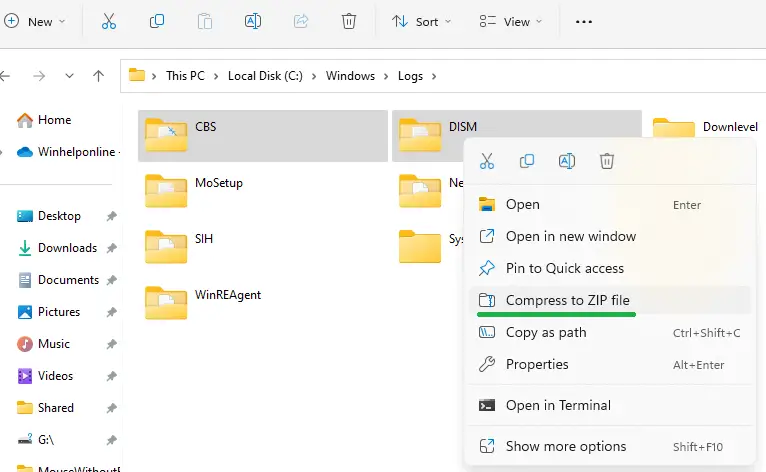
If you’re using Windows 11, click “Show more options” in the right-click menu, and click Send to → Compressed (zipped) folder. Alternatively, click the “Compress to ZIP file” option in the fast context menu.
- Click Yes when you see the following prompt:
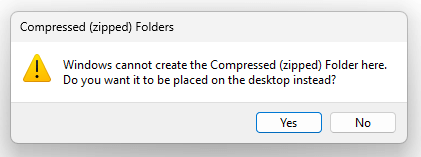
Windows cannot create the Compressed (zipped) Folder here. Do you want it to be placed on the desktop instead?
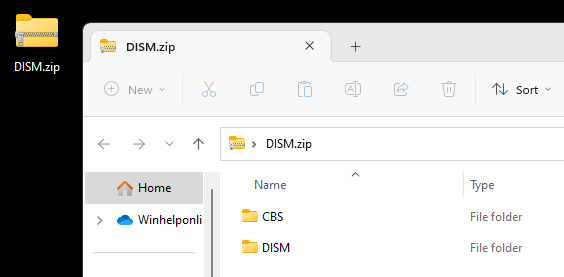
That’s it. The Zip file is saved to your desktop.
Windows Setup Logs
Windows Setup creates log files for all actions that occur during installation. If you’re experiencing problems installing Windows, check the log files to help troubleshoot the installation. The log file names and the locations are mentioned in the article Windows setup log file locations – Windows Client.
The best way to collect the setup logs is by running SetupDiag. SetupDiag is a diagnostic tool that can be used to obtain details about why a Windows 10/11 upgrade was unsuccessful.
Download SetupDiag
SetupDiag works by examining Windows Setup log files. It attempts to parse these log files to determine the root cause of a failure to update or upgrade the computer to Windows 10. or 11. SetupDiag can be run on the computer that failed to update, or you can export logs from the computer to another location and run SetupDiag in offline mode.
The tool collects the setup logs and saves them into a zip file named Logs.zip on your desktop.
System Information Tool (MSINFO32.exe) log
The built-in Microsoft System Information (Msinfo32.exe) tool in Windows gathers information about your computer. It displays a comprehensive view of your hardware, system components, and software environment, which you can use to diagnose computer issues. REF: Description of Microsoft System Information (Msinfo32.exe) Tool.
You can view the list of services and drivers and their configuration, the loaded modules list, and other helpful information using MSINFO32. The MSINFO32.exe report can be generated by pressing Ctrl + S and saving the entries to an .NFO file. Make sure to run the tool as administrator.
For detailed information, check out the post Generate a System Information Report using MSINFO32
Autoruns Log (.ARN)
Autoruns (from Microsoft Sysinternals), which has the most comprehensive knowledge of auto-starting locations of any startup monitor, shows you what programs are configured to run during system bootup or login, and when you start various built-in Windows applications like Internet Explorer, Explorer, and media players. Autoruns is an excellent tool that can be used to locate and remove malware from the startup launch points on the computer.
Here is how to save the Autoruns log if you wish to send it to someone for analysis.
- Download Autoruns from Microsoft, and run it as administrator.
- In the Autoruns window, press “Esc” to stop the entries from loading.
- From the Options menu, click “Scan Options…”
- Click “Verify code signatures” to enable it.
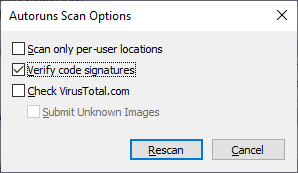
- Click Rescan, and wait for the entries to populate.
- Once the items are loaded, press Ctrl + S and save the entries to an .ARN file.
- Zip the .ARN file and upload it on OneDrive/Dropbox.
Farbar Recovery Scan Tool
Farbar Recovery Scan Tool, or FRST, is a powerful tool that runs on all Windows Operating Systems. The main objective of this tool is to diagnose malware issues, but you can do much more with this tool. Both 32-bit and 64-bit versions of the Farbar Recovery Scan Tool are available. Please pick the version that matches your operating system’s bit type.
Download Farbar Recovery Scan Tool (FRST64.exe) from the following link:
https://www.bleepingcomputer.com/download/farbar-recovery-scan-tool/
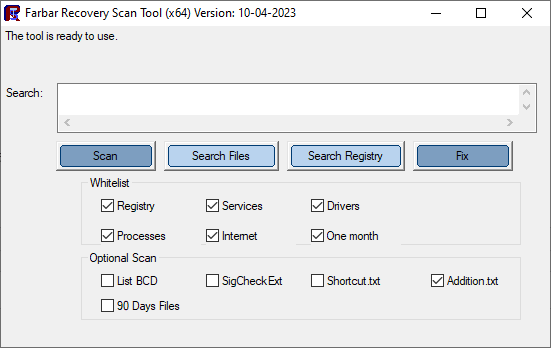
- Run the Farbar Recovery Scan Tool. [FRST.exe (32-bit) or FRST64.exe (64-bit)]
- Leave it at the default settings unless otherwise instructed, and click “Scan“.
- Share the two logs, FRST.txt and Addition.txt, with the support personnel trying to help you.
How does it work?
FRST64.exe doesn’t remove anything when you click “Scan”. It only scans all the launch points, services, and drivers and outputs them to the log file(s). After seeing the logs, the support technician will prepare a fixlist.txt file containing some directives. Then, the fixlist.txt script needs to be executed using the Farbar Recovery Scan Tool. Here are the instructions.
- After sharing FRST.txt and Addition.txt with the support technician, wait for him to prepare a fixlist.txt file for you.
- Once available, get the fixlist.txt from the technician.
- Make sure FRST64.exe and FixList.txt are in the same folder.
- Launch FRST64.exe and click “Fix“.
- Share the output log file (FixLog.txt) with the support technician. This log file will contain the result of each operation specified in fixlist.txt.
Windows Event logs
Event logs store records of significant events on behalf of the system and applications running on the system. You can export an event log via the Event Viewer console.
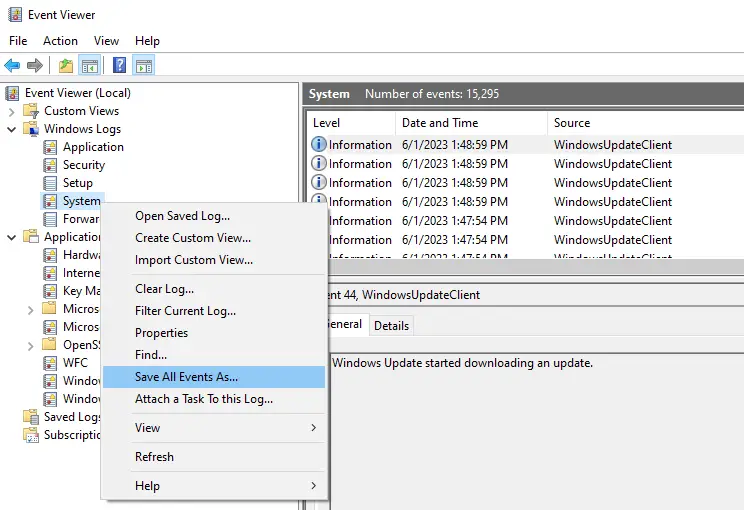
For more information, see the article How to Export Windows Event Logs from Event Viewer.
One small request: If you liked this post, please share this?
One "tiny" share from you would seriously help a lot with the growth of this blog. Some great suggestions:- Pin it!
- Share it to your favorite blog + Facebook, Reddit
- Tweet it!