This post explains how to clean boot Windows using the Autoruns utility from Microsoft. Clean boot is nothing but starting Windows without 3rd party services and startup programs. This procedure is done to find out the which program, service or a module is causing a specific problem in Windows. Once you narrow down the offending program or module, remove the program, and enable all other items that you’ve disabled earlier, to come out from clean boot to normal state.
(Microsoft has a nice article on this topic How to perform a clean boot in Windows, which instructs how to do a clean boot using the System Configuration Utility (msconfig.exe) in Windows. This post tells you how to clean boot using the excellent Autoruns utility from Windows SysInternals. Autoruns is even better as it allows you to eliminate additional components, such as 3rd party shell extensions and scheduled tasks etc.)
How to Clean Boot Windows Using Autoruns?
Procedure
- Preliminary Steps
- Disable Startup Entries
- Disable 3rd party shell extensions
- Disable 3rd party services
Note: Following this procedure, you may need to restart Windows multiple times until you narrow down the program causing the problem. After completing each step (except for step #1), restart Windows and see if the problem persists. If that doesn’t help, proceed to next step and restart again. If the procedure in a step solves the problem, you don’t need to proceed to the next step.
#1 Preliminary Steps: Create Restore Point and configure Autoruns
First, create a Restore point. Then download Autoruns. Right-click Autoruns.exe and choose Run as Administrator.
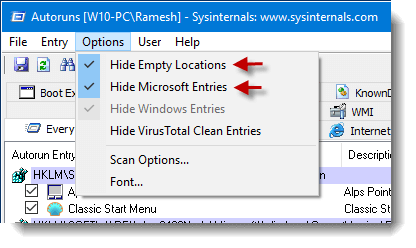
From the Options menu, enable the option Hide Microsoft Entries. This is to make sure you don’t accidentally remove any standard or Microsoft entries using this utility.
Autoruns starts scanning automatically. If it doesn’t, refresh the view by clicking the Refresh button in the toolbar.
#2 Disable Startup Entries
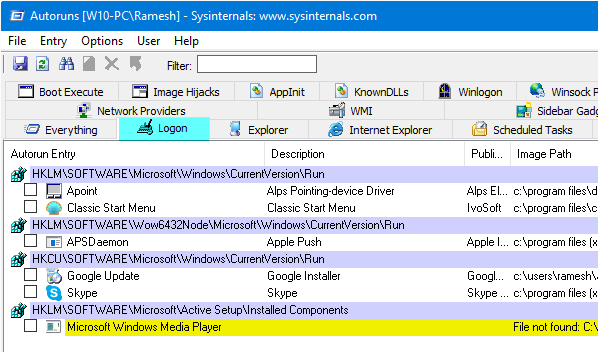
Click the Logon tab, and uncheck all* the entries displayed.
*Special Note – Important: The Autorun entry "Userinit" (Description: Userinit Logon Application) doesn’t usually appear in the Logon tab if you Hide Microsoft or Windows Entries. In case it appears (in a malware-infested system) even if “Hide Microsoft entries” and/or “Hide Windows entries” are enabled in the Options menu, DO NOT uncheck or delete the Userinit entry. Fixing the "Userinit" requires special care. This is very important.
![]()
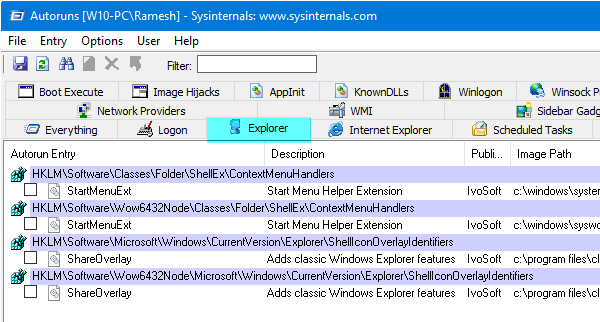
#3 Disable 3rd Party Shell Extensions
Click the Explorer tab, and disable all shell extensions displayed.
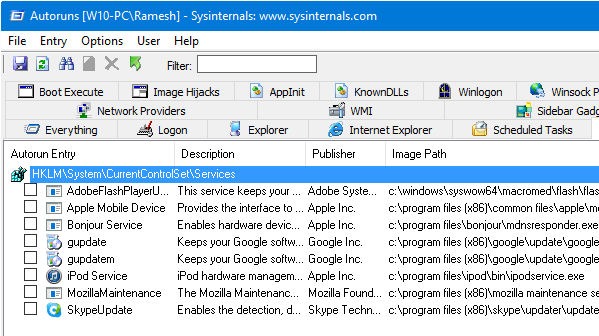
#4 Disable 3rd Party Services
Click the Services tab, and uncheck all the 3rd party services listed.
Narrow Down the Offending Program, Service or Module
If disabling all 3rd party services and rebooting Windows help you resolve a problem, the next step is narrow down the *particular* service causing the problem. To find it out, re-enable first half of the services and restart Windows. If the problem doesn’t re-occur, re-enable half of the services from the lower half (i.e. half of the lower half).
Repeat these steps until you find out which item is causing the problem. Use the same logic for startup programs and shell extensions; but note that for startup programs and shell extensions, you don’t need to restart Windows… logging off and logging back on should be sufficient.
Revert back to Normal state
Once you find the item causing the problem, remove or disable it. Enable all other items and restart Windows. You’re now back to normal mode.
One small request: If you liked this post, please share this?
One "tiny" share from you would seriously help a lot with the growth of this blog. Some great suggestions:- Pin it!
- Share it to your favorite blog + Facebook, Reddit
- Tweet it!
I love this article. I have had problems with command prompt briefly opening on start-up of windows and closing. Once this happened i couldn’t open command prompt what so ever and even the apps that would require it to run would not work because the thing would open quickly and dissappear.
I tried googling the issue for months with not fix except for creating a new user but this was too much effort for me to do at the time. I only really found a fix when once instead of googling a fix for the “command prompt” i phrased it as “command processor”. I was directed to website that told me to go to my registry editor a delete an autorun script for the command processor under local_user>windows>…. This has fixed the problem and command prompt would work again. The only issue then was that with the following windows start-up the explorer.exe wouldnt be executed and the only thing on the screen would be the command prompt.
I really appreciate the article and found this very helpful!
@Sebastian: Glad you found the info useful, and thanks for the feedback!
I lost some system applications, probably deleted my malware. how to download them back.