Pinning applications to the Start menu or Taskbar is a great way to access them quickly, especially the ones which you use frequently. However the Pin to.. option isn’t available for Windows Update and perhaps for some other special executables in Windows. To Pin Windows Update icon to the Start menu/Taskbar in Windows 7, here are some neat tricks:
Windows 7
Tips, Fixes and Articles on Windows 7.
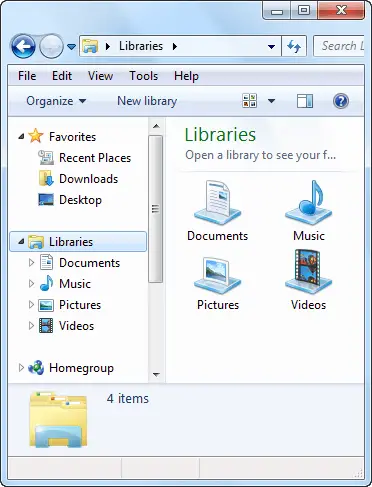
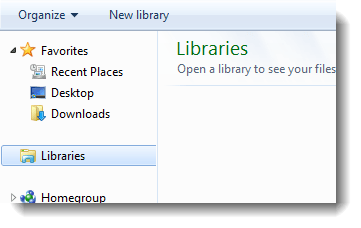
Libraries Listed Under Desktop in the Navigation Pane in Windows 7?
The navigation pane in Windows 7 lists Libraries as a separate category by default, as in the picture below:
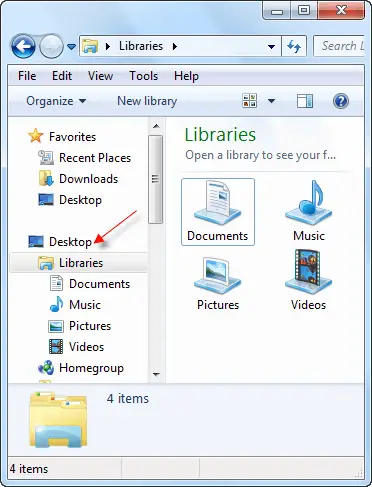
In some systems, Libraries may be listed under Desktop, and users may be wondering why it’s listed so all of a sudden, or think it may be due to inadvertent dragging of Desktop icon over Libraries or vice-versa. It’s not so. There is a simple (but overlooked) setting for the navigation pane where in you can choose to show all folders or not.
How to Fix Empty User Accounts Picture in the Windows 7 Welcome Screen
When you start your computer, the user accounts listing in the Welcome Screen may show up with an empty frame. Result would be the same if you open the User Accounts window in the Control Panel. Also, the user accounts icon may be missing in the Start menu.
![]()
How to Restore Missing or Hidden Libraries in Windows 7
When you open Explorer, all the libraries may be missing, and clicking the “Restore default libraries” context menu option would have no effect. For reasons unexplained, in some cases, the libraries may become hidden, and all you need to do is to remove the hidden attribute set from the “library-ms” files.
Fix: “View Reliability History” (Reliability Monitor) is Completely Blank
When you try to view the reliability history (Reliability Monitor) of your computer via Control Panel or Action Center, the reliability history page may be completely blank/empty. This can happen if the Task Scheduler Service or RACTask scheduled job is disabled in your computer.
![]()
To re-enable tracking of events by the Reliability Monitor, use these steps:Read more