Windows 10 (Creators Update and higher) and Windows 11 includes the capability to capture a screen region using Win + Shift + S shortcut key, as mentioned in the article Screenshot a Portion of the Screen [Winkey+Shift+S].
Contents
- Create Snipping Tool Shortcut to Capture Screen Region Using Snipping Tool
- Issue: Snipping Tool defaults to the last used Snip mode?
Create Snipping Tool Shortcut to Capture Screen Region Using Snipping Tool
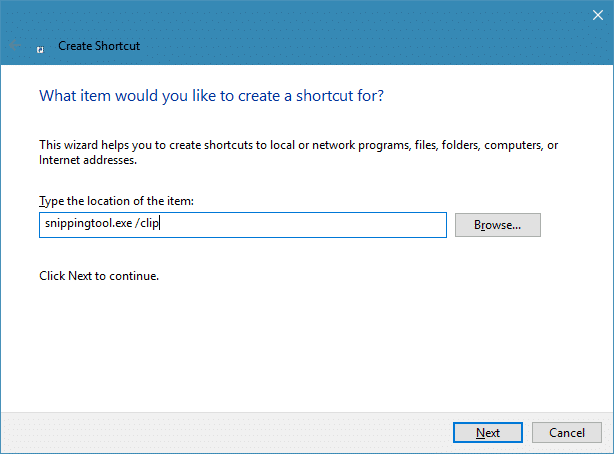
If you find the Winkey + Shift + S inconvenient, you can instead create a shortcut and assign a preferred hotkey to it, such as Ctrl + Shift + S. This can be made possible using Snipping Tool’s new, and undocumented switch named /clip.
The Winkey + Shift + S simply invokes the Snipping Tool in the background. So, all you need to do is create a shortcut with the following target:
C:\Windows\System32\SnippingTool.exe /clip
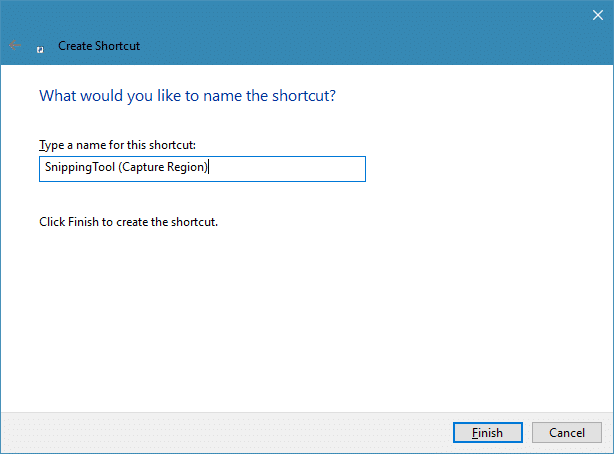
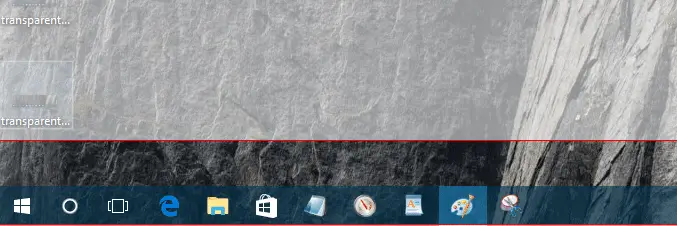
Assign a hotkey — such as Ctrl + Shift + S — or anything as you’d like. You can pin the shortcut to the taskbar if required. Clicking the shortcut or pressing the assigned hotkey would invoke capture mode (rectangular snip) — by starting the Snipping Tool in non-interactive mode.
Select a region on the screen to copy it to clipboard. Open Paintbrush and paste the captured image.

Snipping Tool defaults to the last used Snip mode?
Note that the Snipping Tool defaults to the capture mode you last used when running the tool interactively (i.e. without /clip parameter). For example, if you had selected a “Window Clip” the last time when you run Snipping Tool the next time either interactively or using /clip, it defaults to Window Snip. That’s a little glitch Microsoft needs to fix.
[Script] Launch SnippingTool.exe /clip in Rectangular Snip mode always
However, here is a script I wrote which Starts Snipping tool in Rectangular Snip mode always, no matter which mode you last used.
'Capture a rectangular screen region to clipboard - using Snipping Tool non-interactively.
'Created for Winhelponline.com by Ramesh Srinivasan on January 20 2017.

Dim WshShell : Set WshShell = WScript.CreateObject("Wscript.Shell")

'Set the Snipping Tool capture or Snip mode in this value.
strSnipMode = "HKCU\SOFTWARE\Microsoft\Windows\TabletPC\Snipping Tool\CaptureMode"

'CaptureMode DWORD values
	'1 - Free-form Snip
	'2 - Rectangular Snip
	'3 - Window Snip

'We set CaptureMode to 2 for Rectangular Snip
WshShell.RegWrite strSnipMode, 2, "REG_DWORD"

'Launch the Snipping Tool to capture screen region
WshShell.Run "snippingtool.exe /clip",,True
Set WshShell = Nothing
Script Usage
- Copy the above lines to Notepad. Save the file with .VBS extension, say
snip.vbs. - Place the script in a permanent folder, like
d:\scripts - Create a desktop shortcut to the script, using the following target:
wscript.exe d:\scripts\snip.vbs - Right-click on the shortcut and click Properties
- Assign the Snipping Tool (snippingtool.exe) icon to the shortcut.
- Assign a shortcut key for the script shortcut, like Ctrl + Shift + S
- Optionally, pin the script shortcut to your Start menu or Taskbar.
Clicking this shortcut will launch the rectangular snip mode using which you can capture any region on the screen. The clipboard image can be pasted into Paint.
Note that the new Snipping Tool command-line argument and the Winkey + Shift + S feature are available in Windows 10 Creators Update & higher and Windows 11. However, in the recent builds Win + Shift + S snipping capability is powered by the Snip & Sketch app (instead of Snipping Tool).
One small request: If you liked this post, please share this?
One "tiny" share from you would seriously help a lot with the growth of this blog. Some great suggestions:- Pin it!
- Share it to your favorite blog + Facebook, Reddit
- Tweet it!
Do you know if this has made to the mainstream update yet?
seeems the /clip parameter does not work for me
Is there any SIMPLE way to get things working like this:
1. I hit PrtScr
2. I drag out a rectangle
3. It’s instantly saved to a file (not the clipboard)
No windows open. No menus to pick. No prompts. No need to open Paint. Nothing to paste in. Nothing to save. No need to destroy my existing clipboard. No scripts. No program code to write. No filenames to enter. No folders to pick. No special executables to download/install/update/configure. Instantly done.
Windows+PrtScr is close, except:
A. Needs 2 hands
B. Can’t draw a rectangle
C. More keys to remember
Sounds great. But, how to set it up? If i press PrtScr, it copys a screenshot to the clipboard…
@pattyYY: You may try the 3rd party screenshot software named ShareX that can do exactly what you said. This article on screenshots can be useful too.