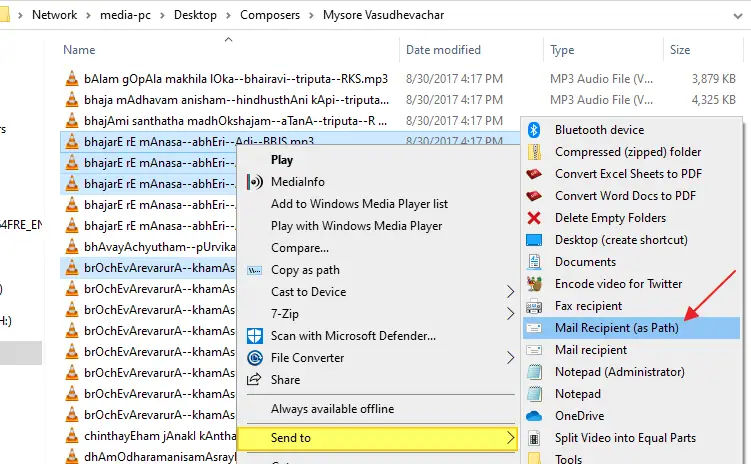
Let’s assume you’re working in the training department of a firm and need to send training materials to recruits regularly. The usual way is to right-click on the file, click Send To, and click Mail Recipient. This attaches the file to the compose window in your mail client.
How about saving bandwidth on your local network by sending the target path of documents (in a network share) instead of attaching them to mail?
Send to Mail Recipient (as Path)
For this purpose, I wrote a script that adds the Mail Recipient (as Path) option to the Send To menu, which, when clicked, opens the compose mail window and adds the target location of selected files and folders to the Body.
- Download
SendLinkToMail.vbsabove or copy the above code to Notepad and save it with a .vbs extension. - Double-click
sendlinktomail.vbsto run it. - When you see the “Configuring…” prompt, press Enter:
The Mail Recipient (as Path) is now added to the Send To menu.
Open the network location which contains files you want to email (as Path).
Select the files, right-click on the selection, click “Send to”, and select “Mail Recipient (as Path).”
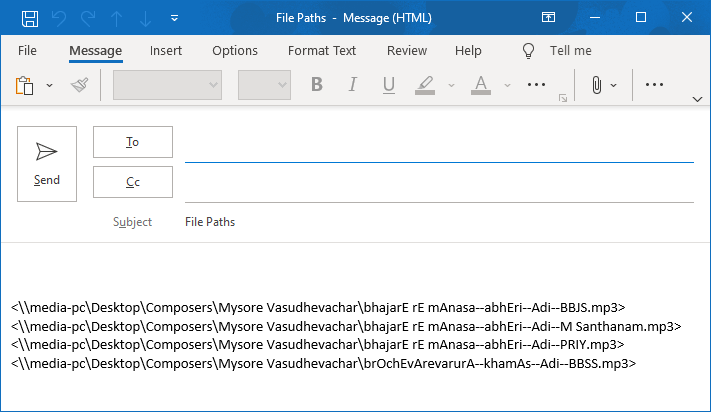
This opens the new message window in your email client (e.g., Outlook) with the Subject and Body fields populated.
Customization
To change the default Subject line and To: address, edit the script using Notepad and modify the variables in Line numbers 28 and 29.
For example:
strRecipientEMail = "[email protected]"
strMailSubject = "Training Documents"
Undo Information
To remove the Mail Recipient (as Path) option from the Send To menu, re-run the script, type UNINSTALL and press ENTER. Then delete the file sendlinktomail.vbs manually.
This script invokes the mailto: protocol, and it works in all versions of Windows, including Windows 10.
One small request: If you liked this post, please share this?
One "tiny" share from you would seriously help a lot with the growth of this blog. Some great suggestions:- Pin it!
- Share it to your favorite blog + Facebook, Reddit
- Tweet it!
THANK YOU SO MUCH, I LOOKED EVERYWHERE FOR THIS
YOU ARE DA – BOMB
I am so sorry !!!!
i just realized that i wasn’t fully extracting the file but using it from the zip file.
it works and it works great!!!!!!
thanks very and again apologies
I’ve done as you said and the system loaded. But when I try to use it I get the following message, The file or folder ‘SendLinkToMail.vbs’ that this shortcut refers to can’t be found. Im using Windows 7.
regards,
Alan.
Alan,
I am assuming you are making the same mistake i was making.
make sure to save the file first before extracting!!!!! that’s the cause of that error.
Andrew
Works fantastic!
Is there any way to get the message to include my signature?
is there one that well send as attachment rather than link.
A link to a folder or file on my pc helps no one on the receiving end.
Thanks